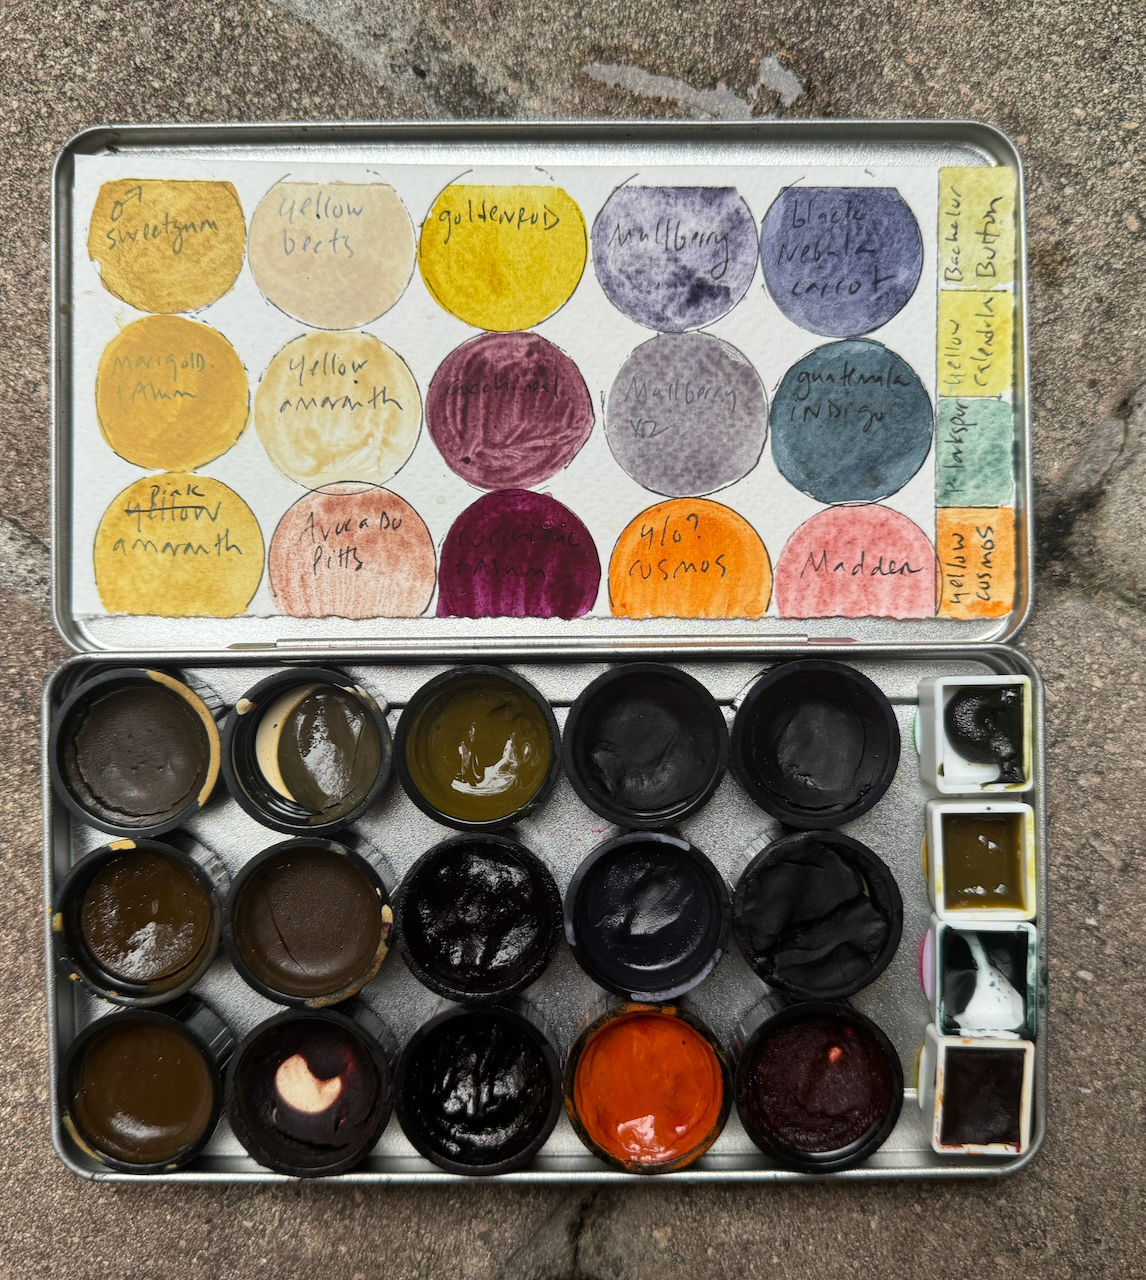
I like making both inks and paints, and there are differences both in how they are used to make art, and practically – how they store and travel, how long they last, and how much is involved in the process of making them.
Ink is ancient. It’s been prepared and used for thousands of years, transmitting language on various surfaces. Dark brown ink made from oak galls was used to create many famous manuscripts (like the US Constitution); Leonardo daVinci drew with it.
Basically it’s a concentrated colored liquid used to write with. It is fairly simple to make with fewer ingredients and steps compared to paints, but is perishable, harder to transport, and not as easy to use due to its fluidity. But the fluidity can be a good thing, as colors readily run together and dry in beautiful and unexpected ways. Additives to improve stability and thickness can be used to produce high quality ink.
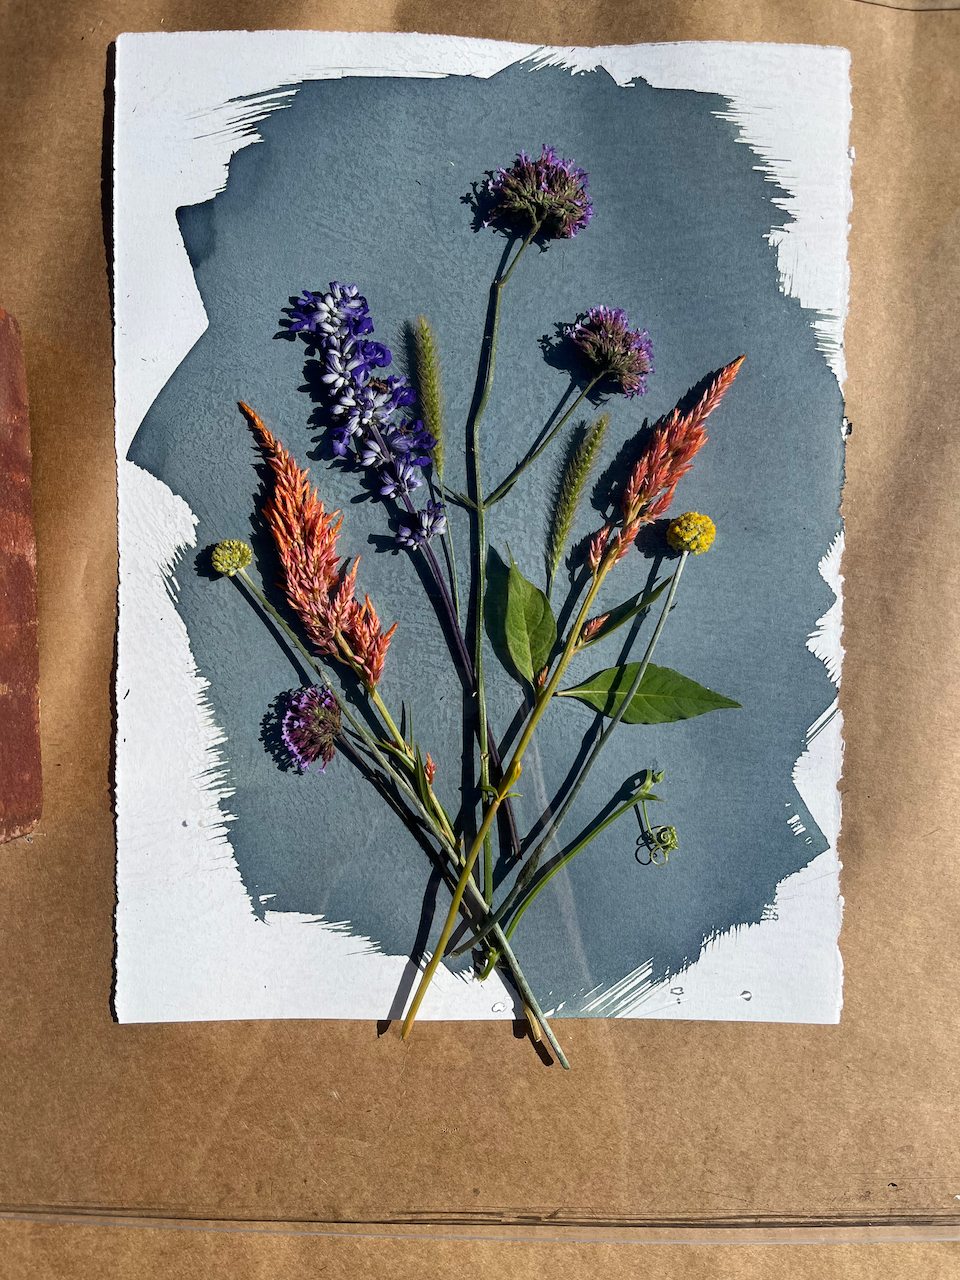
I started with inks and graduated to paints, but keep both for use in my artwork. Much of the artwork in this sketchbook was created with inks. Jason Logan’s book, Make Ink: A Forager’s Guide to Natural Inkmakingis very inspirational.
For lots more detailed information, pigmented plants to find in Florida, techniques, plant info, and lots of my art – pick a copy of my book!
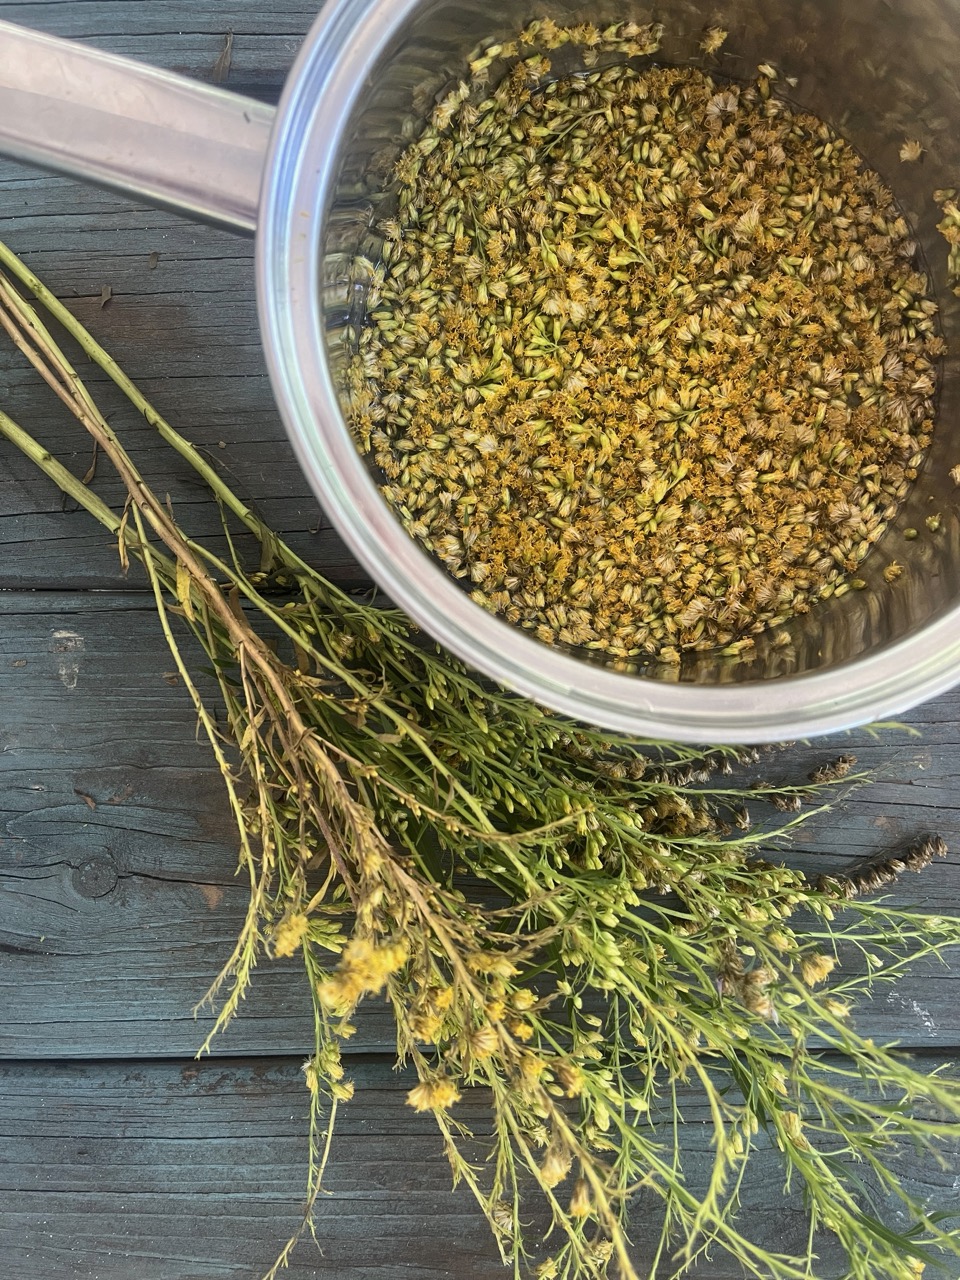
Simmer plant material in water (except for berries that may not need additional liquid), muddling several times. 1-2 hours for flowers and petals, much longer for bark, roots and other tough materials. Simmer until a rich colored and concentrated dye is obtained with as little water as possible. Cut the heat and rest overnight. Repeat again if needed to allow tough plant tissues to break down further; likely not necessary for delicate petals. Avoid burning and boiling. Attend your pot closely, set timers periodically so you don’t forget to check!
Allow liquid to cool enough to handle.
Squeeze out all plant material through a cloth or very fine sieve. Compost the plants.
Pour your new liquid ink into a very clean and labelled jar or bottle. Include plant + date and anything else you want to capture. A separate notebook is good for the finer details you can’t fit on a small bottle.
Optionally, add 1 part watercolor medium to 3 parts ink, or approximately 10 drops to 2 ounces of ink.
Add a drop of preservative oil, shake to mix. Store in refrigerator ideally but will last weeks or months at room temperature.
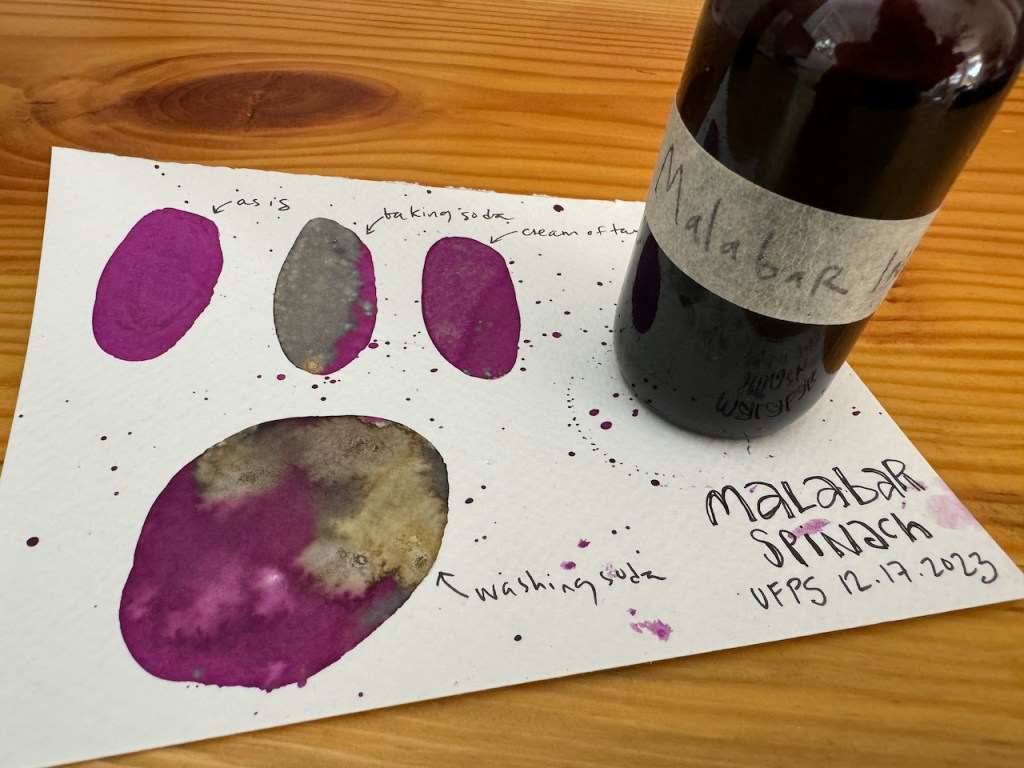
Alum, copper, iron oxides and cream of tartar may be used to make the ink more permanent. Experiment with what works for various hues.
I like making both inks and paints, and there are differences both in how they are used to make art, and practically – how they store and travel, how long they last, and how much is involved in the process of making them.
Paints are solid and can be re-wetted with water for use. Creating them is an involved process but worth the exploration if you become more serious about homemade colors. Pure pigments are drawn out of botanical material through a chemical process known as “laking”, which binds the pigment to a metal salt.
The resulting pigment is dried, finely ground, and mulled with a watercolor medium into a paste which is then used like watercolor paint. Earth based materials like clays and stone can also be used.
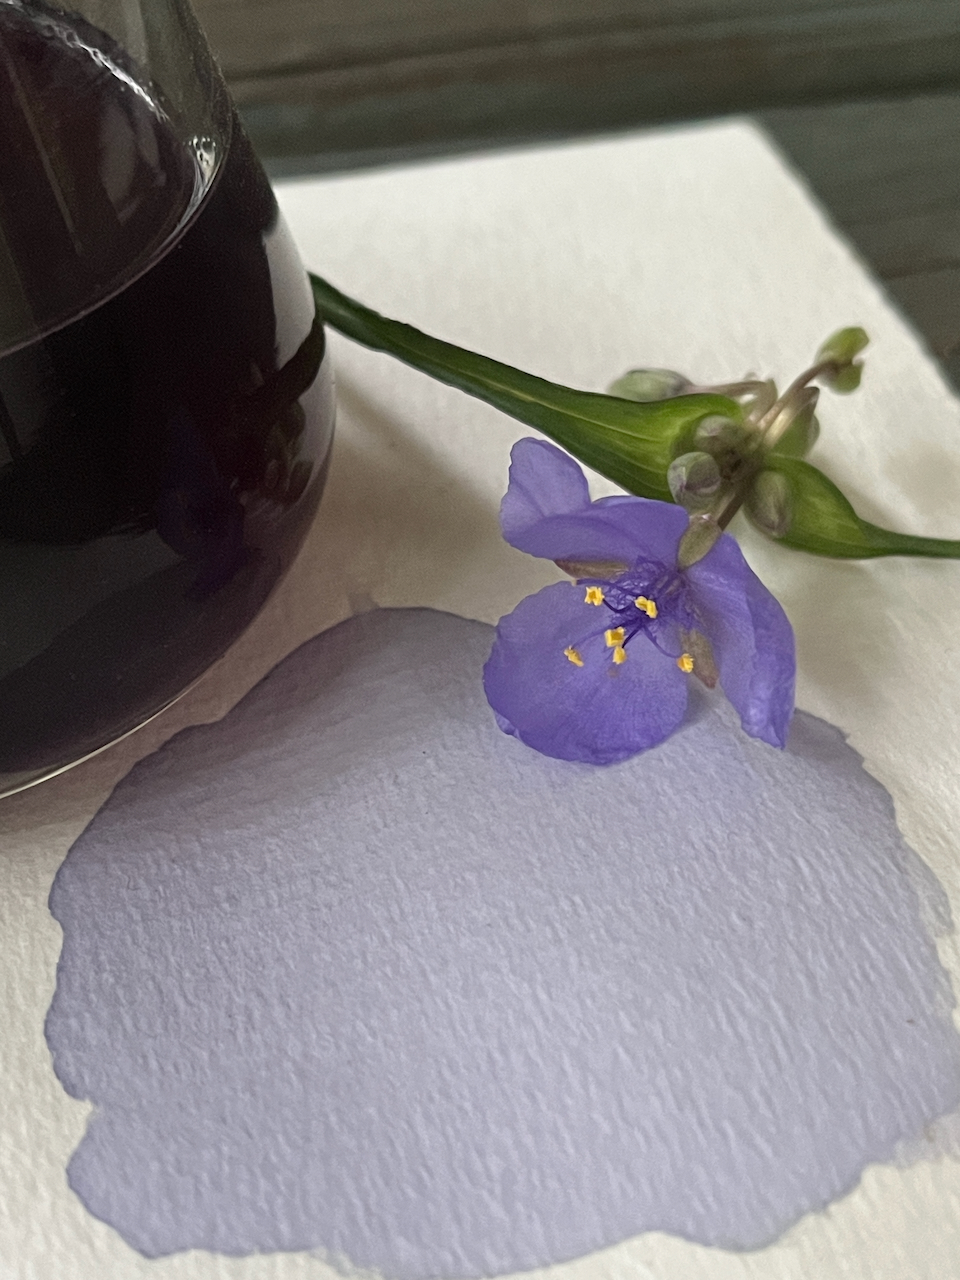
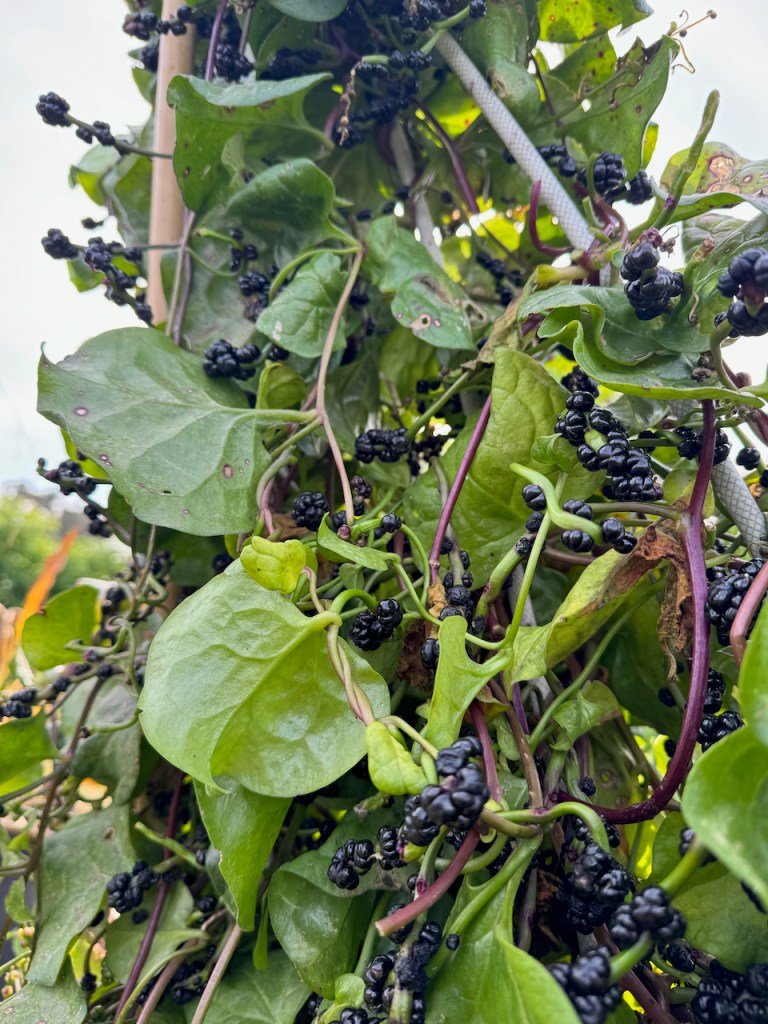
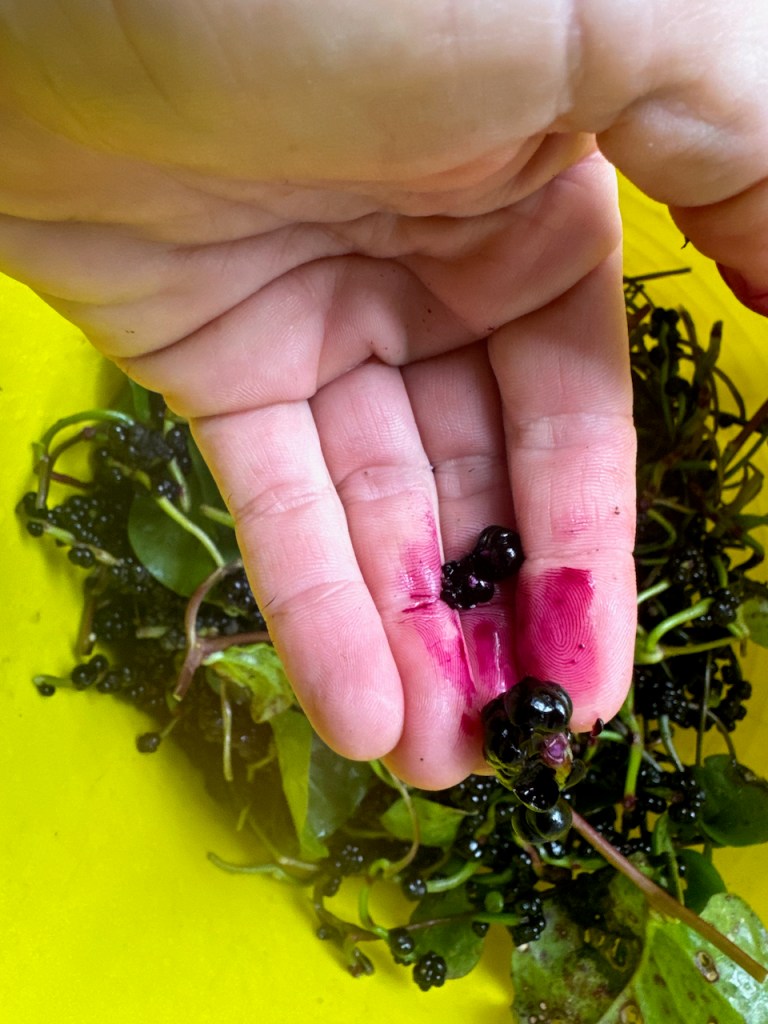
Compared to inks, paints are more portable, do not need refrigeration, and tend to be more stable. I am slowly converting most of my colors to be in paint form as I find them easier to create art and travel with. However, some have better colors as an ink and are best used that way. For example, both beets and malabar spinach berries are bright pink inks, but dull brown paints.
For lots more detailed information, pigmented plants to find in Florida, techniques, plant info, and lots of my art – pick a copy of my book!
Simmer plant material in water, muddling several times. Perhaps 30 minutes or up 2 hours for flower petals until rich colored dye is obtained. For bark, roots or other tough material, chop and simmer over a few hours, rest over night, and repeat again if needed to allow tough plant tissues to break down. Unlike ink, it’s not necessary to reduce water to a very low volume, but you do want to make sure you’ve pulled as much pigment into the water as possible which could take time, depending on the material.
Squeeze out all plant material through a cloth or very fine sieve. Reheat liquid if cooled before the next step.
Mix alum with enough boiling water to fully dissolve.
Mix soda ash with enough boiling water to fully dissolve.
Stir alum solution into warmed colorful dye liquid.
Slowly stir in soda ash solution and prepare for foaming action! Container should be big enough to allow expansion and overflow.
Continue stirring and scraping the foam till settled down.
If you have pH papers, test for a neutral 7 and tweak acid/base addition (more alum to decrease, more soda ash to increase).
Rest at least an hour or overnight allowing pigment to settle.
Pour off liquid on top (supernatant) and carefully strain out the remainder over another container fitted with a coffee filter secured with a rubber band or clothespins.
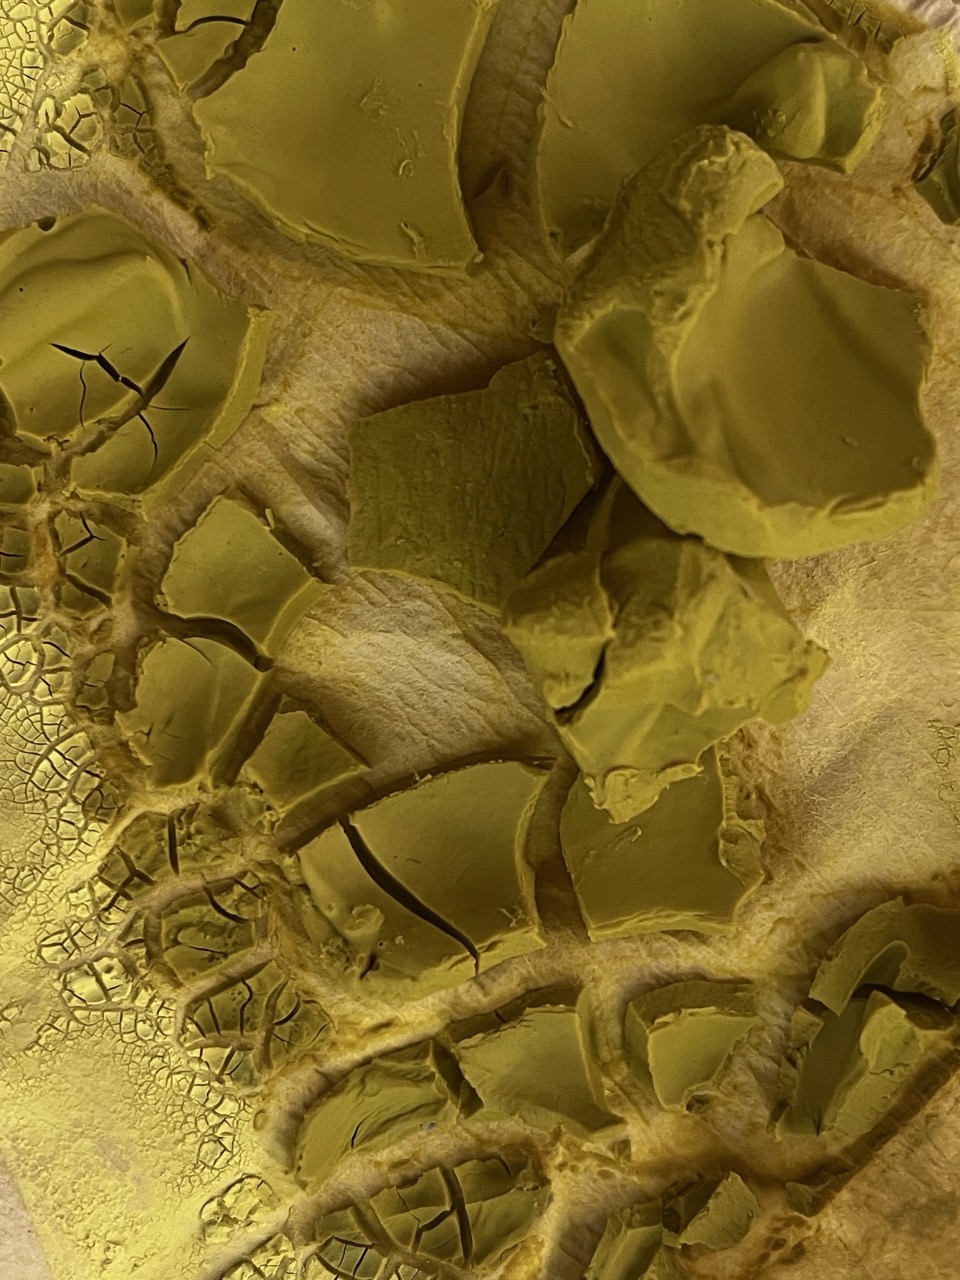
Carefully remove coffee filter once all liquid has drained and a colorful pasty sludge remains. Lay flat to dry over a towel. While not necessary, it is preferable to get the cleanest pigment possible by washing after the first strain. If frothy bits or white crystals are present, I recommend this extra effort. When pigment has been fully strained, re-submerge in a clean bowl of water. Let settle and pour off water once or twice more till clear and clean looking. Strain again and dry.
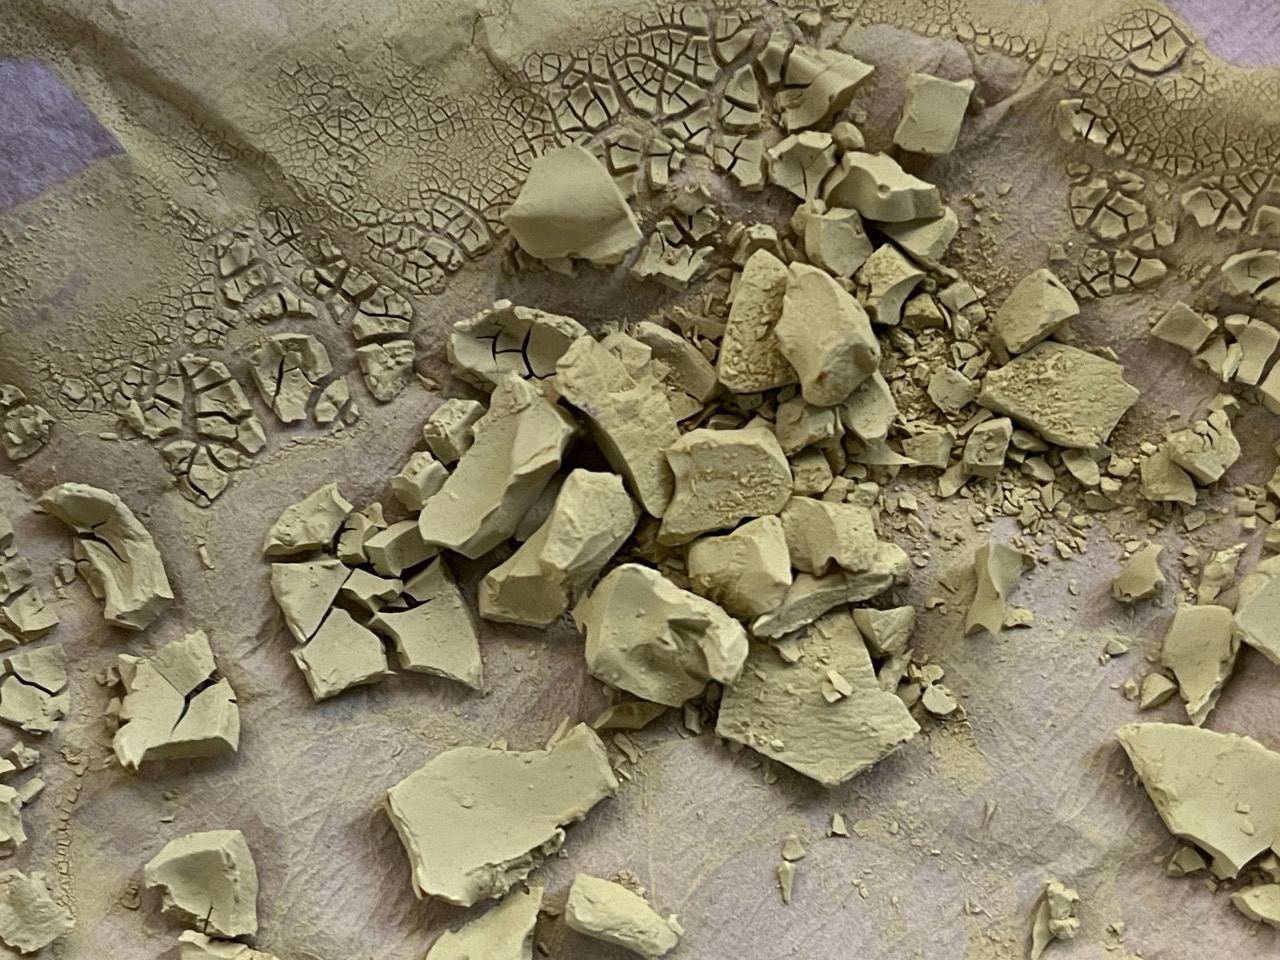
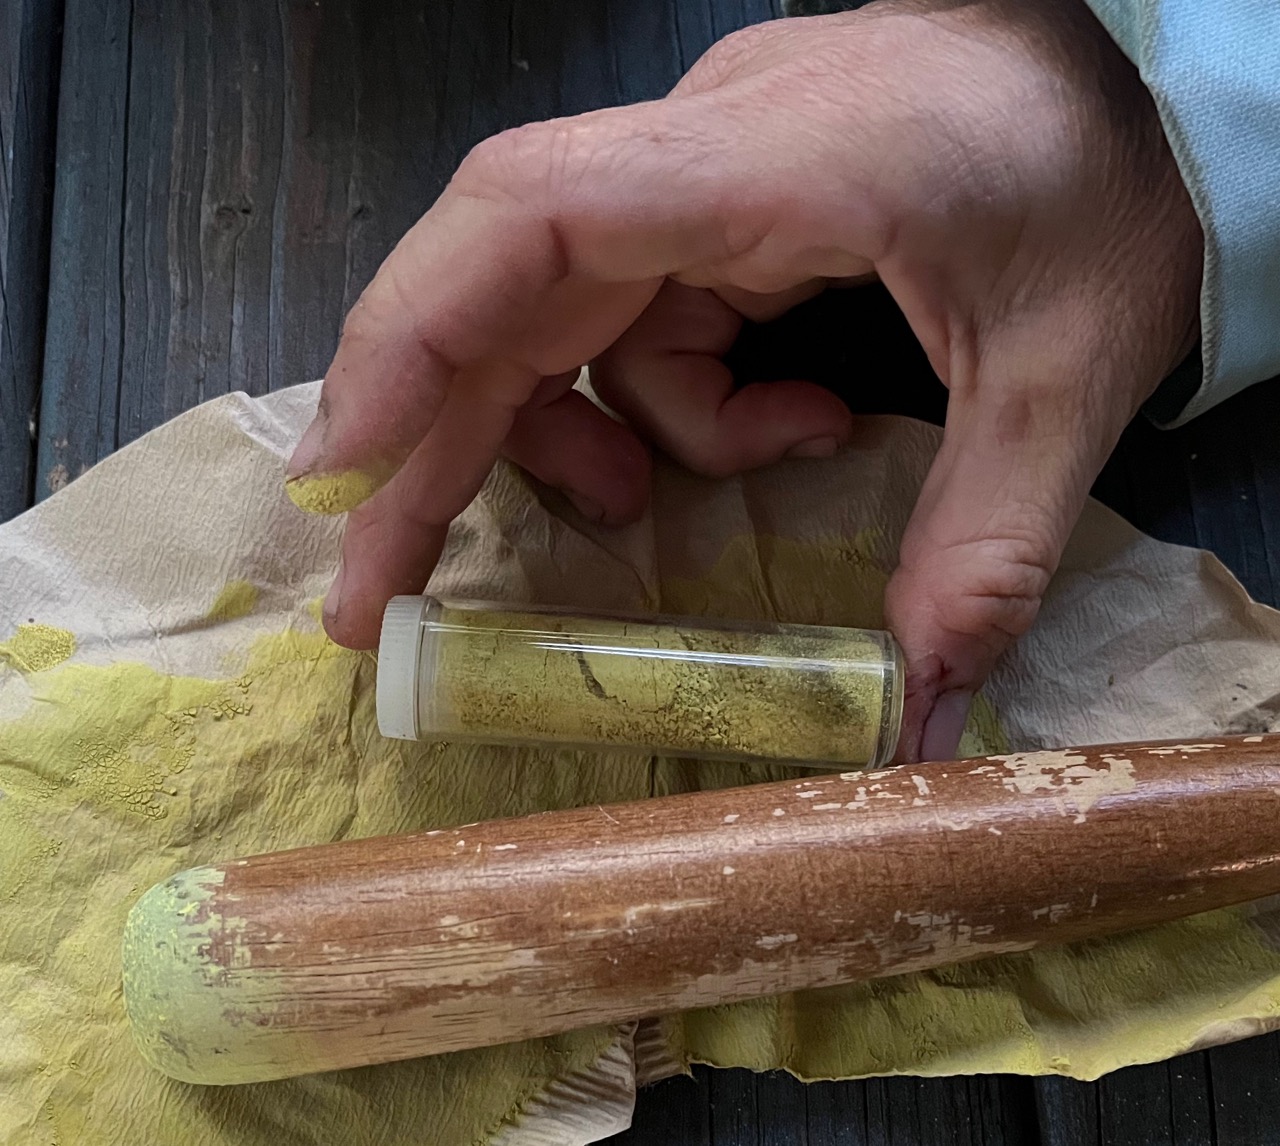
Once pigment is fully dried, grind into a fine powder using a mortar and pestle. The finest powder possible is required. Sieve and re-grind if necessary.
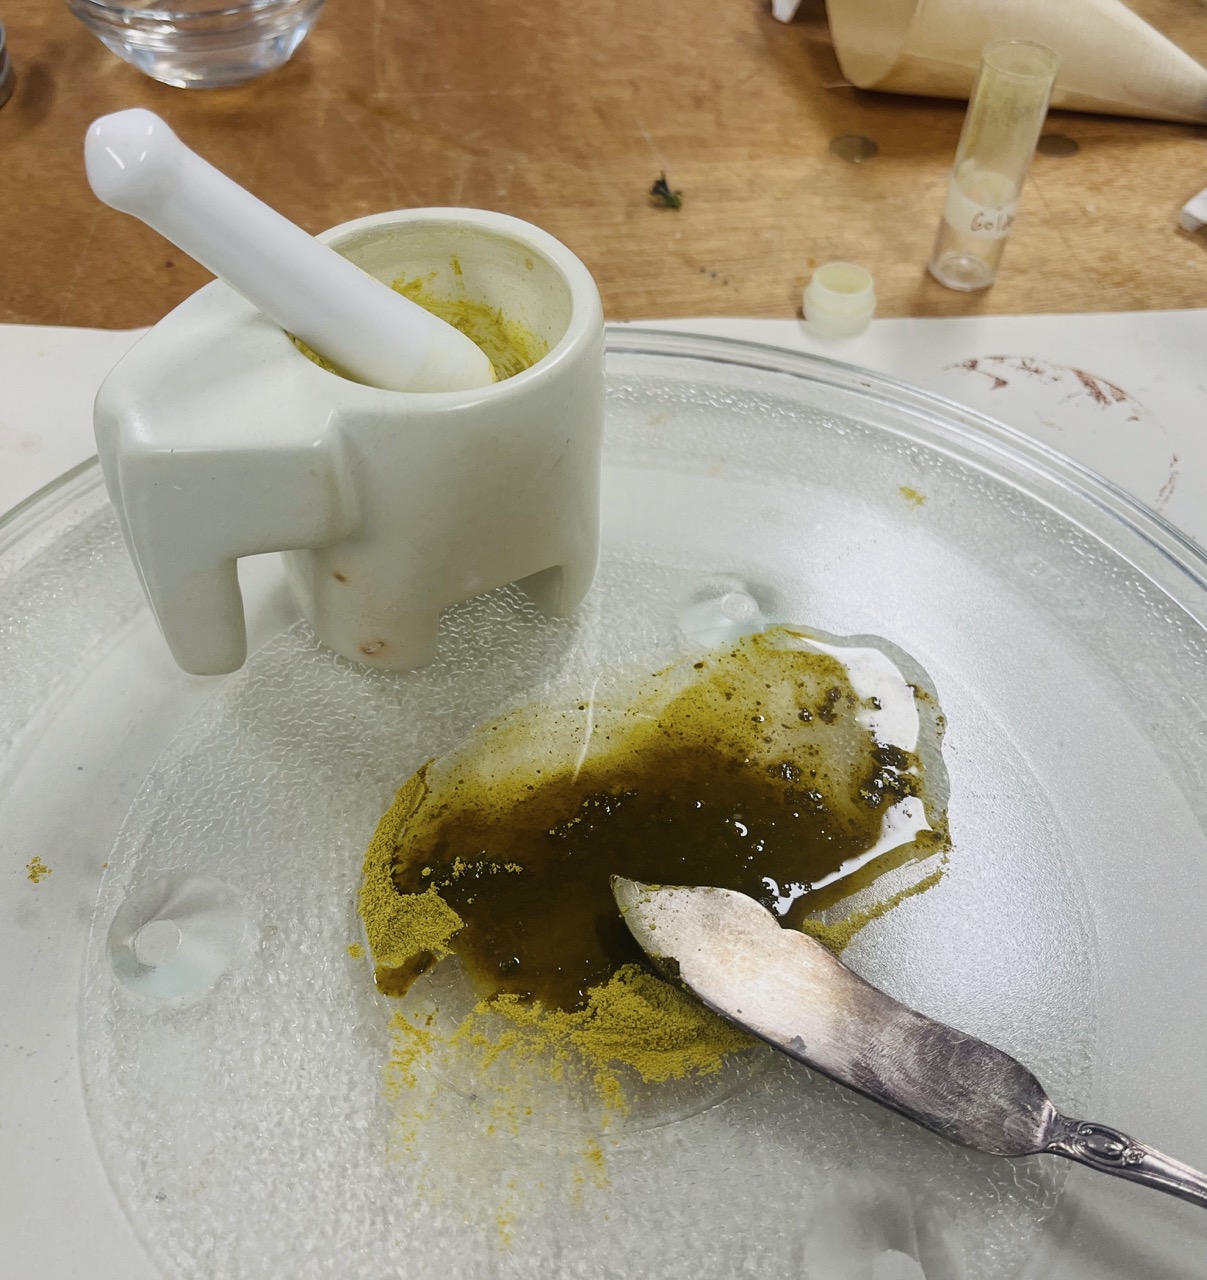
Measure approximately equal amounts of pigment powder and watercolor medium onto a glass board.
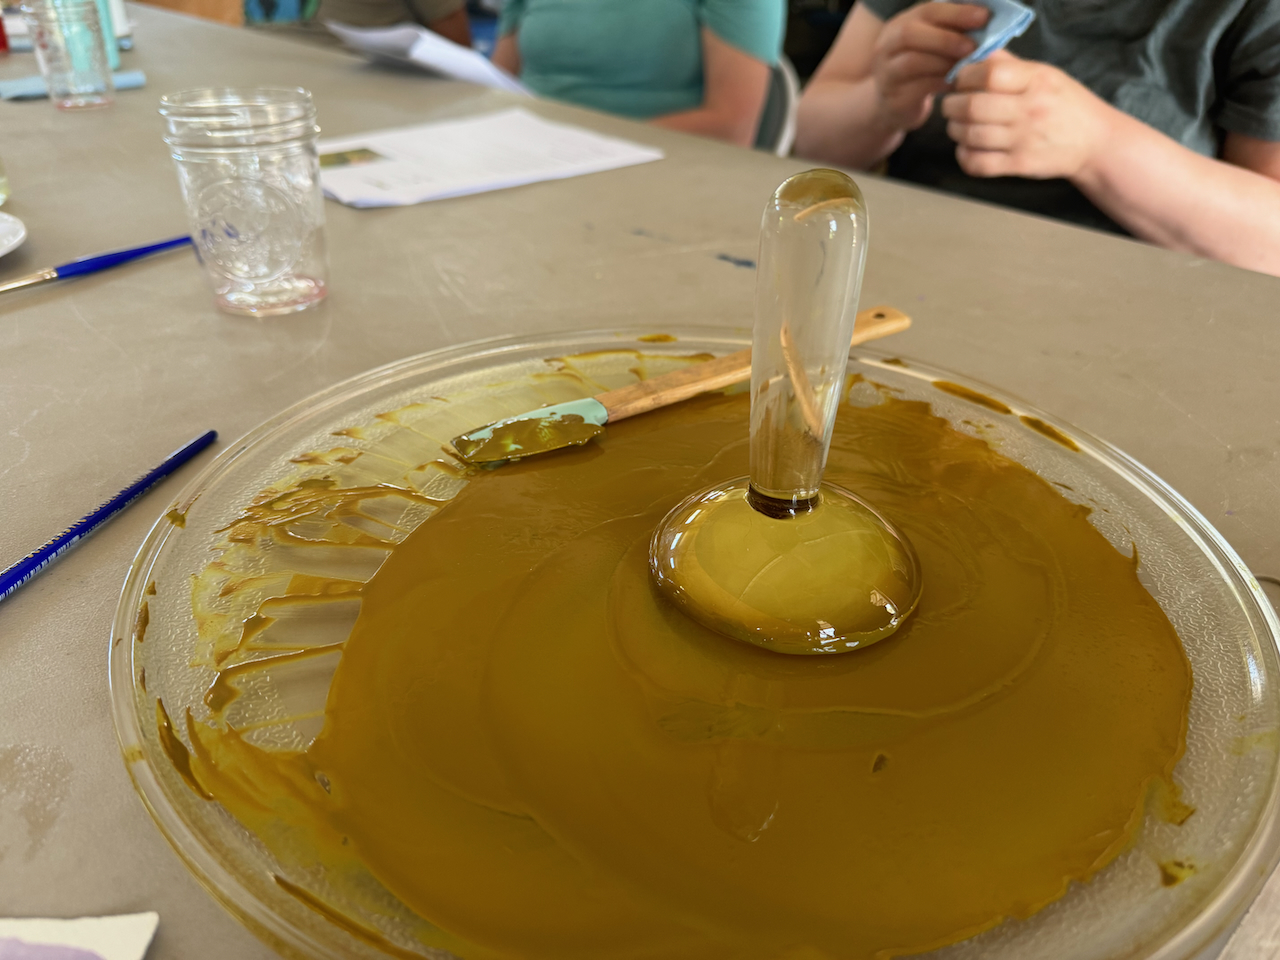
Mix with a palette knife and then mull with glass muller in circular and figure 8 patterns, repeatedly scraping back into the center, and continuing until smooth and gliding easily. Additional water droplets or medium may be needed. This may take a lot of time, and takes practice to get right. Enjoy the process!
Scrape into a container. You now have paint! Yay!
Test the color and enjoy painting, using like watercolor paints.
If your supernatant (clear liquid above settled pigment) is still very dark in color, you can lake that again for a different color! It’s also a sign that more chemicals could have been used the first time.
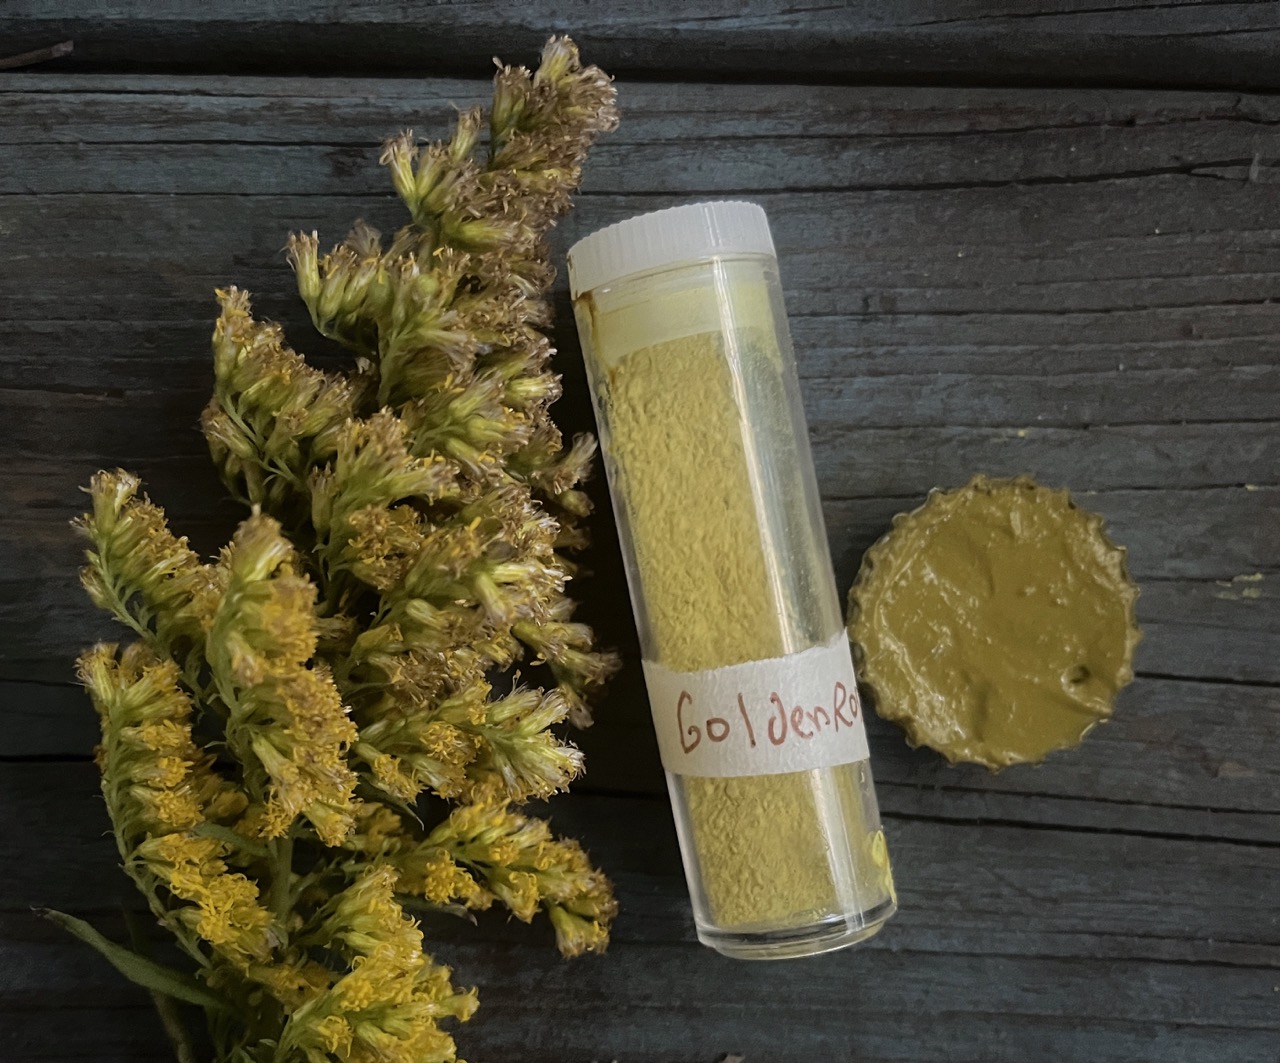
Simmer flowersLaked solution with pigment settlingPigment drying on coffee filterDried pigment on coffee filterGround pigmentBlending pigment with watercolor medium using palette knife Mulling pigment after blending with palette knifeFlowers – pigment – paint!
Part 4 of a series of posts about my artist in residency experience at Oak Spring Garden Foundation.
In my ongoing experimentation with creating paints from plants on site, I have learned what most people dabbling in or perfecting this art have as well: lots of things turn brown! It makes a whole lot of sense if you stop for a second and think about it. All living beings will eventually return to the soil and turn some shade of brown. Dying plants, seed pods, fallen leaves, decaying bones and flesh….
So macerating petals and simmering leaves with the hopes to preserve vibrant hues is not in line with nature just doing her thing. The trick is figuring out if it’s possible to capture the pigments and preserve them before they turn brownish. Some will oblige, others will not. For those that will not, the fleeting glimpse of their living pigments on paper is only meant to be enjoyed for a short period of time. Or perhaps best enjoyed on the living plant.
What’s our obsession with preserving things in perpetuity anyway? Avoiding change or worse – death! Why do we allow ridiculous things like embalming bodies in formaldehyde so they don’t rot and turn brown? I wrote about death awhile ago. It’s all around us, all of the time but our culture prefers to ignore it, and be afraid of it. You and me, and everyone we love are going to die one day and turn brown (if we go the natural way of things and avoid formaldehyde and cremation). I’m not being morbid, or pessimistic, or dark. Quite the contrary! Accepting that we are not here forever, allows us to fully embrace and love the hek out of this ephemeral life! This colorful, beautiful, ephemeral life.
Trust me. As a cancer survivor, every precious day is more vibrant because of death.
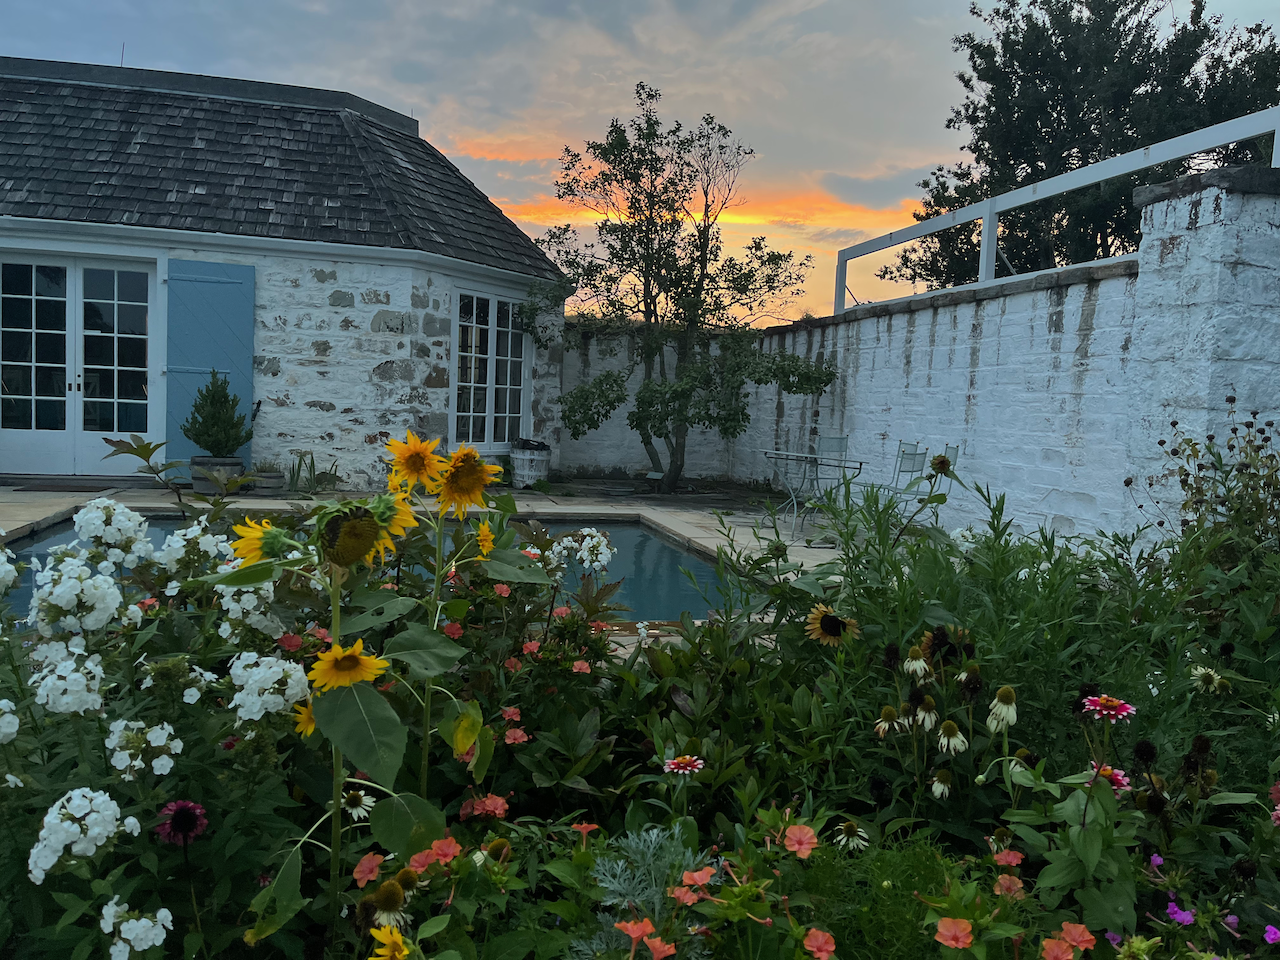
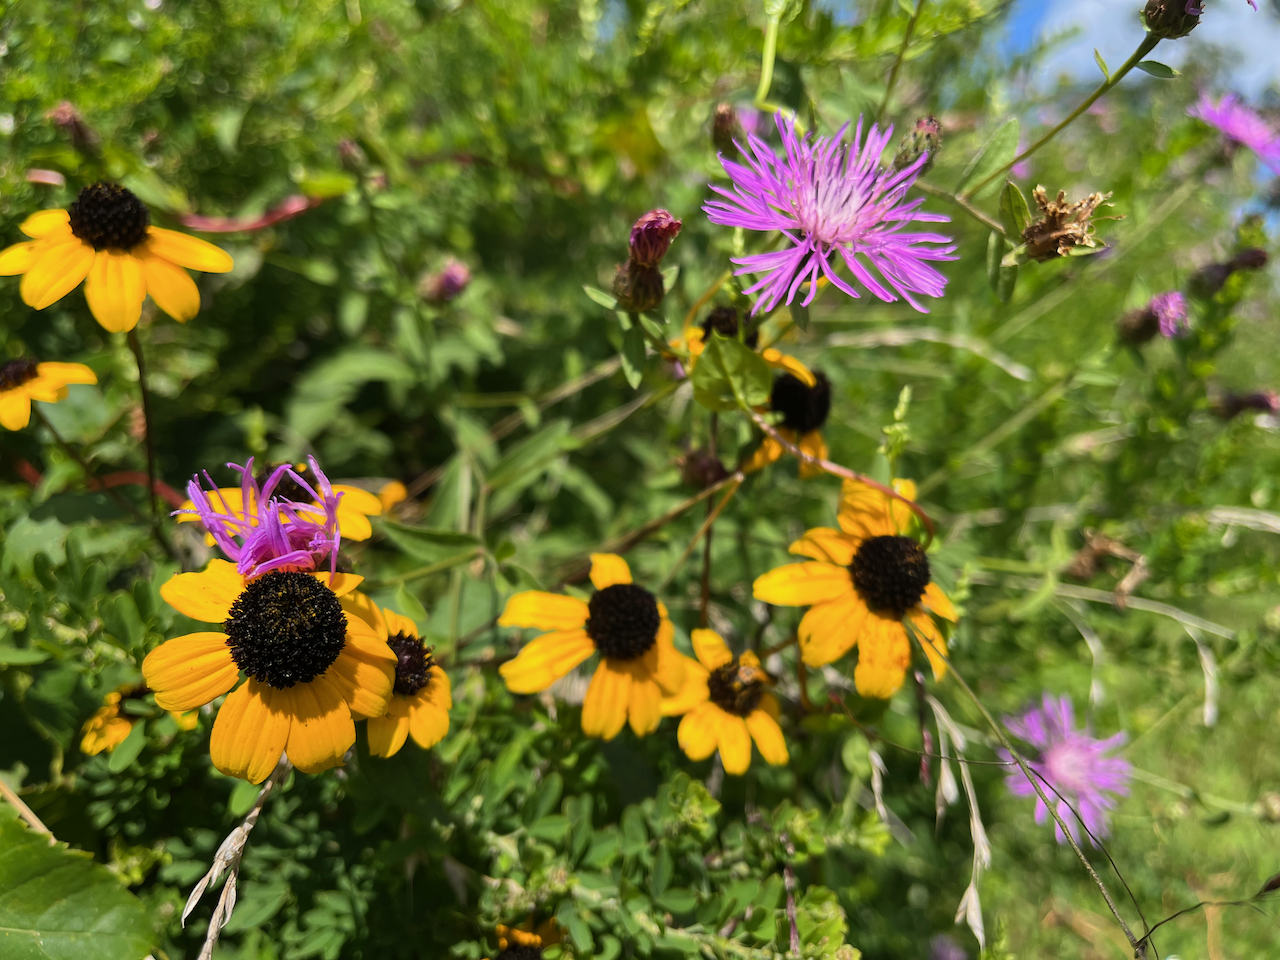
An abundance of vibrant colors that will all one day…turn brown! Top left to bottom right: Black Swallowtail butterfly on Thistle, making cyanotypes with garden flowers, the formal garden at Little Oak Springs, plant based paints, Rudbeckia and Aster(?) along the Appalachian Trail.
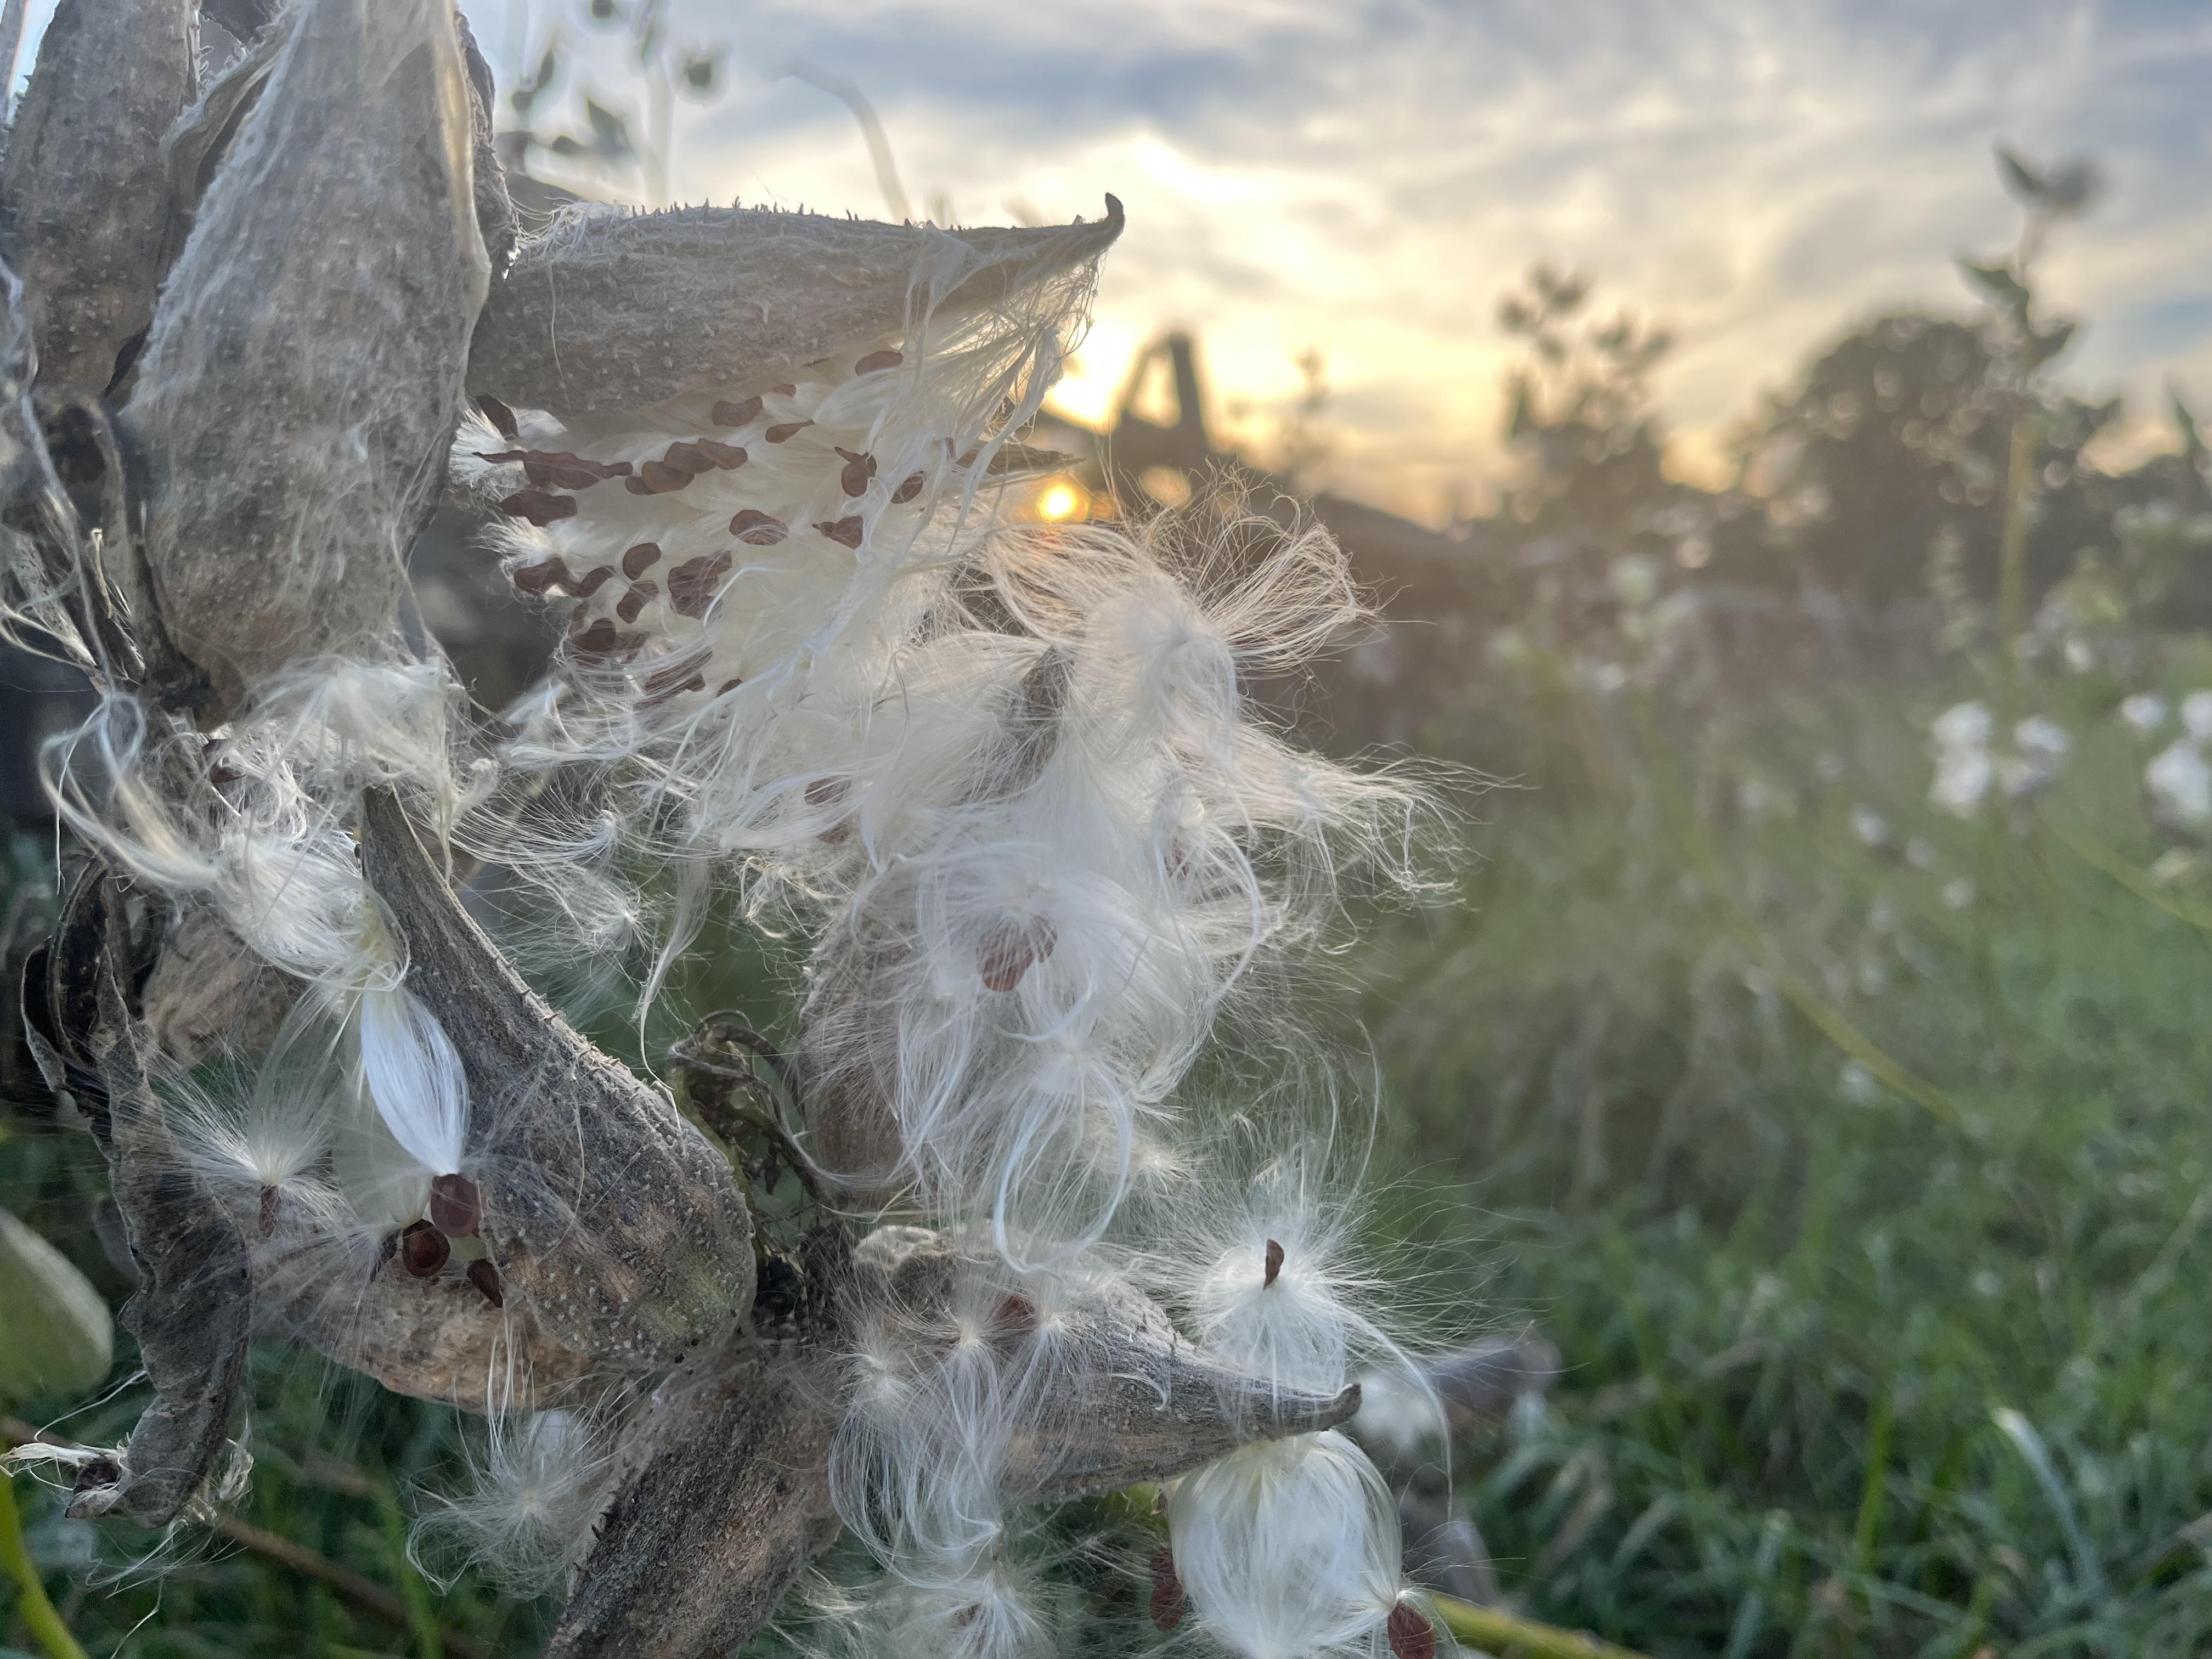
In my early disappointment at watching vibrant green or yellows turn brown, I looked around me and realized – it’s just fine! Plenty of pretty beings living or dead are some shade, or many shades of brown. The Polyphemus moth, and actually most moths and many butterflies, rabbits, coyotes, milkweed and thistle seed pods, spiders a plenty, lots of birds fully brown or with brown bellies or throats, falling leaves, grasses going to seed…. So I embraced the browns and the shades of them I was getting.
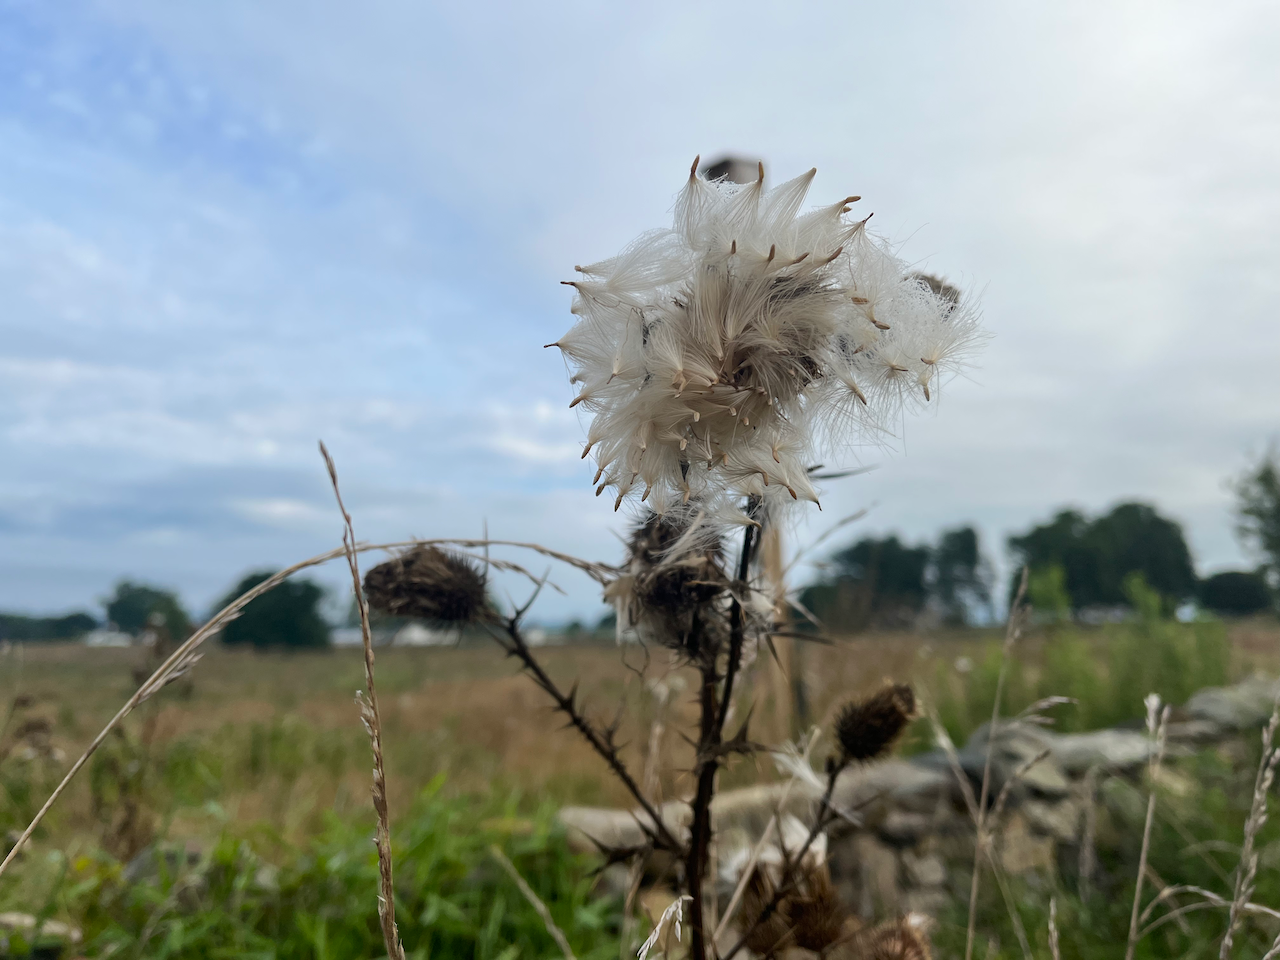
Everyone turns brown. Top left to bottom right. Polyphemus moth and Dobson fly, Crab spider on grass, Thistles going to seed, and Common Milkweed seed pods all at once went POOF!
Anyhow, back to plant pigments!
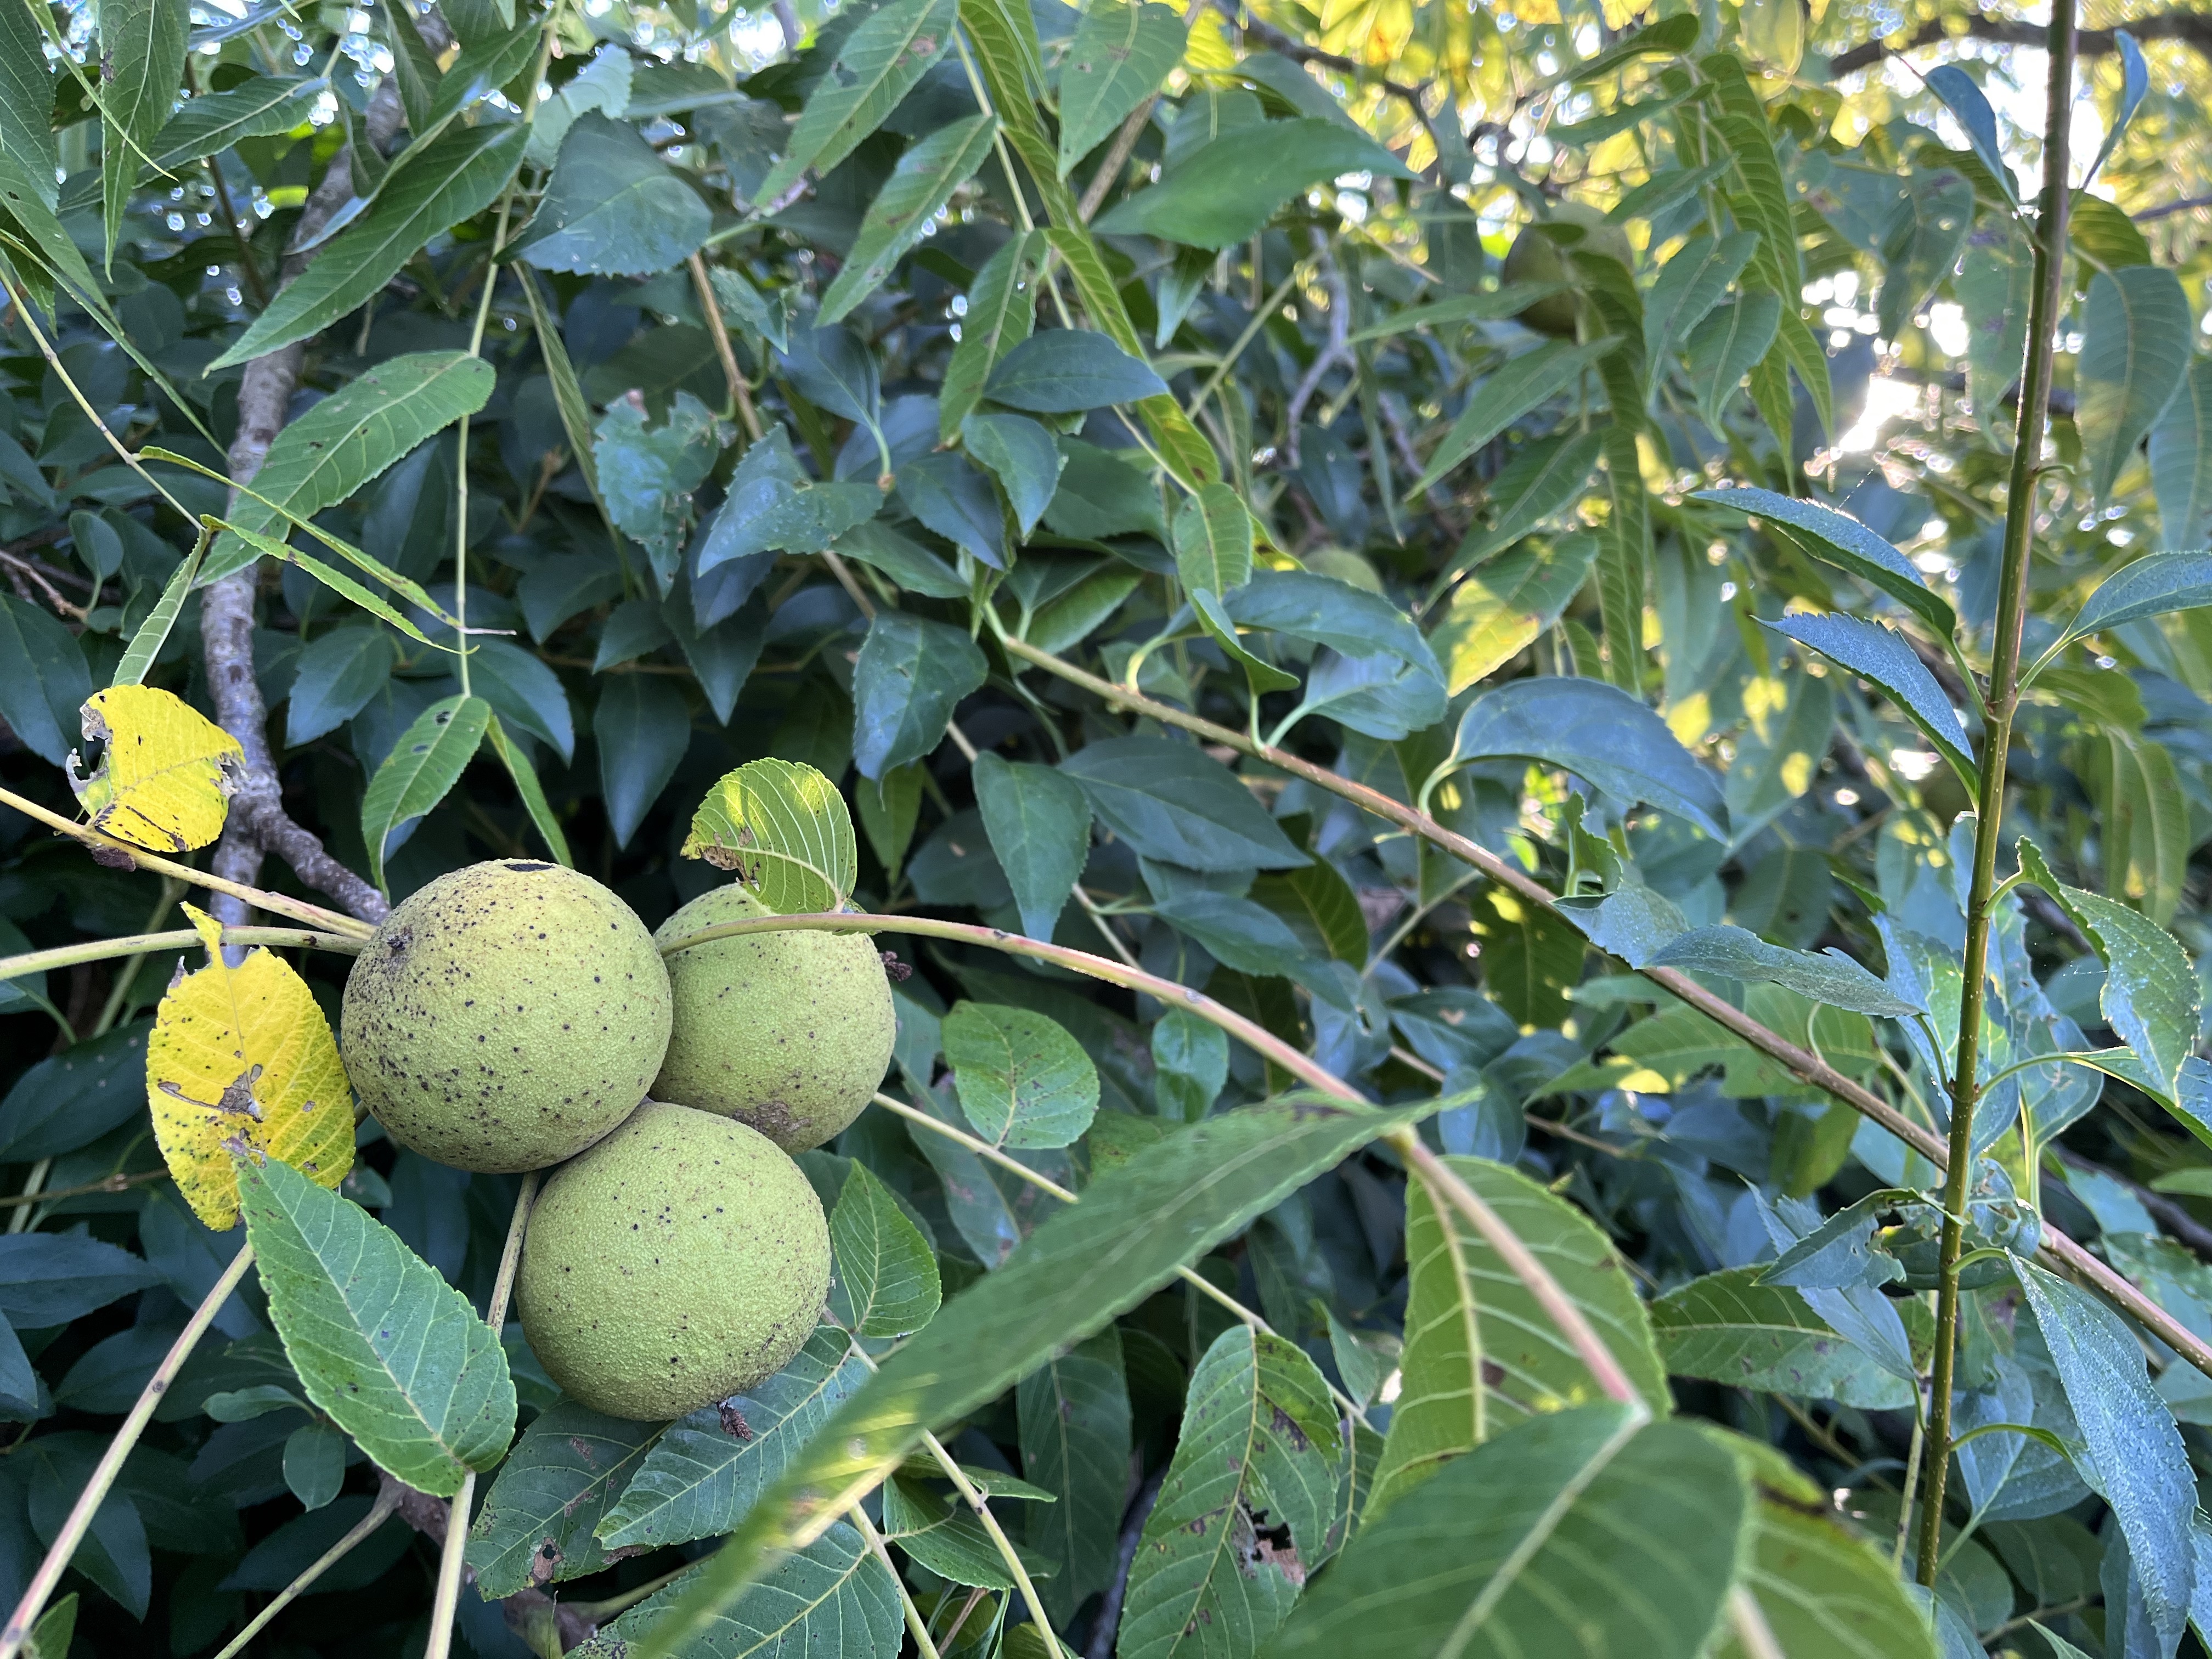
One that particularly made me happy was the Eastern Black Walnut. A common complaint is that the fallen fruits stain things when they drop. PAINT! In the same way I always spot SEEDS! whenever I’m out and about, I am now looking and wondering….PAINT?! One of our cohort mates here Jackie, a botanist from the Dominican Republic, found a Black Walnut tree here and brought me some of the fruits to play with.
Eastern Black Walnut tree in the early morning sun, and their fruits!
The Eastern Black Walnut is a native tree to the Eastern US, and considered a “pioneer” species meaning they are one of the first trees to establish in disturbed areas like along roadsides, in fields, and forest edges; places that are more open. They don’t thrive in forests with other trees and lots of shade. They must spread out in full sun to live their best life. They secrete a chemical into the soil called juglone which repels some species of plants. A partial list includes includes tomatoes, potatoes, peas, peppers, cabbage, alfalfa, serviceberry, chestnut, pine, arborvitae, apples, blueberry, blackberry, cherry, azalea, rhododendron, lilac, hydrangea, privet, and members of the heath family. But not all plants are poisoned by juglone, some will thrive and others can tolerate it.
The tree is lovely in her own right, but of course as humans we need to know the uses for living beings to understand them or find value. So, it turns out that walnut trees makes fantastic lumber, the staining fruits are used to make dyes and inks, the nuts are edible for many wildlife and of course humans too, and the abrasive shells have many industrial uses for blasting, sanding and filtering things.
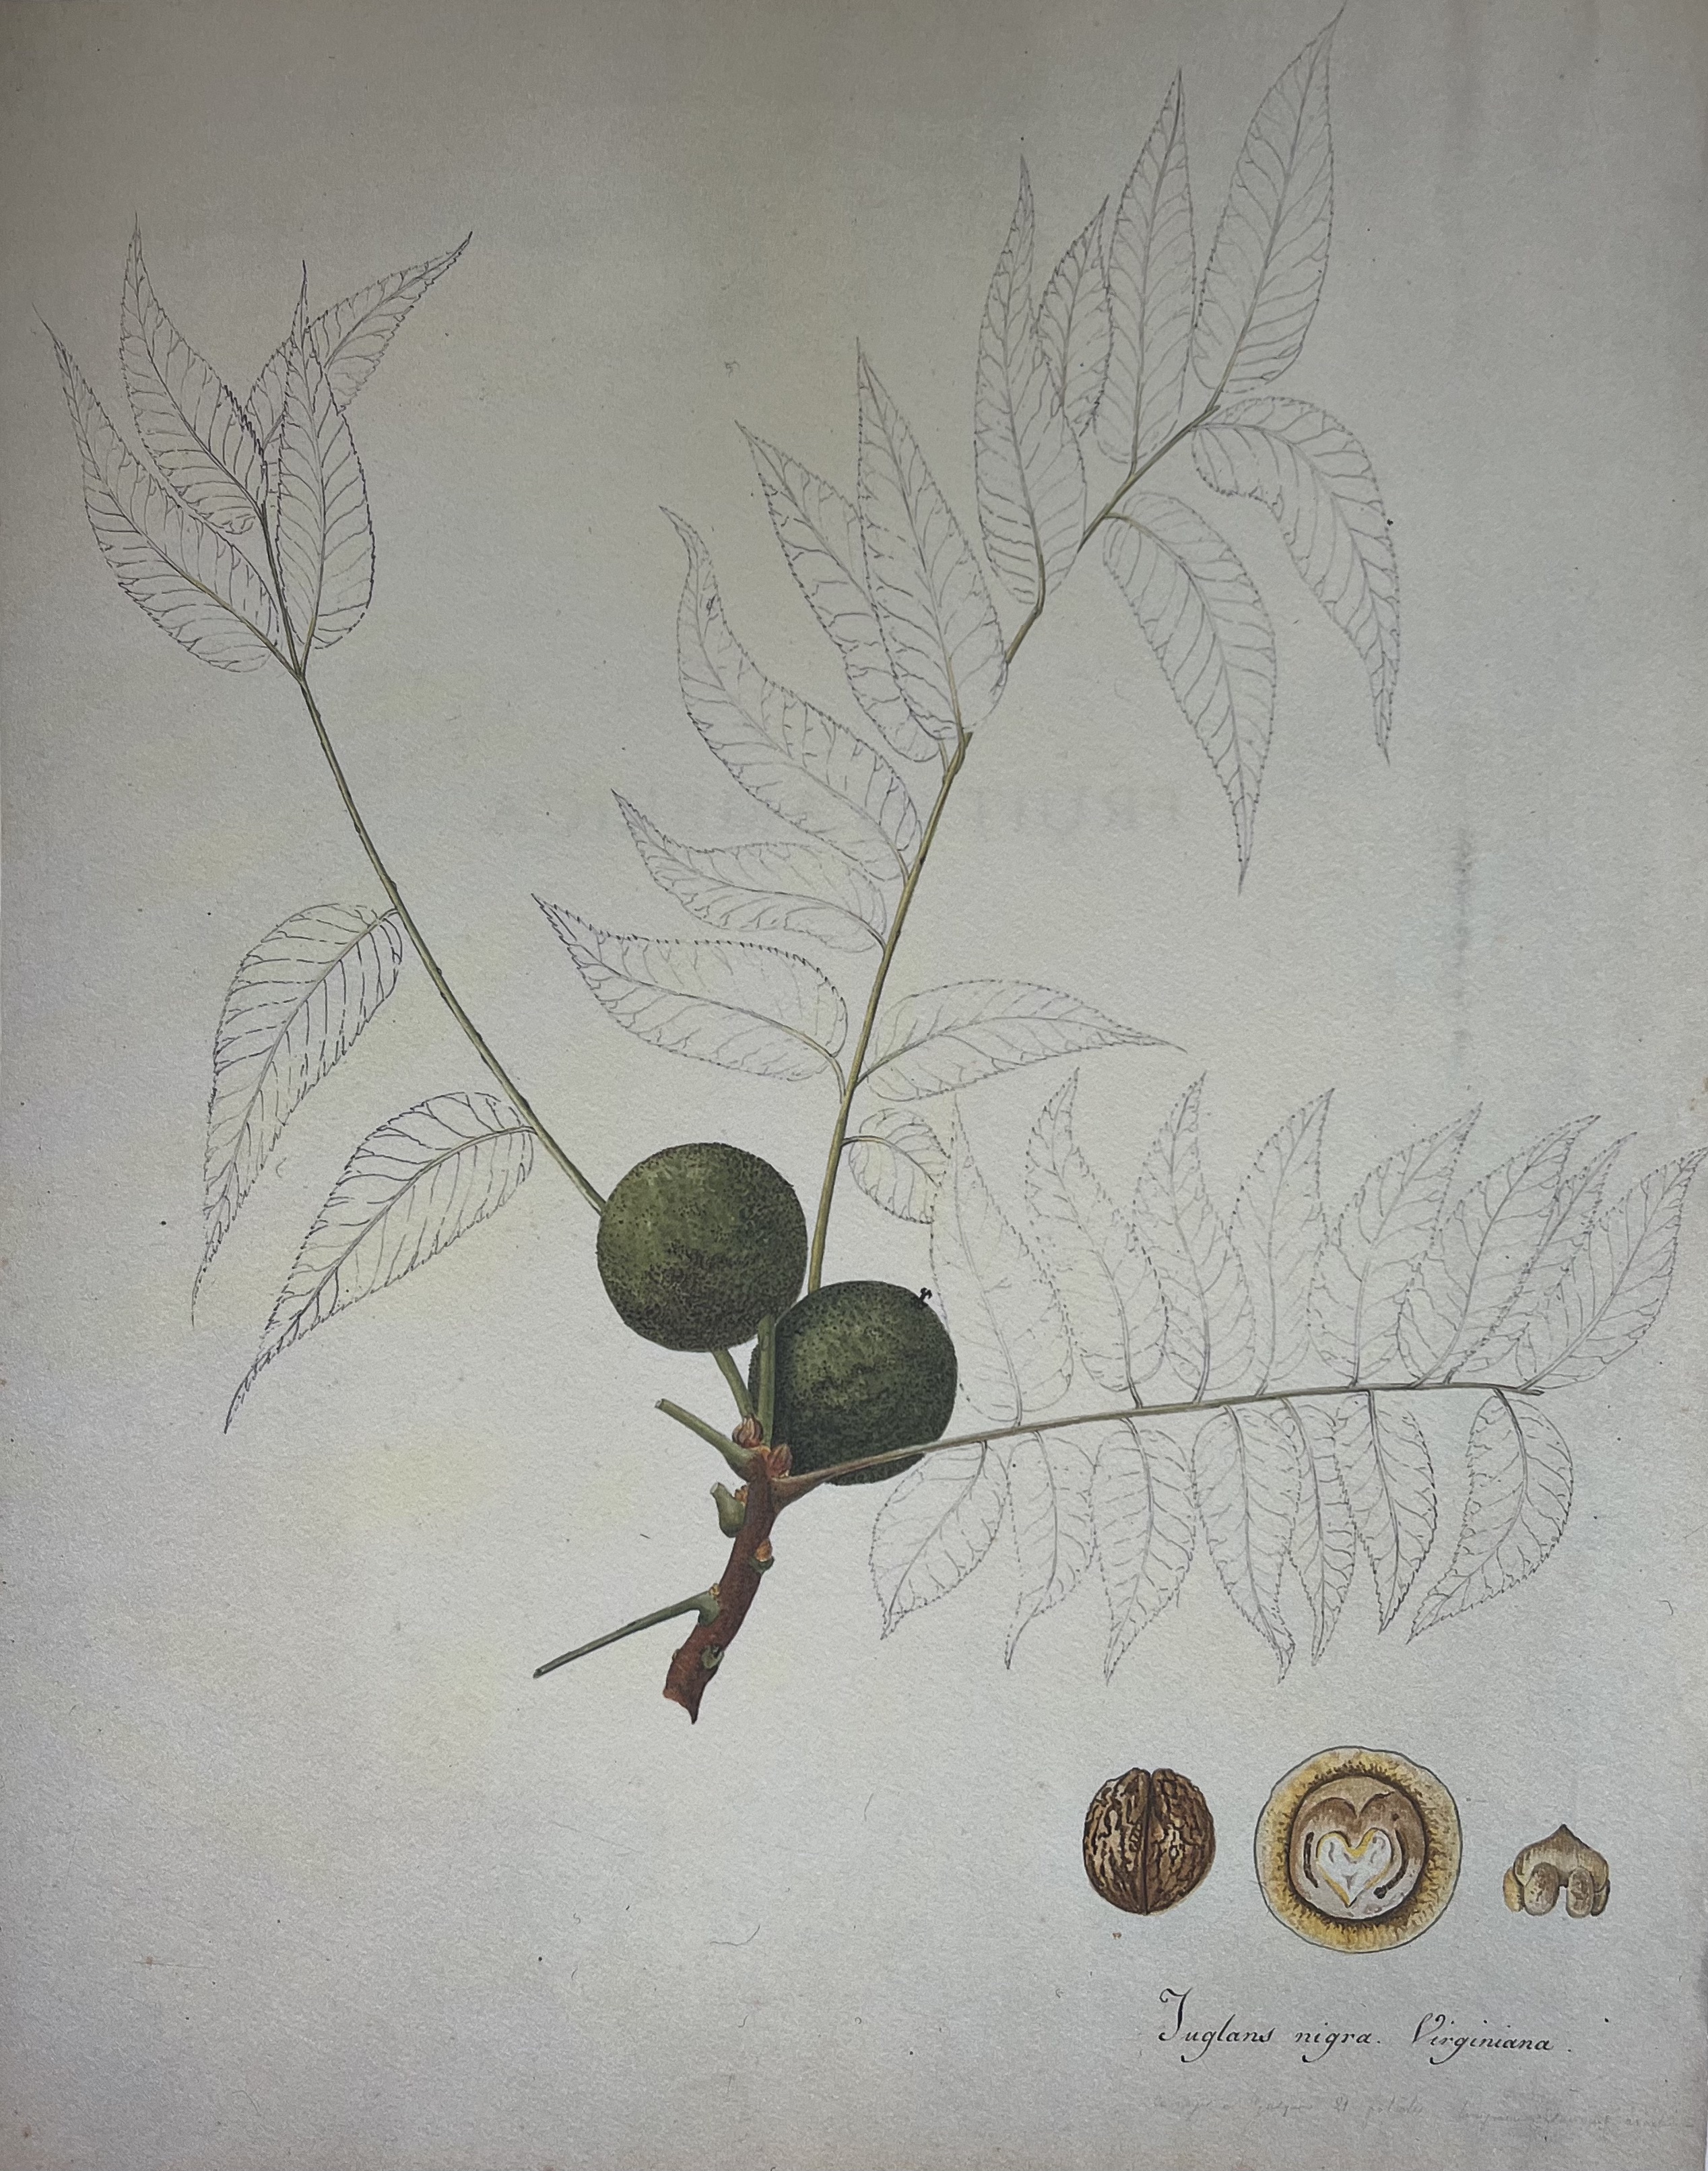
An anonymous French watercolor of a Black Walnut from Virginia, made early the nineteenth century when the tree was being naturalized in France. Photo courtesy of An Oak Spring Pomona by Sandra Raphael. Oak Spring Garden Library in Upperville, Virginia, 1990.
The process of making paint from the Black Walnut fruits was simple. What I loved most is that it required nothing but time, water, and heat to prepare.
I cracked the fruits with a hammer against a hard floor, to remove the skin from the seed and shell. I broke the skin into as many pieces as possible and covered them with water. I did not wear gloves, but kind of wish I had. My hands were stained brown, fading to yellowish tan for many days. I don’t really care, but it was pretty obvious and perhaps something to consider next time! They soaked for 48 hours out in the sun while I was tinkering with other things in my studio. The water turned a lovely deep, iridescent mix of yellowish-greenish-brownish hues as the oils, pigments and tannins leached out. Then I strained out the chunks and gently simmered the solution for about 1 hour on the stove. I let it settle and tried to take a photo of the lovely design on the surface of the inky water, but only got my reflection!
Soaking the fruit skins, the strained and simmered solution sitting awhile, and me trying to take a photo of the last phase and seeing my silly self in the reflective liquid. Lovely, lovely, browns and friends along the way.
That’s it! Next up for all my paints, I will be adding a solution made of gum arabic, honey, thyme oil and glycerin that all together help bind the pigments to the paper, prevent decay, and slow the drying time of the paint. I’ll share my “recipes” later on once I’ve fiddled and had a chance to compile all my notes and color charts.
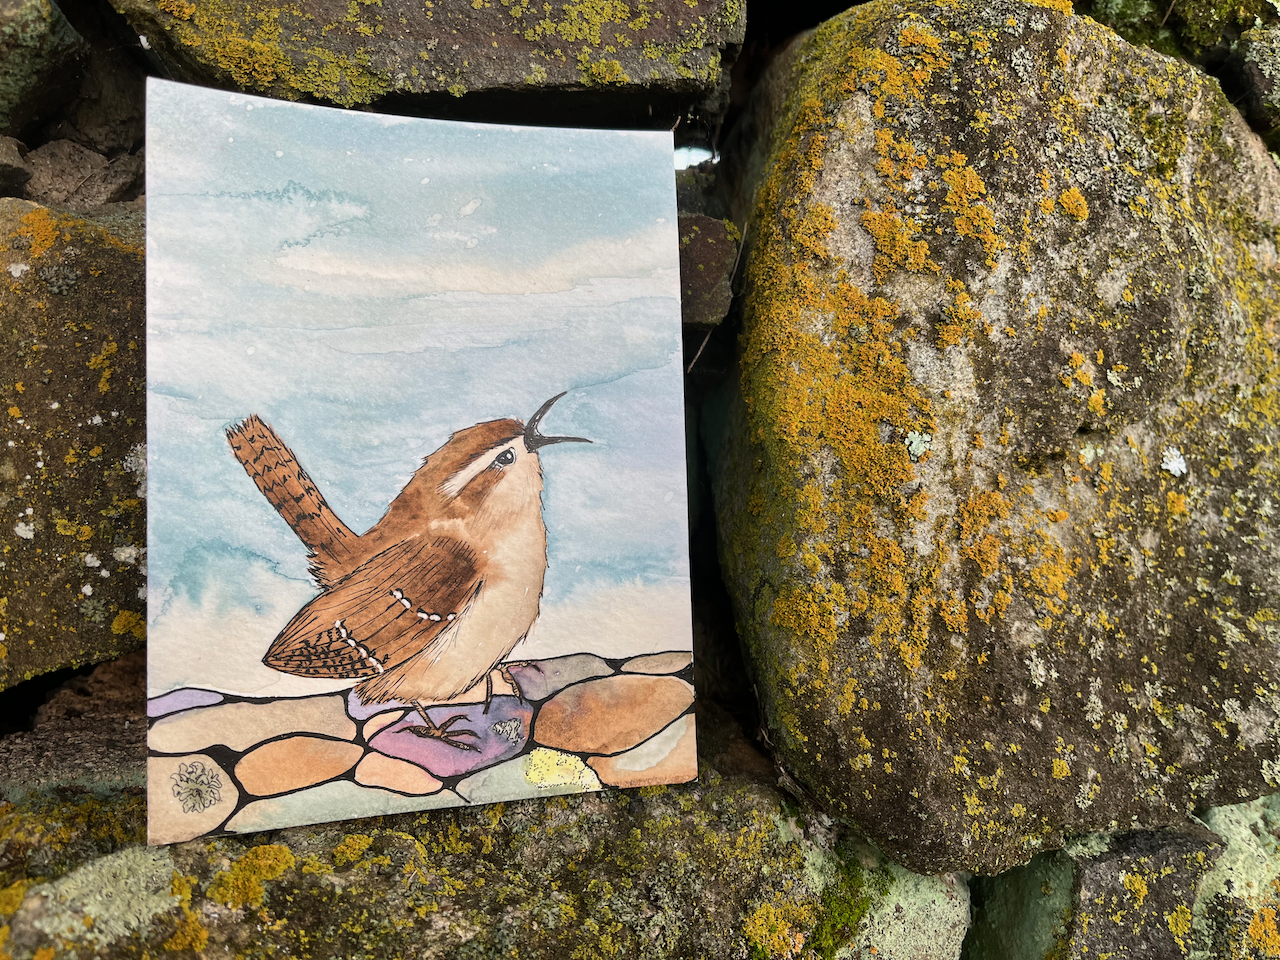
Here are just a couple of lovely brown creatures I created. They are all using only paints I’ve made here from local plants!
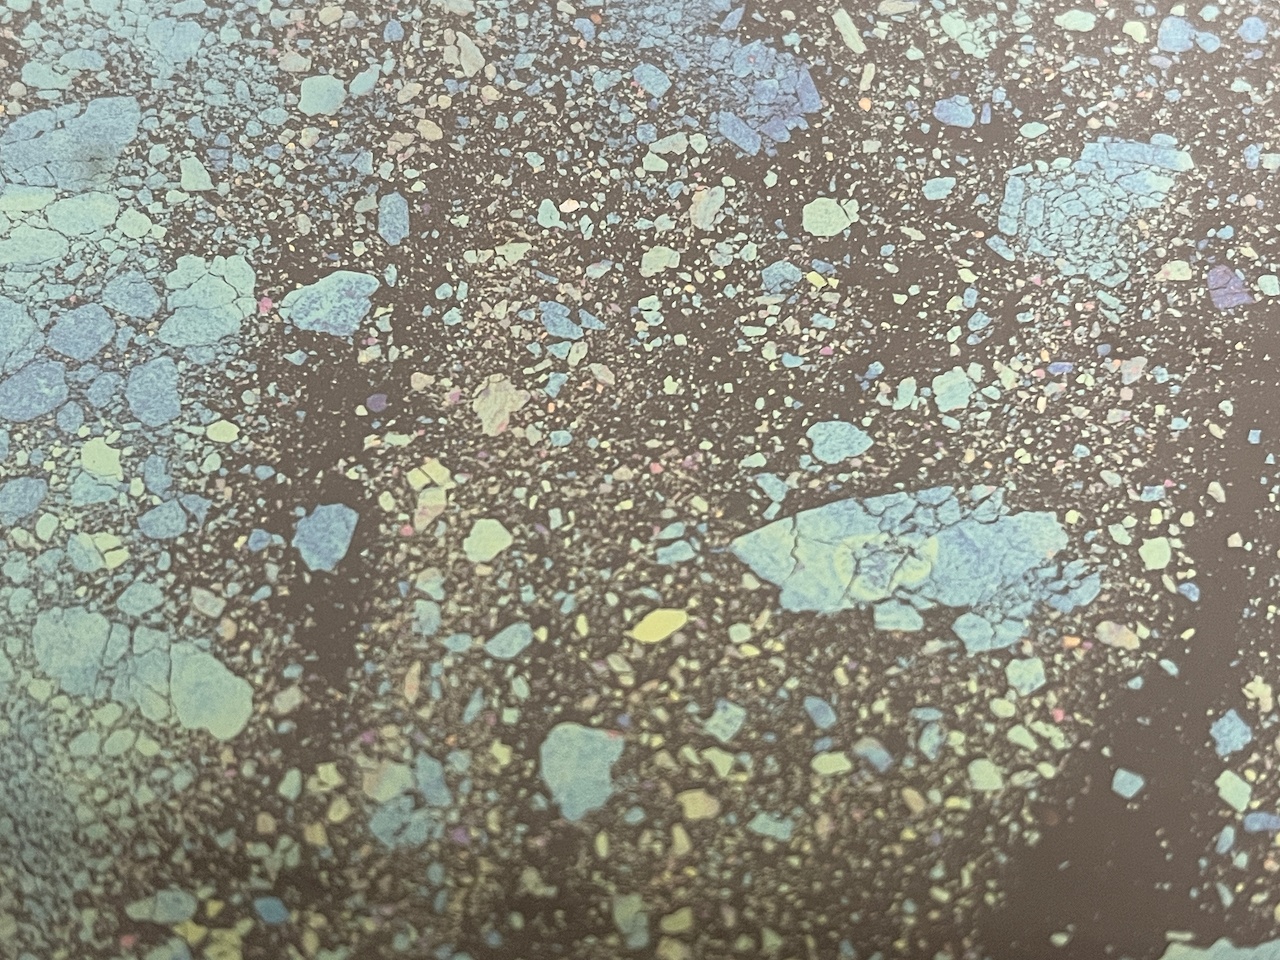
The iconic rock walls covered with lichens and mosses are familiar here, as are the familiar Carolina Wrens that belt out their tunes. Little Wren’s browns were created using Black Walnut’s Ink (the dark brown on his back), and brownish hues of Narrow-leaf plantain and yellow onion skins mixed to make his brownish belly. The rocks that are brown are various invasive plants from around here that I acquired during a workshop I attended. Polyphemus moth. Those antennae get me every time! Various shades of brown used include pink onion skins, plantain leaf and Black Walnut fruits. The mossy inspired background is a wash of orange marigold with splashes of beets, yellow onion skins and butterfly pea.