If you’d like to follow along with my art and gardening stuff, I’ve made a shift to Substack. I’ll keep this website mostly as a landing page to find the resources and stories about my cancer journey, my art samples an such, but any blog style articles will move to Substack.
I just wrote about making oak gall ink, if you want to pop over and check it out. While you’re there you can subscribe, if you like.
I’m excited to share that I’ll be participating in an upcoming online writing course with Janisse Ray, an award-winning Southern author whose writing is deeply rooted in the land and in the rhythms of her daily life.
Janisse believes in the power of stories—to change the world, to help address the climate crisis, and to create a more just society. Notably, she was a major inspiration for me early in my career around seeds and seed saving, after I read The Seed Underground: A Growing Revolution to Save Food. Her work helped shape how I think about stewardship, nature, and attention to place.
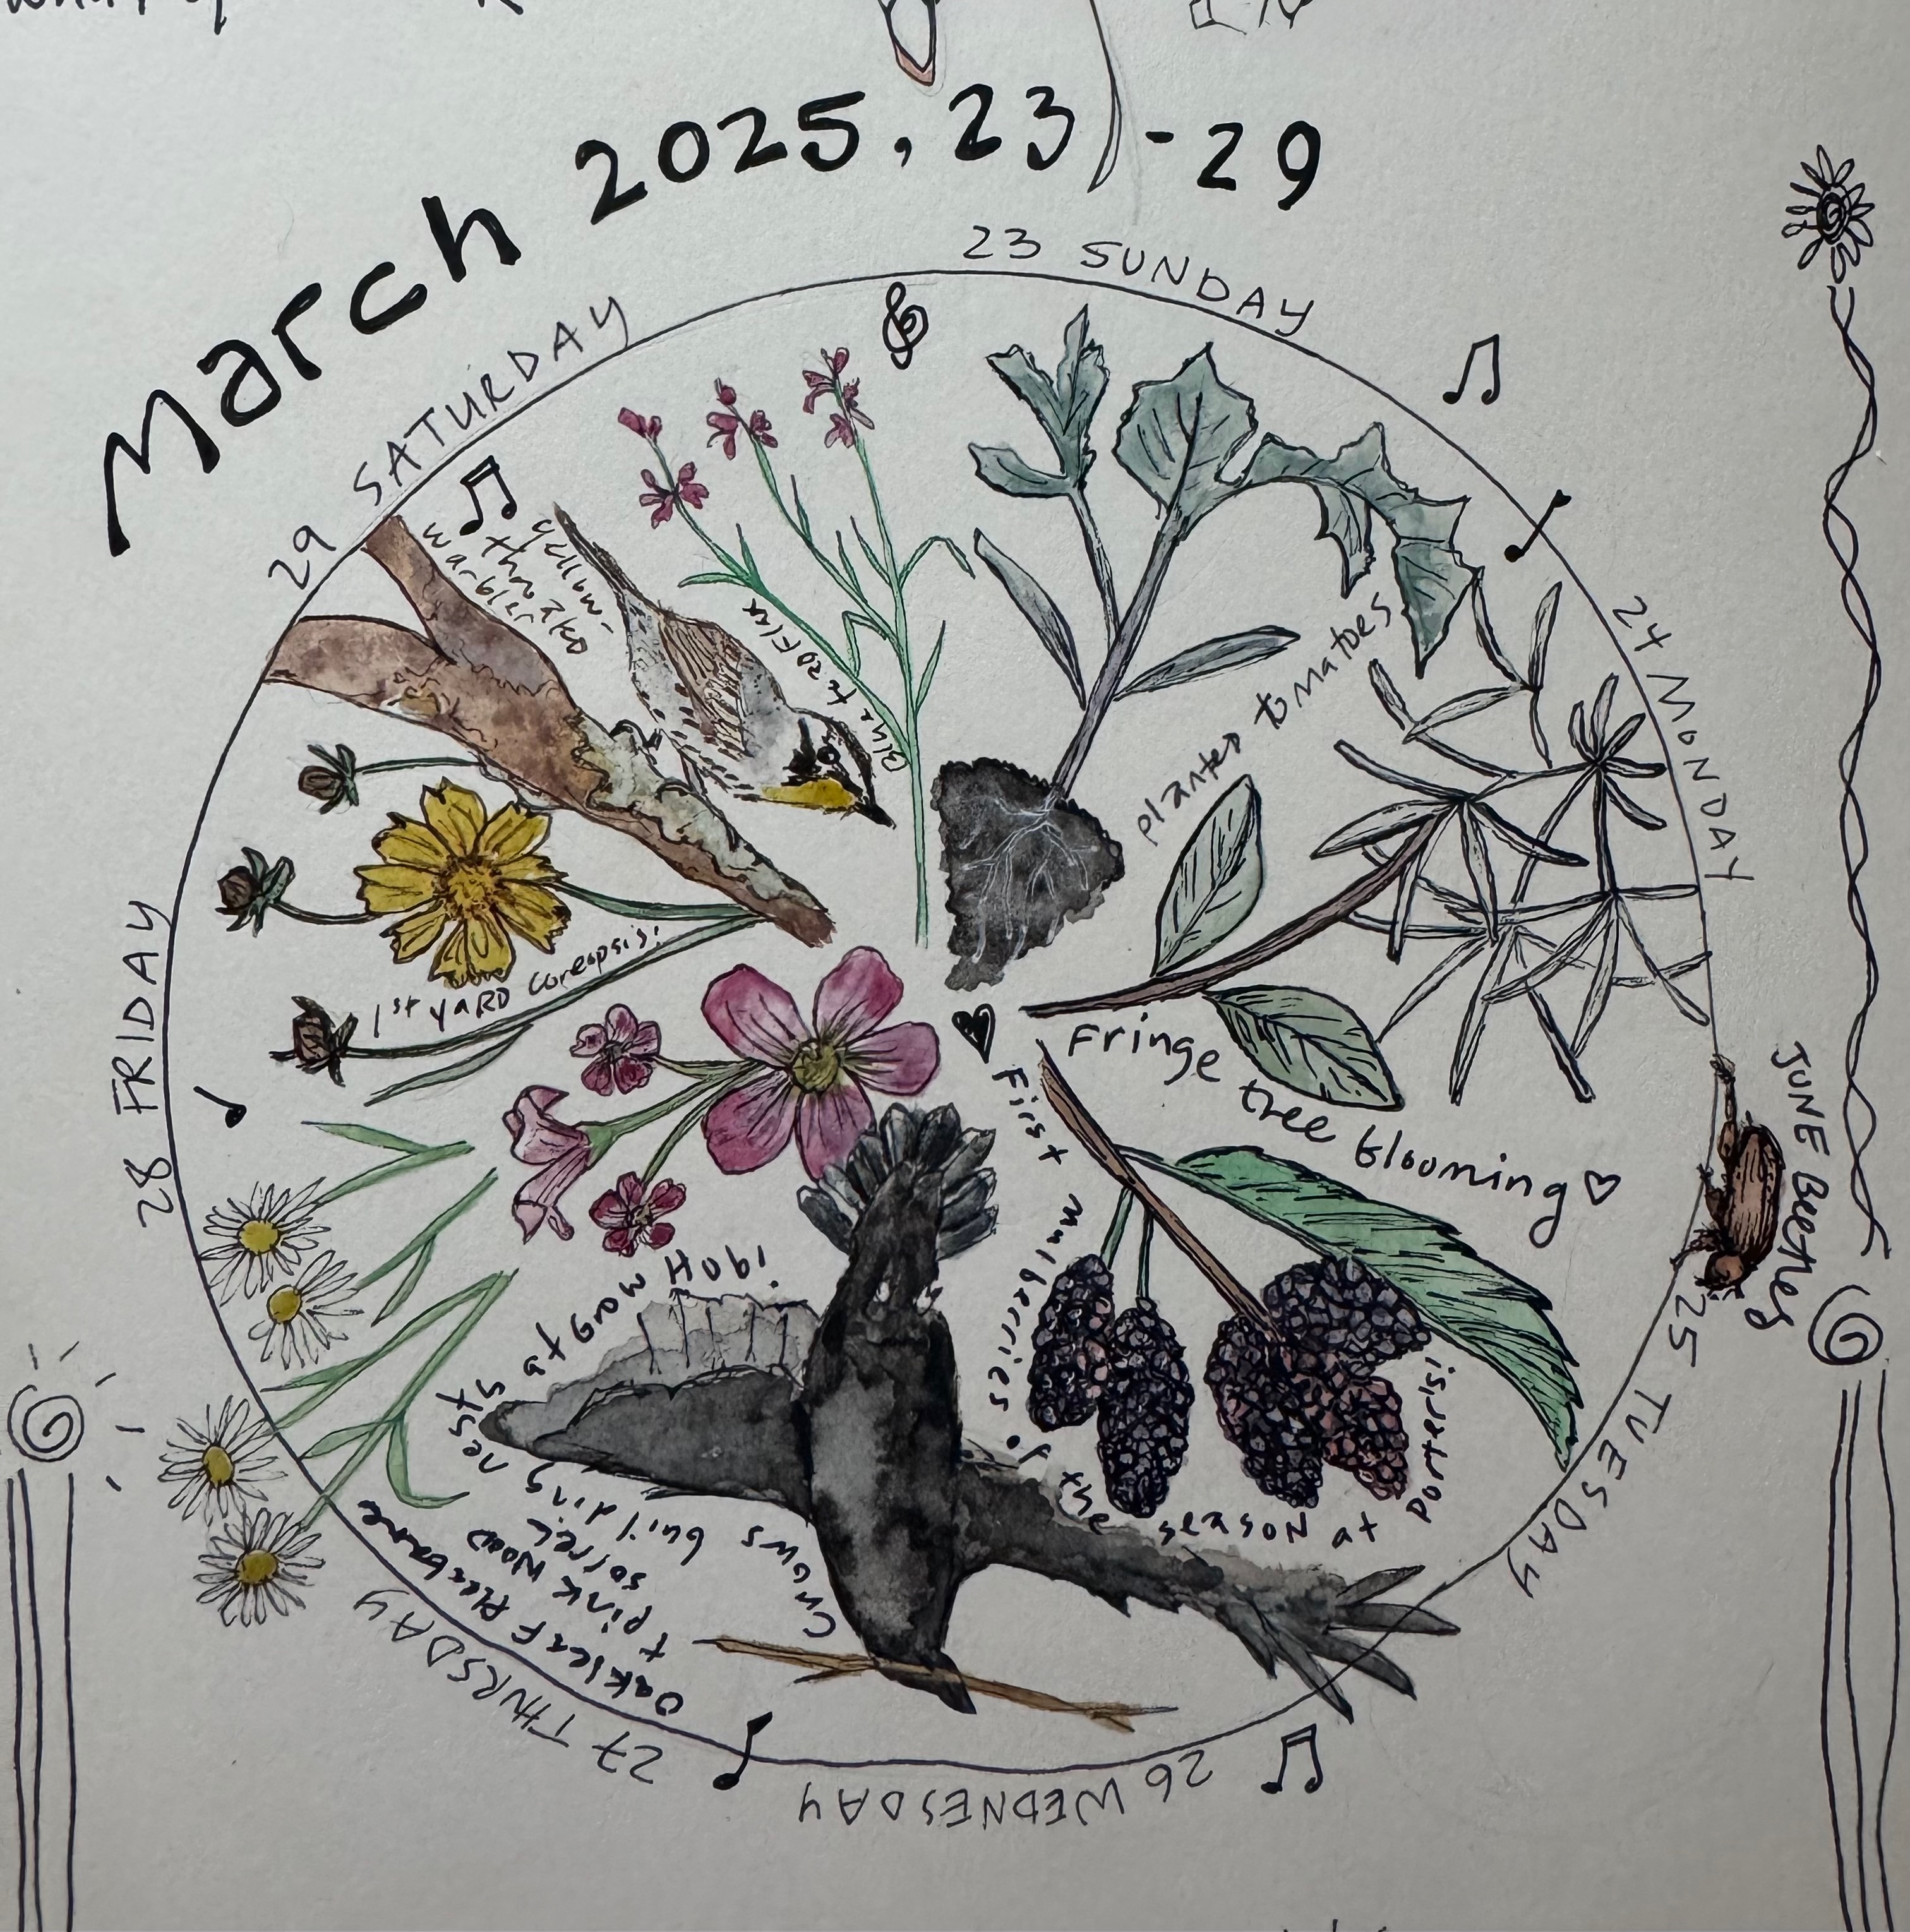
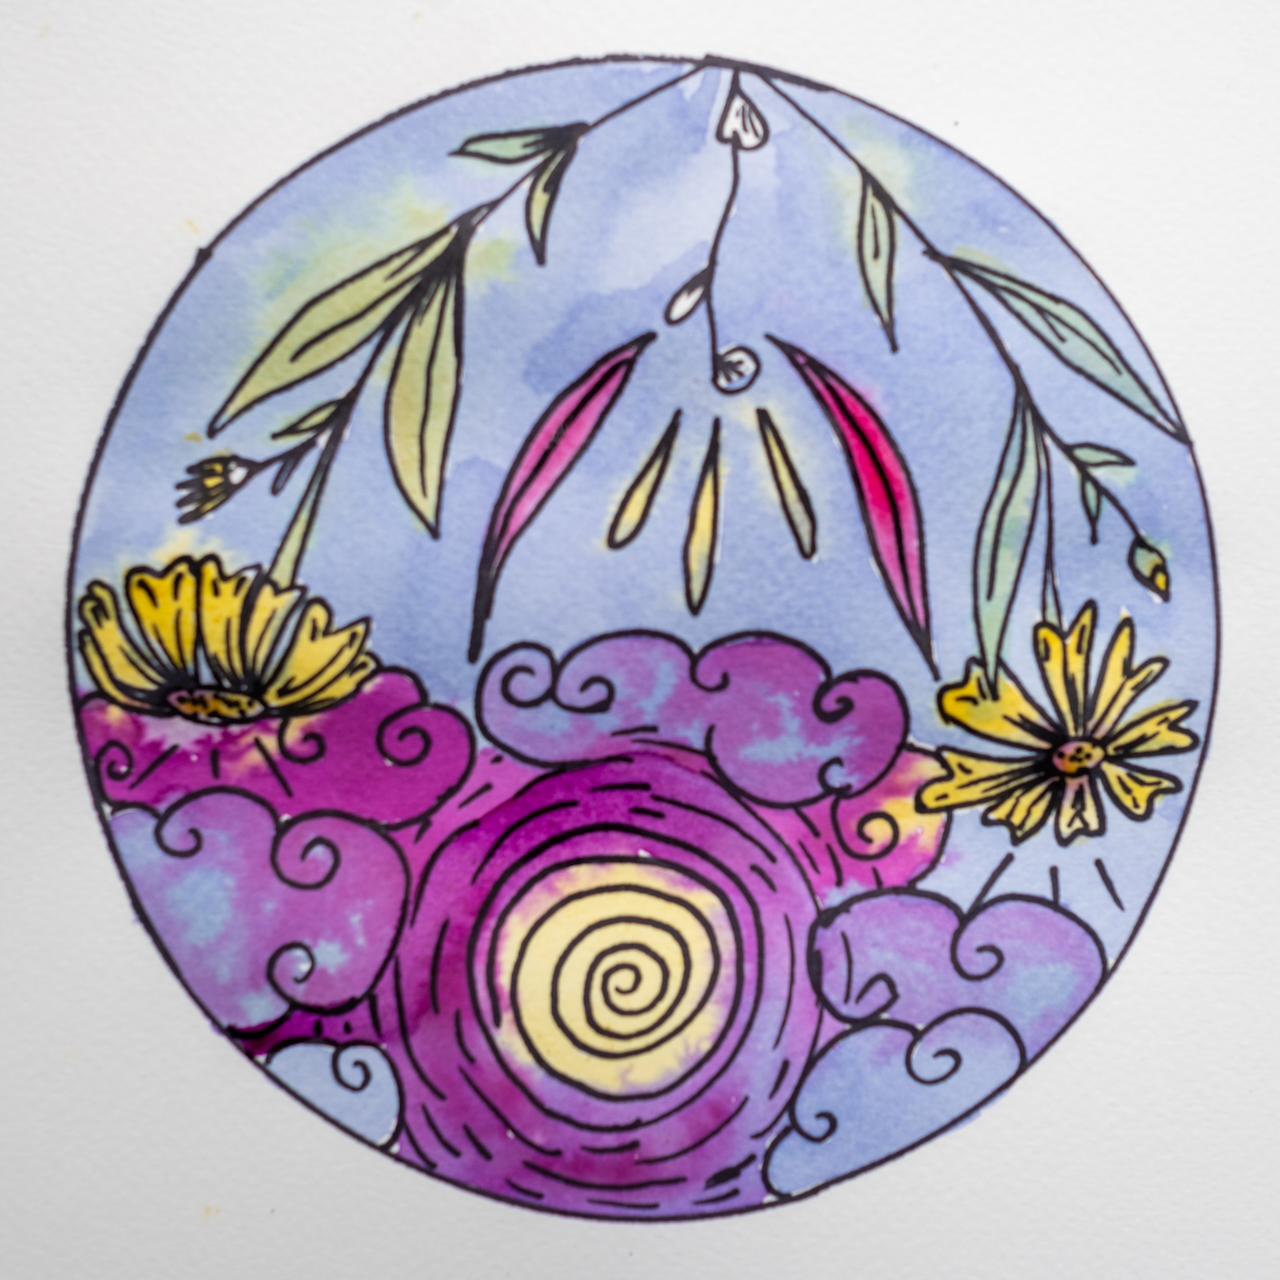
I took a previous online offering with Janisse, and it inspired me to begin creating phenology wheels. For me, they’ve become a perfect way to gather and reflect on my observations—what’s happening, when it’s happening and how it’s all woven together, what I see both in the natural world and in my garden. They give me space to practice sketching and painting skills, while sharpening my ability to notice patterns and seasonal change.
This is just one of many creative practices that will be shared in the course. I’ll be joining 10 other creatives, each offering ideas to support your own journaling practice, including:
nature observation and writing
simple art exercises
shapes, borders, corners, spirals, dividers, banners, and other page designs
weather, mapping, perspective
what place means to us …and so much more.
Registration is by donation, so you can pay what you’re able and what the experience feels worth to you.
The Winter 2026 series focuses on Place—our complicated, ancestral, and modern relationships with the places that matter to us.
The course meets 7 Sundays in a row, from January 11 through February 22, 2026, on Zoom from 5–6 pm Eastern.
I love outlining and detailing my paintings with fine ink. But even the best artist quality ink pens have been a huge pain in the butt, always getting ruined when trying to draw over dried paint. It feels wasteful, all those plastic pens just giving up so easily. And I’m constantly scribbling them on a separate page in attempts to revive them, only to just get a few more lines before they crap out for good. I had an aha! moment while enjoying another amazing artist residency program at Oak Spring Garden Foundation.
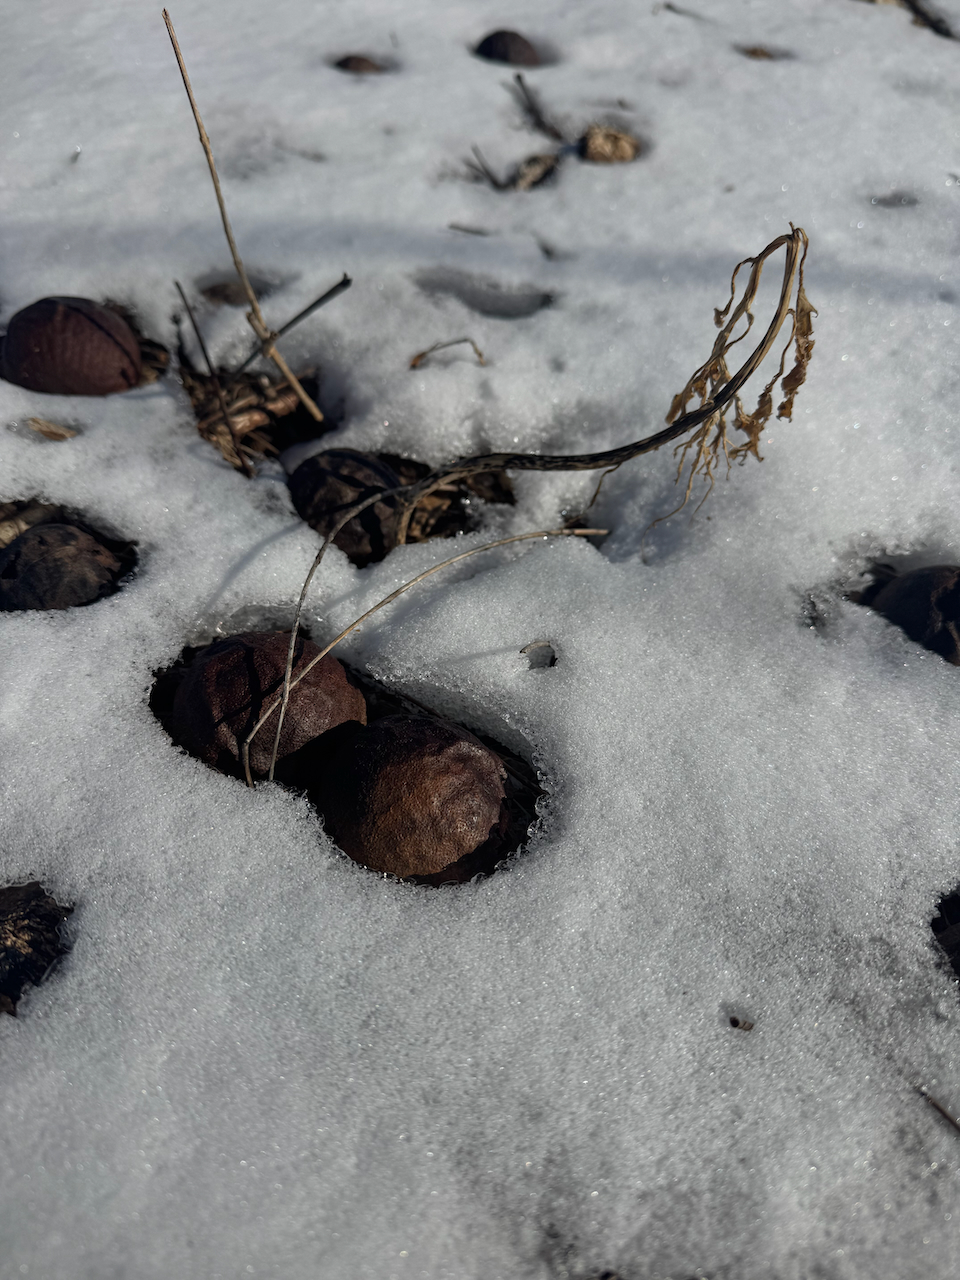
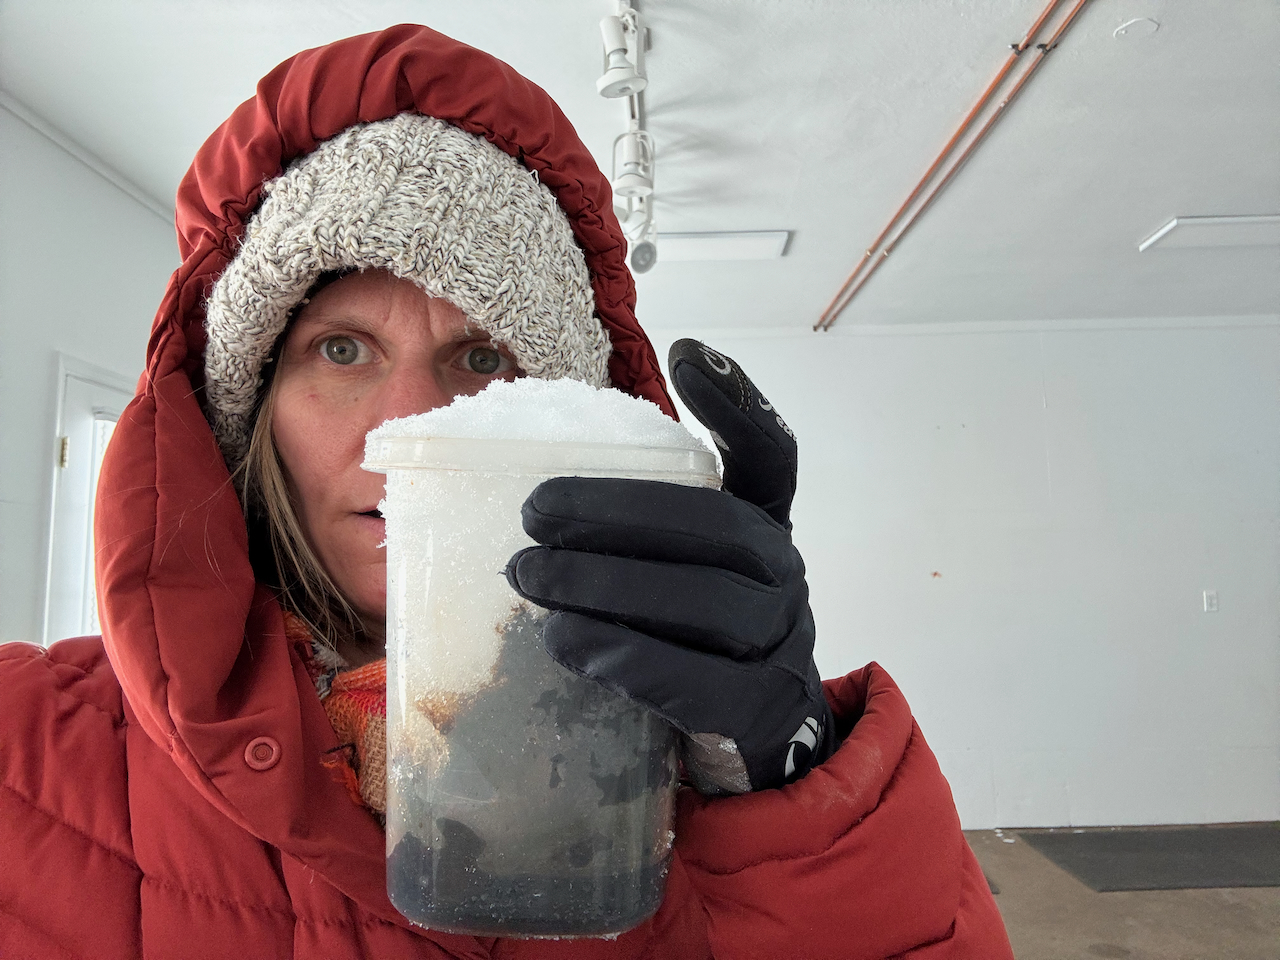
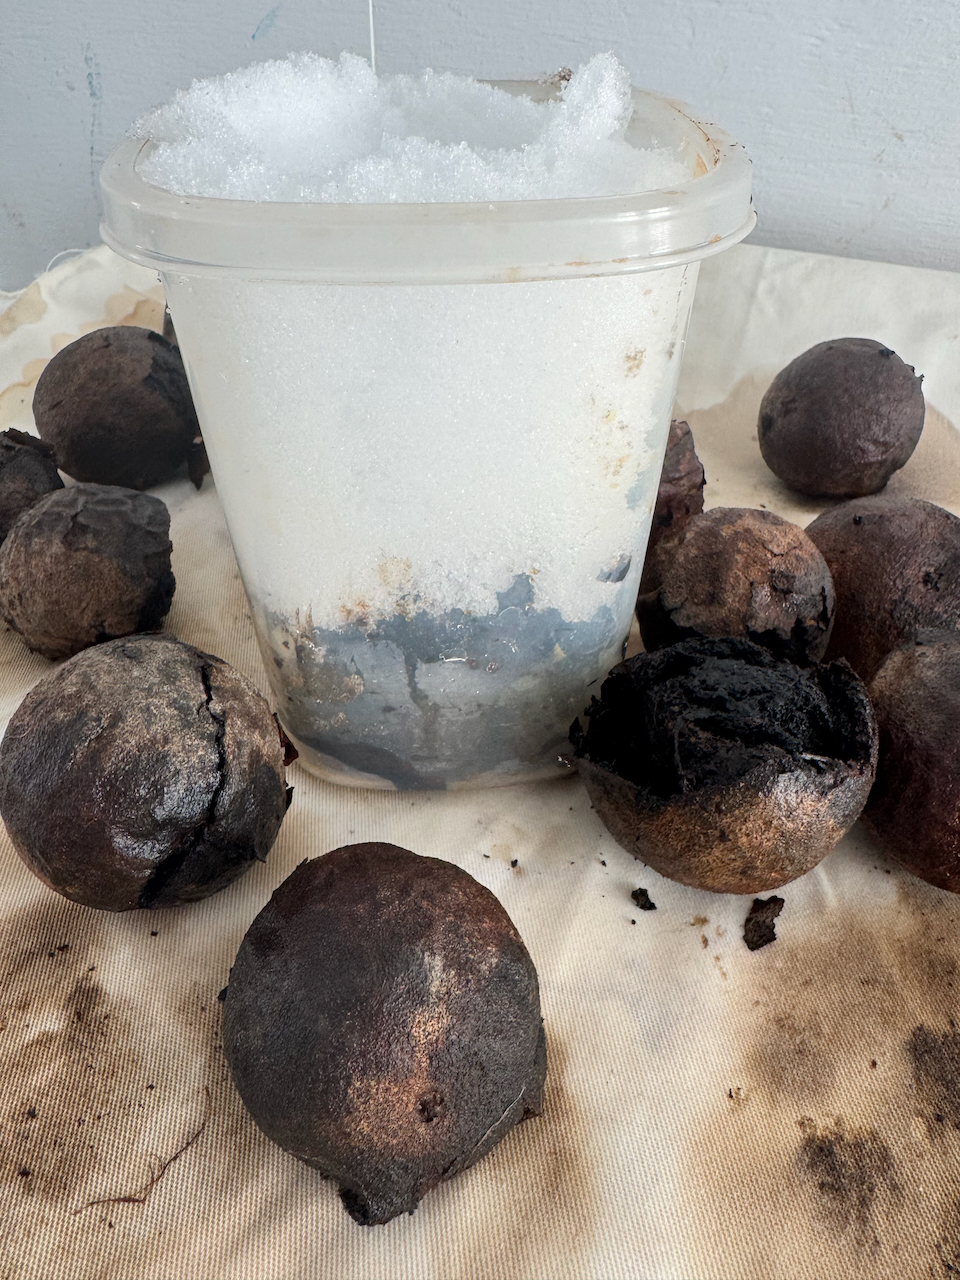
I arrived here in Virginia in mid-January. Not a great time to forage for botanical inks, but a good time to stay indoors and be creative. I happened to be here during the Arctic blast system that sent snow to Florida! The highs were in the teens, lows in the single digits for many days. All the plants are dead or dormant. But I did know from the previous times I roamed about in warmer weather here, that the stand of Black Walnut trees behind the farm might have some fallen and frozen fruits. I just couldn’t help myself, so I got on all my winter gear and wandered around, trying to remember where exactly those trees were, and then searching around the ground underneath for the fruits once I found them.
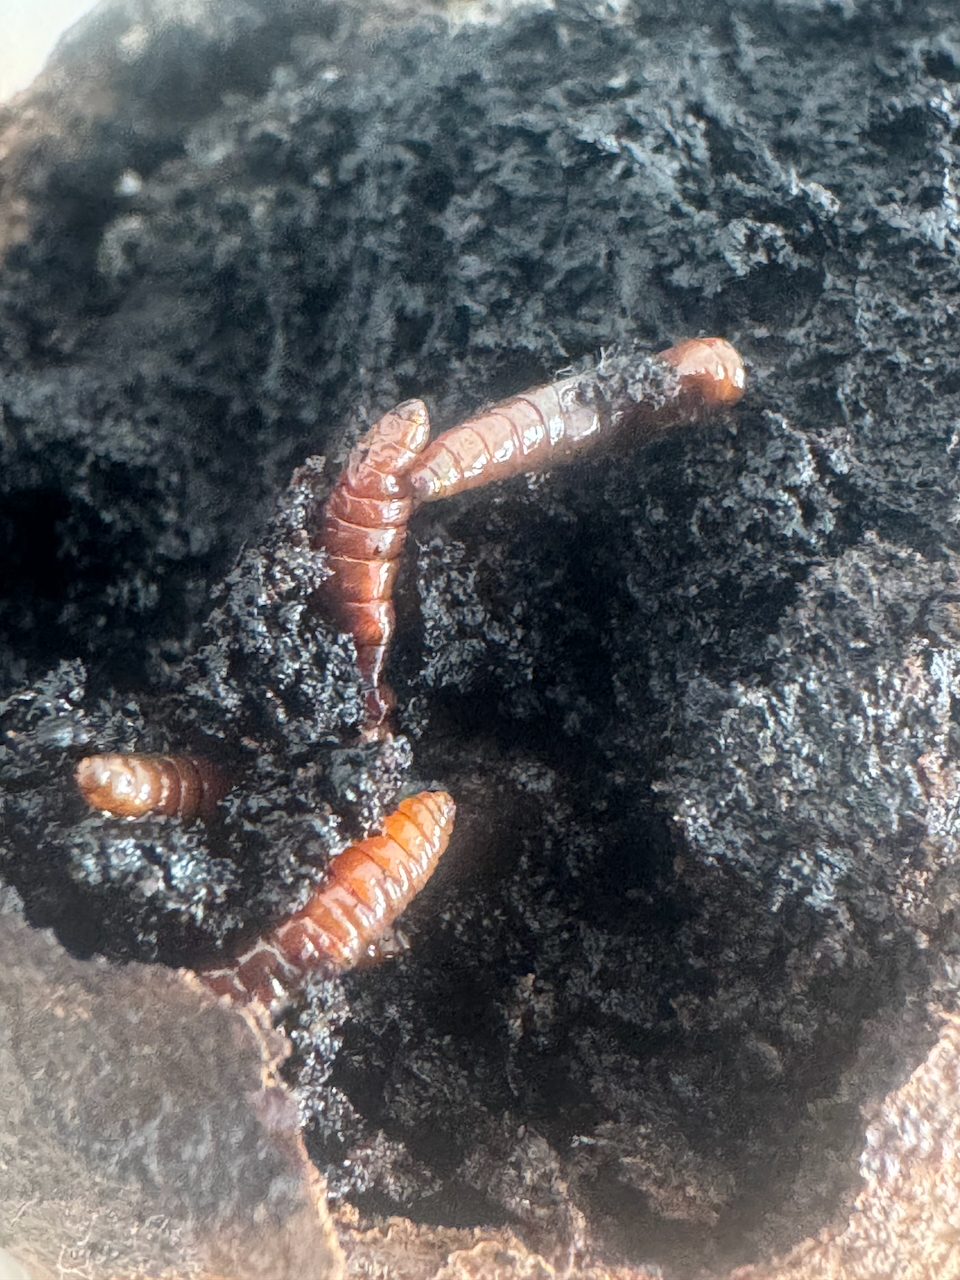
I found some in the snow, decomposing. Yay! I gathered a few, washed them off, and then let them soak in snow for several days in the studio. One had some dead little grubs inside, so I accidentally took some winter bird food away from the critters. Although I wonder what they taste like, soaked in that intense tannic juglone chemical that keeps many other plants from growing nearby.
After soaking in melted snow for a few days, I gently simmered the watery brown liquid for an hour or so until is was concentrated enough to my liking. I then strained, bottled, and labelled a little jar – and that’s it.
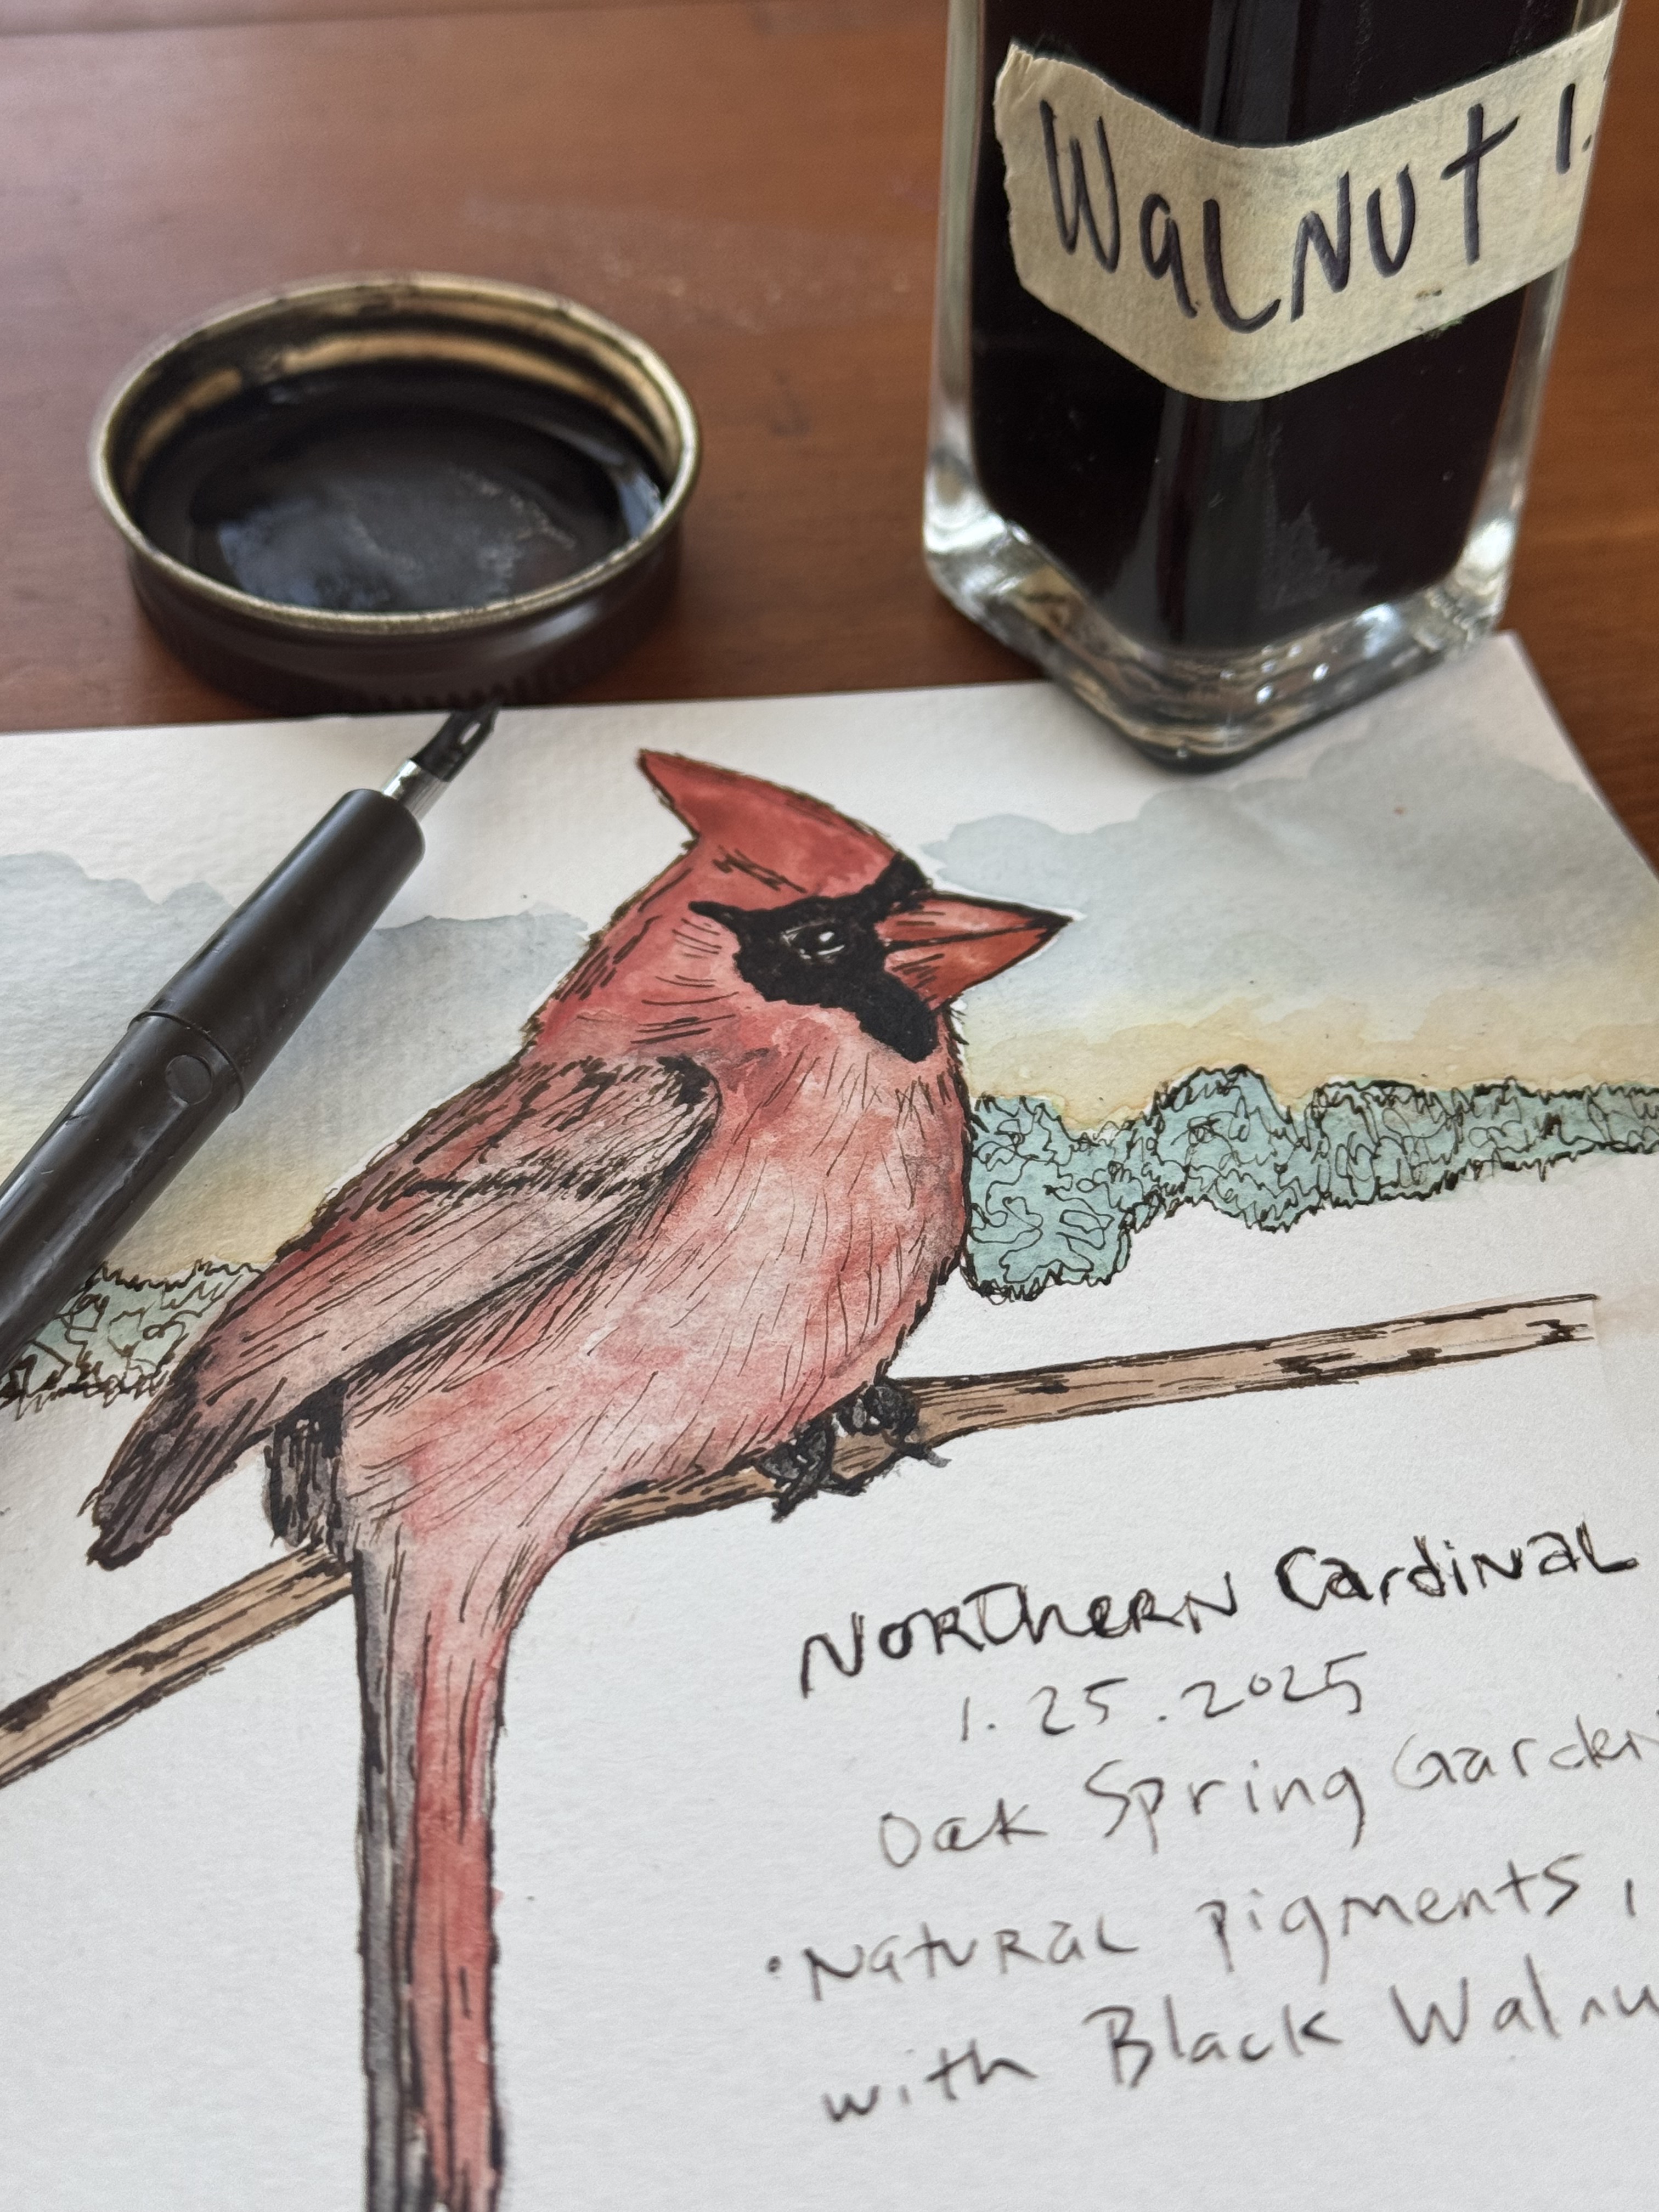
As I was doodling and painting various birds and getting frustrated again with those dang pens, I wondered….could I find a dip pen and try my own recently made ink?
It seems anything you need at this place, appears if you ask. When I first arrived, I inquired about a humidifier for my room, as the dryness was parching me. I’m so used to Florida humidity, and not adapting well to the cold and dry. Headaches, thirst, bloody nose. Ugh. The next day, James (our artist resident coordinator) showed up at my door with one! So I asked – might there be a dip pen around I could borrow? And there was!
So I tried my freshly made walnut ink and it’s a dream! The detailed lines I got with this simple pen were amazing. Neither the ink or pen were ruined by the paint at all. I was delighted and surprised at how long the ink lasted in the little dip pen reservoir, before needing another dip.
This is a game changer for my work. I can now use my own handmade inks and avoid wasting plastic pens. It’s also really pleasurable to hold an old and effective tool in my hands, doing slow and methodical work.
The only downside I see thus far, is that that the walnut ink is not waterproof. So I can’t paint over it once the final lines are drawn. This particular nib also seemed a bit scratchy, maybe from being practiced with by amateurs like me. Perhaps a new one, in a more skilled hand will glide better. It will also likely work better on smoother, hot press watercolor paper compared to the cold press and more textured paper I tend to use.
I have so many colorful botanical inks in my collection, and can’t wait to try them! I just ordered a sampler set of nibs and a holder so that I can keep practicing when I get home. I might try making my own version of India ink, from burnt pine bark chunks I have from a prescribed burn site.
I like making both inks and paints, and there are differences both in how they are used to make art, and practically – how they store and travel, how long they last, and how much is involved in the process of making them.
Ink is ancient. It’s been prepared and used for thousands of years, transmitting language on various surfaces. Dark brown ink made from oak galls was used to create many famous manuscripts (like the US Constitution); Leonardo daVinci drew with it.
Basically it’s a concentrated colored liquid used to write with. It is fairly simple to make with fewer ingredients and steps compared to paints, but is perishable, harder to transport, and not as easy to use due to its fluidity. But the fluidity can be a good thing, as colors readily run together and dry in beautiful and unexpected ways. Additives to improve stability and thickness can be used to produce high quality ink.
I started with inks and graduated to paints, but keep both for use in my artwork. Much of the artwork in this sketchbook was created with inks. Jason Logan’s book, Make Ink: A Forager’s Guide to Natural Inkmakingis very inspirational.
For lots more detailed information, pigmented plants to find in Florida, techniques, plant info, and lots of my art – pick a copy of my book!
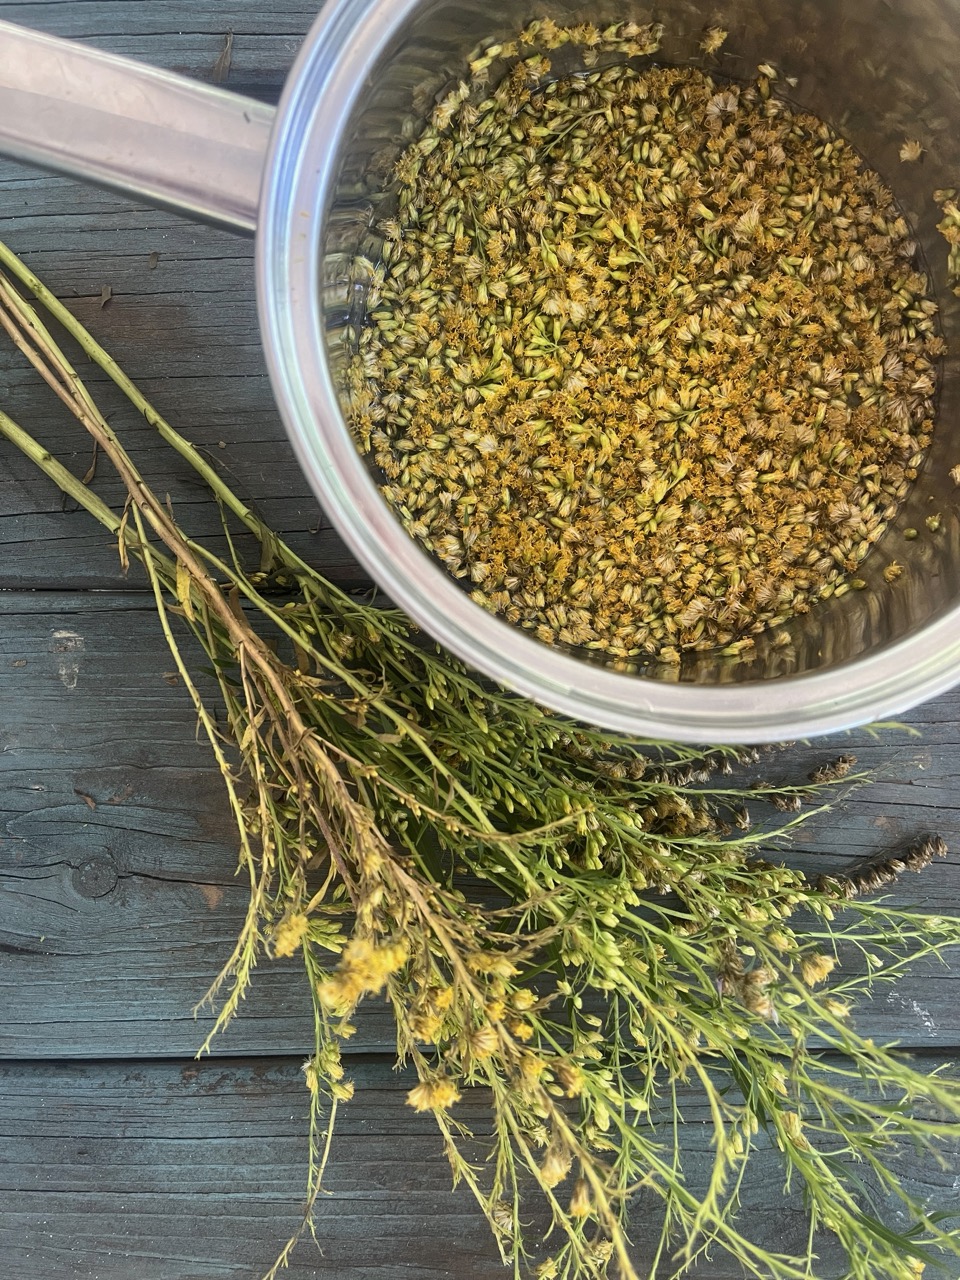
Simmer plant material in water (except for berries that may not need additional liquid), muddling several times. 1-2 hours for flowers and petals, much longer for bark, roots and other tough materials. Simmer until a rich colored and concentrated dye is obtained with as little water as possible. Cut the heat and rest overnight. Repeat again if needed to allow tough plant tissues to break down further; likely not necessary for delicate petals. Avoid burning and boiling. Attend your pot closely, set timers periodically so you don’t forget to check!
Allow liquid to cool enough to handle.
Squeeze out all plant material through a cloth or very fine sieve. Compost the plants.
Pour your new liquid ink into a very clean and labelled jar or bottle. Include plant + date and anything else you want to capture. A separate notebook is good for the finer details you can’t fit on a small bottle.
Optionally, add 1 part watercolor medium to 3 parts ink, or approximately 10 drops to 2 ounces of ink.
Add a drop of preservative oil, shake to mix. Store in refrigerator ideally but will last weeks or months at room temperature.
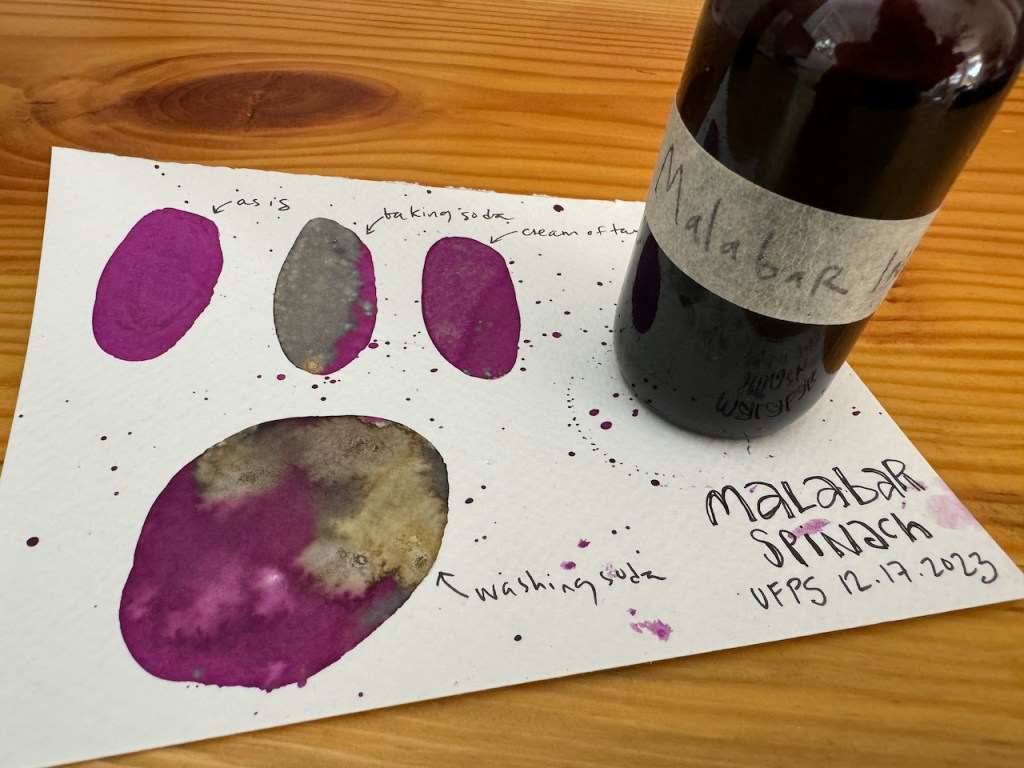
Alum, copper, iron oxides and cream of tartar may be used to make the ink more permanent. Experiment with what works for various hues.
I like making both inks and paints, and there are differences both in how they are used to make art, and practically – how they store and travel, how long they last, and how much is involved in the process of making them.
Paints are solid and can be re-wetted with water for use. Creating them is an involved process but worth the exploration if you become more serious about homemade colors. Pure pigments are drawn out of botanical material through a chemical process known as “laking”, which binds the pigment to a metal salt.
The resulting pigment is dried, finely ground, and mulled with a watercolor medium into a paste which is then used like watercolor paint. Earth based materials like clays and stone can also be used.
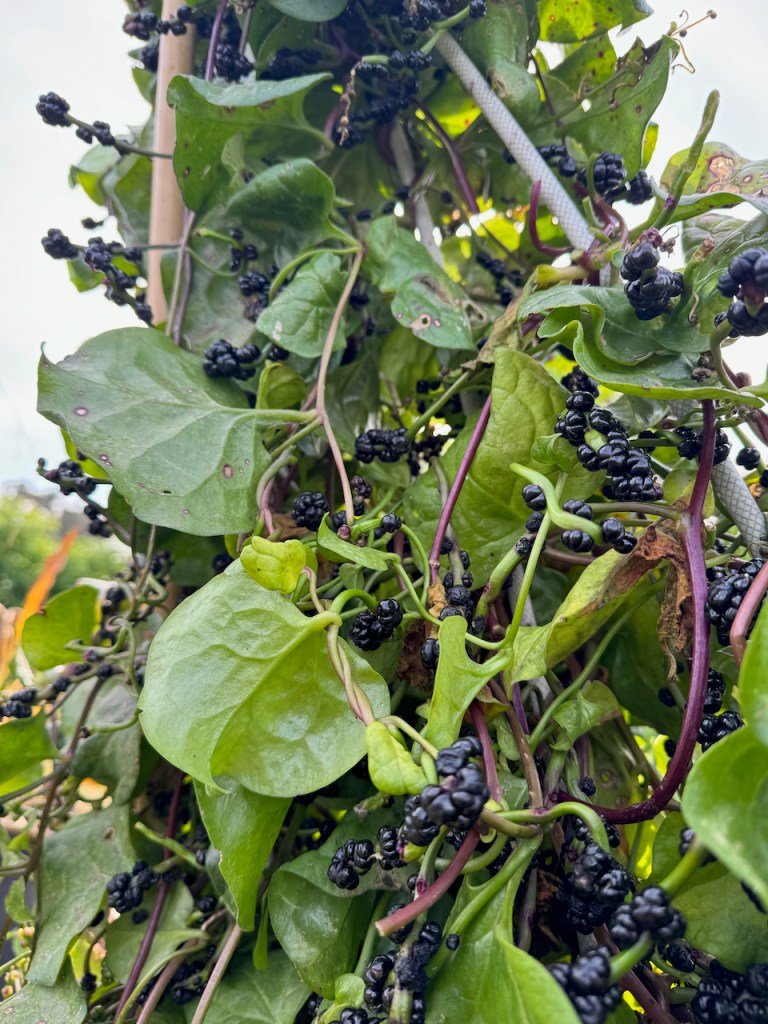
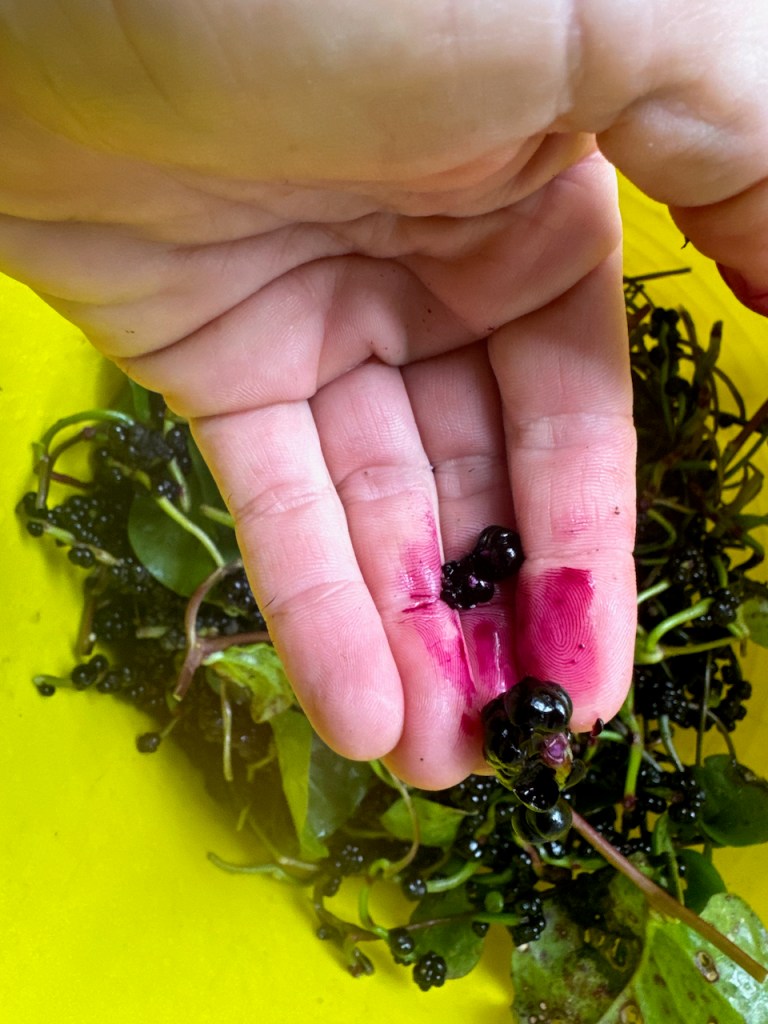
Compared to inks, paints are more portable, do not need refrigeration, and tend to be more stable. I am slowly converting most of my colors to be in paint form as I find them easier to create art and travel with. However, some have better colors as an ink and are best used that way. For example, both beets and malabar spinach berries are bright pink inks, but dull brown paints.
For lots more detailed information, pigmented plants to find in Florida, techniques, plant info, and lots of my art – pick a copy of my book!
Simmer plant material in water, muddling several times. Perhaps 30 minutes or up 2 hours for flower petals until rich colored dye is obtained. For bark, roots or other tough material, chop and simmer over a few hours, rest over night, and repeat again if needed to allow tough plant tissues to break down. Unlike ink, it’s not necessary to reduce water to a very low volume, but you do want to make sure you’ve pulled as much pigment into the water as possible which could take time, depending on the material.
Squeeze out all plant material through a cloth or very fine sieve. Reheat liquid if cooled before the next step.
Mix alum with enough boiling water to fully dissolve.
Mix soda ash with enough boiling water to fully dissolve.
Stir alum solution into warmed colorful dye liquid.
Slowly stir in soda ash solution and prepare for foaming action! Container should be big enough to allow expansion and overflow.
Continue stirring and scraping the foam till settled down.
If you have pH papers, test for a neutral 7 and tweak acid/base addition (more alum to decrease, more soda ash to increase).
Rest at least an hour or overnight allowing pigment to settle.
Pour off liquid on top (supernatant) and carefully strain out the remainder over another container fitted with a coffee filter secured with a rubber band or clothespins.
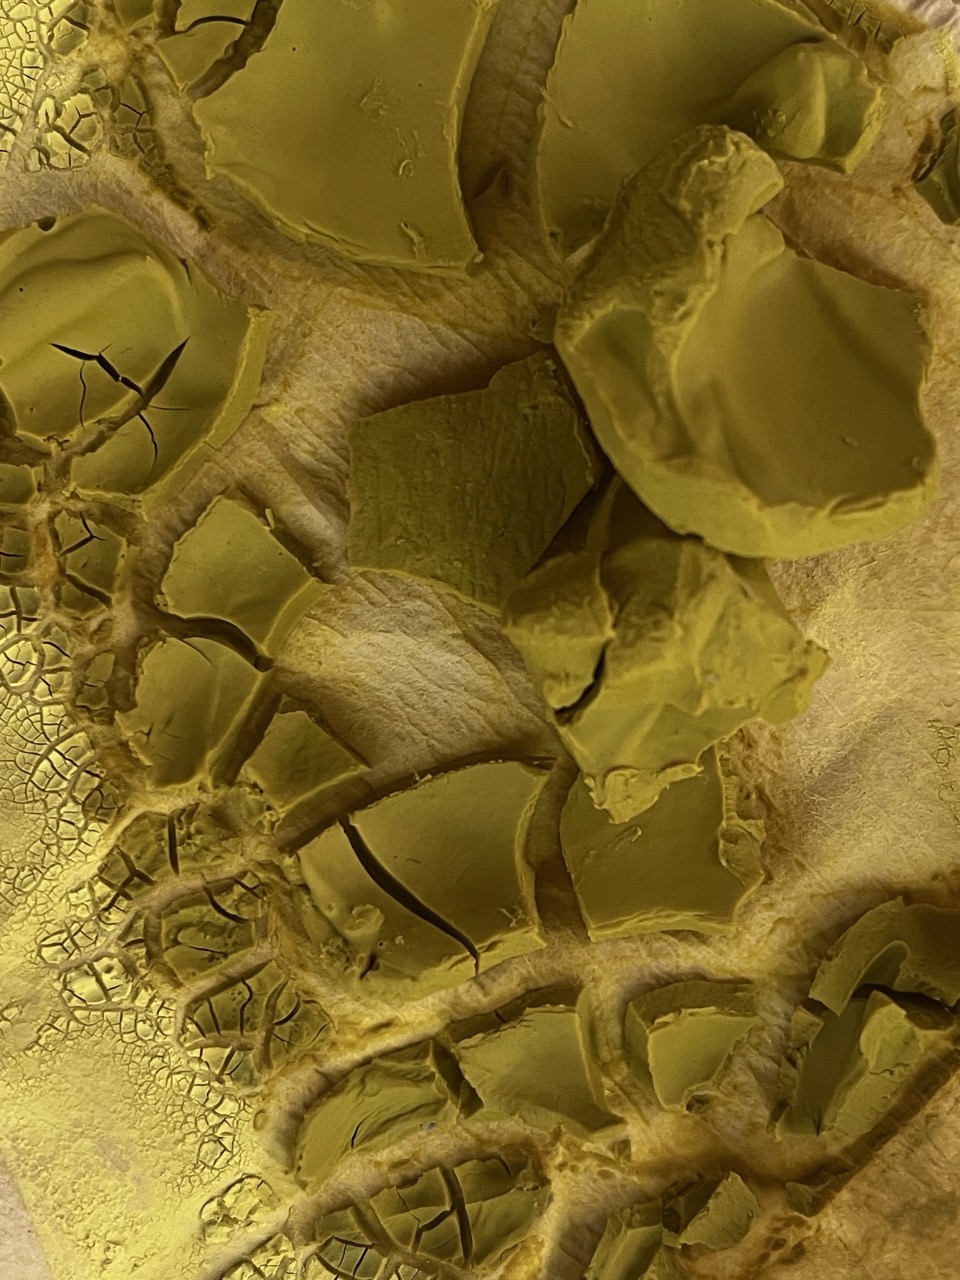
Carefully remove coffee filter once all liquid has drained and a colorful pasty sludge remains. Lay flat to dry over a towel. While not necessary, it is preferable to get the cleanest pigment possible by washing after the first strain. If frothy bits or white crystals are present, I recommend this extra effort. When pigment has been fully strained, re-submerge in a clean bowl of water. Let settle and pour off water once or twice more till clear and clean looking. Strain again and dry.
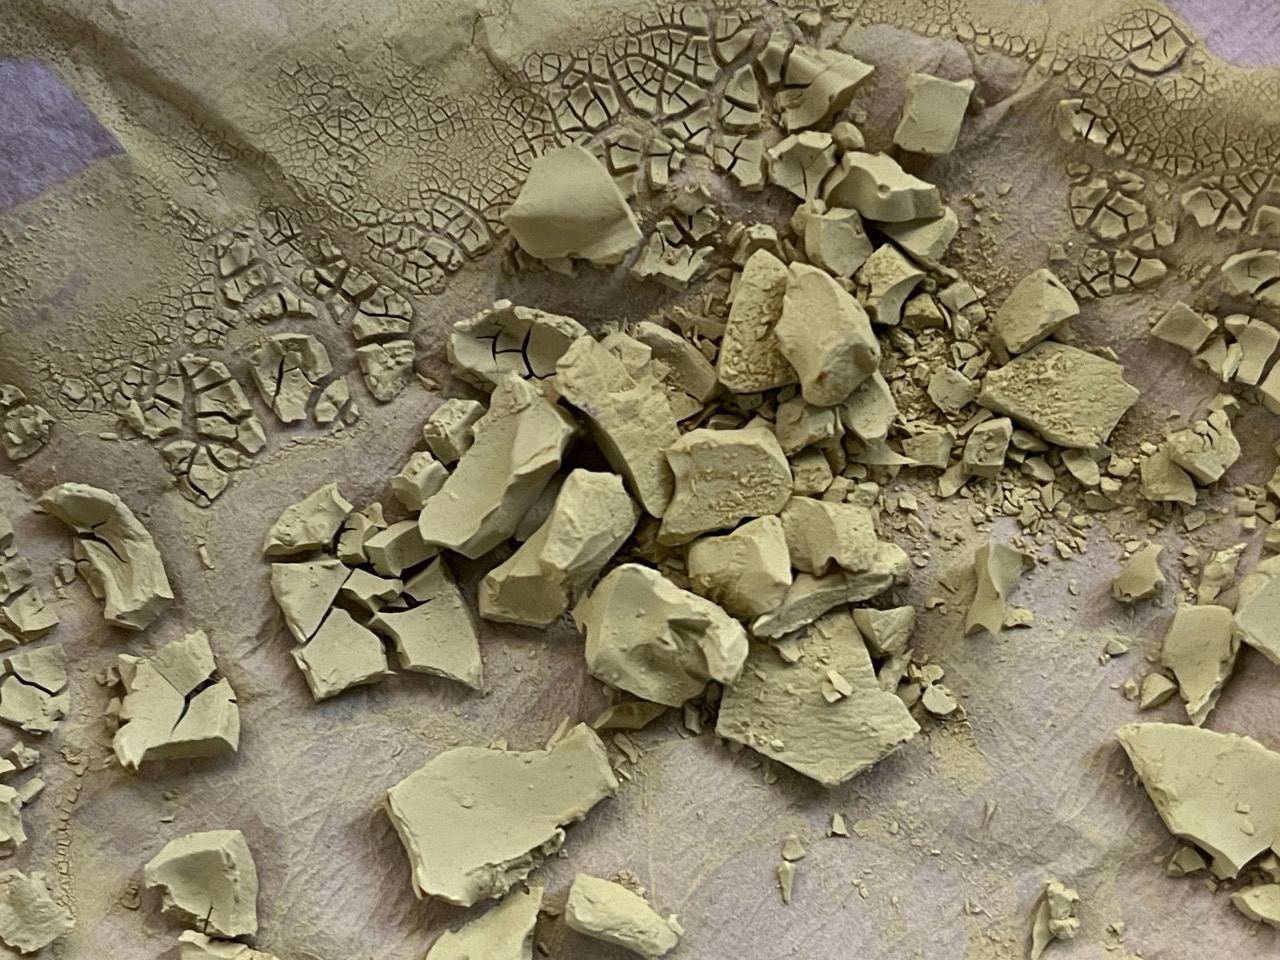
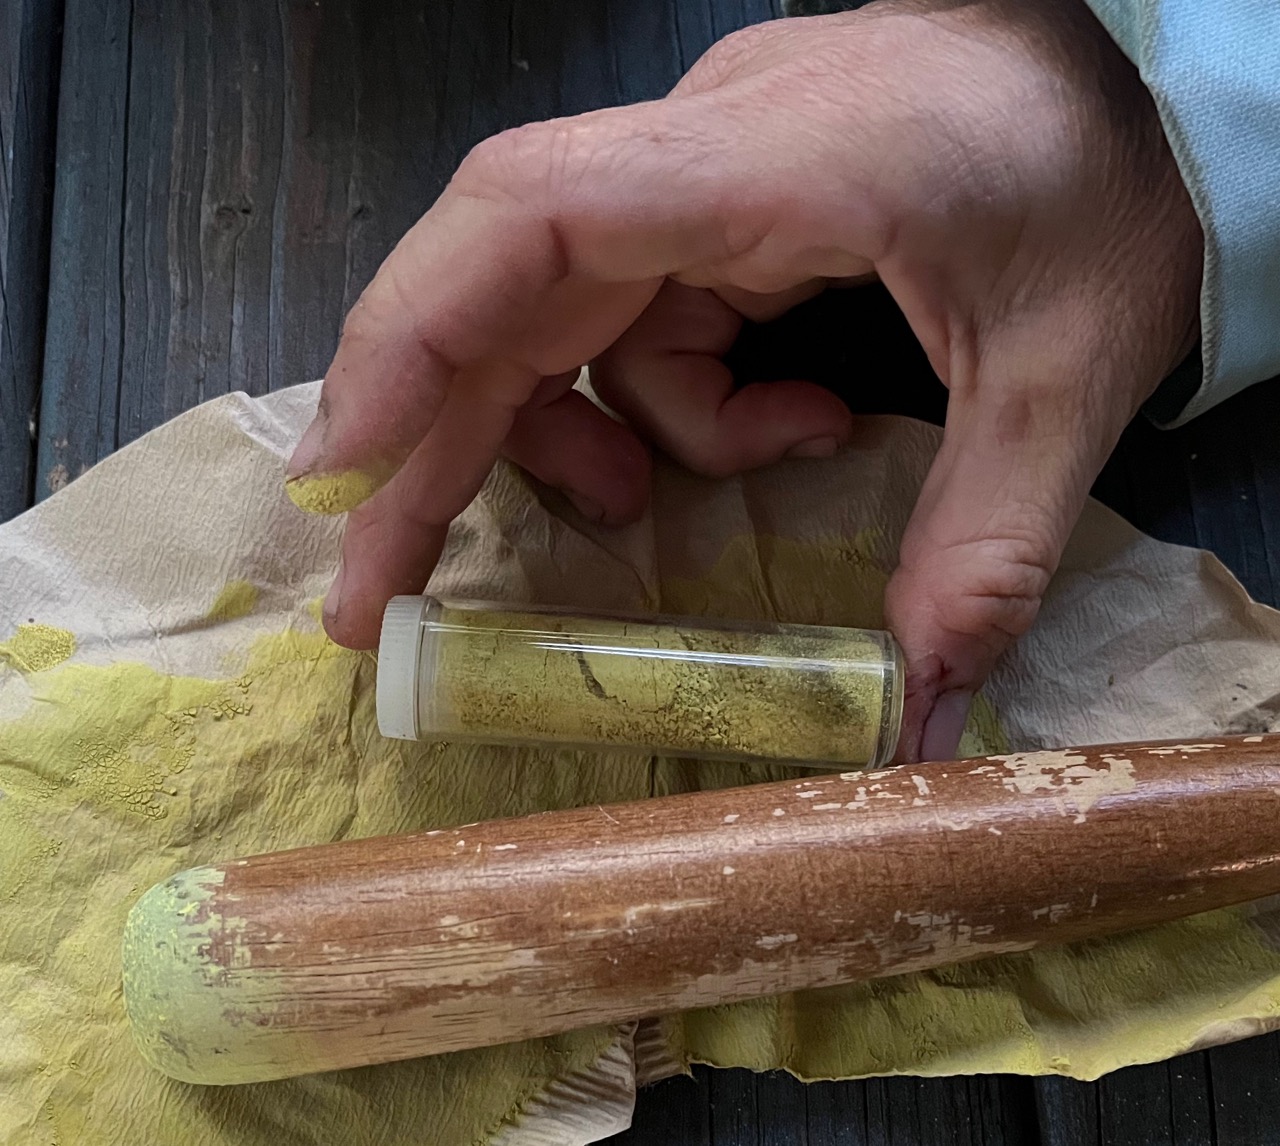
Once pigment is fully dried, grind into a fine powder using a mortar and pestle. The finest powder possible is required. Sieve and re-grind if necessary.
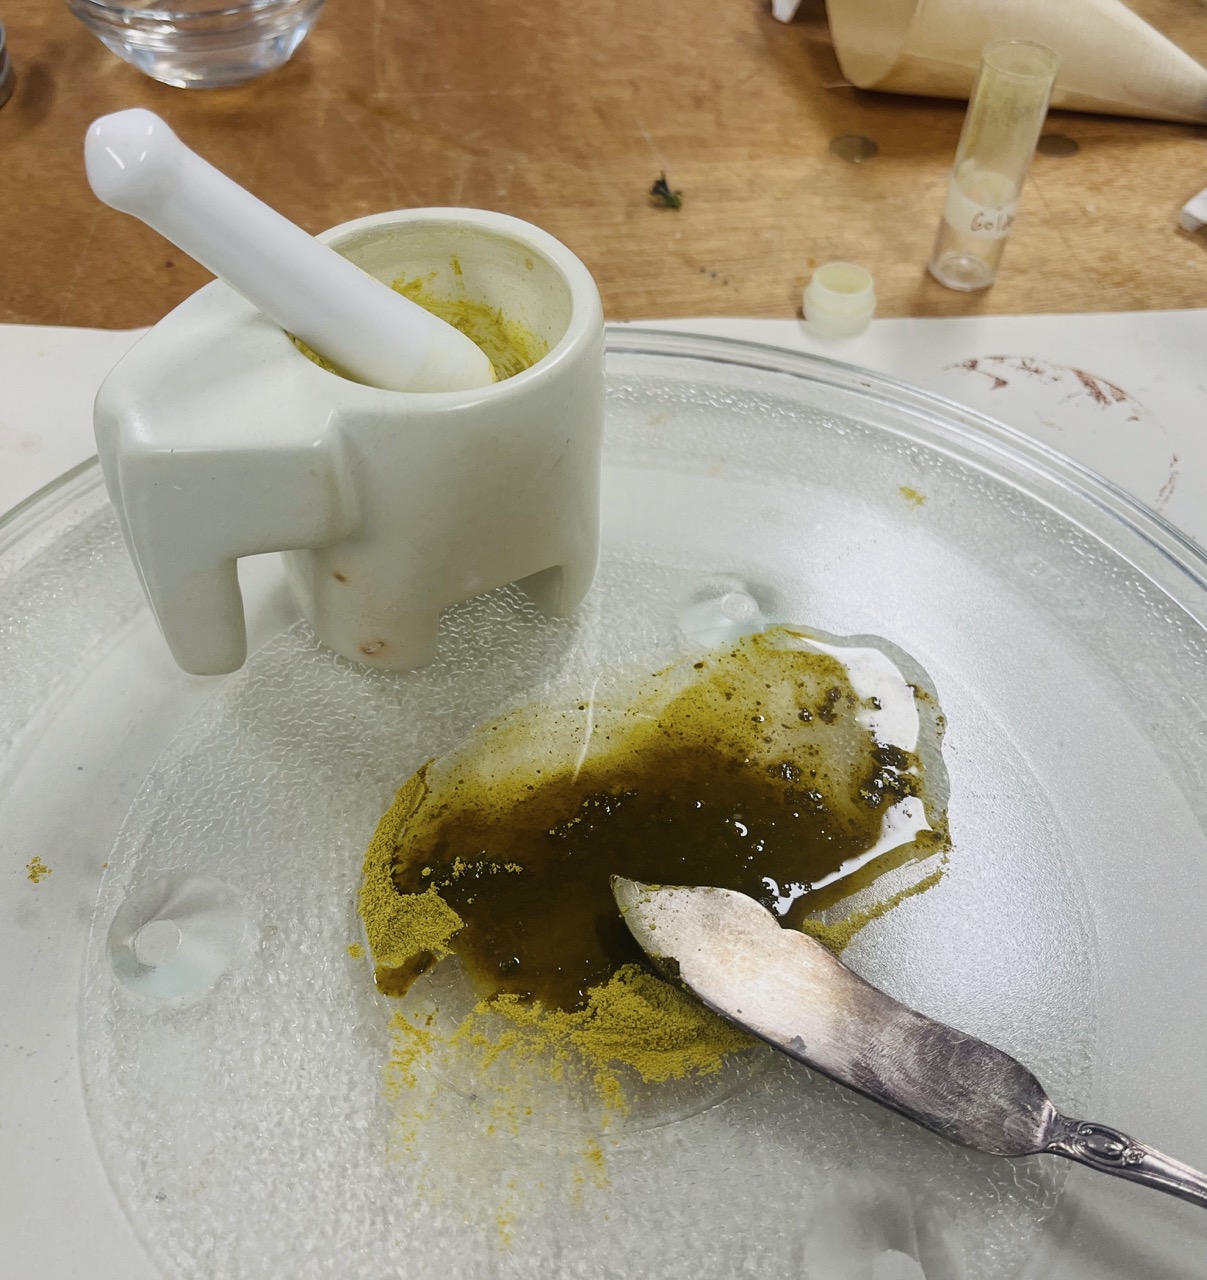
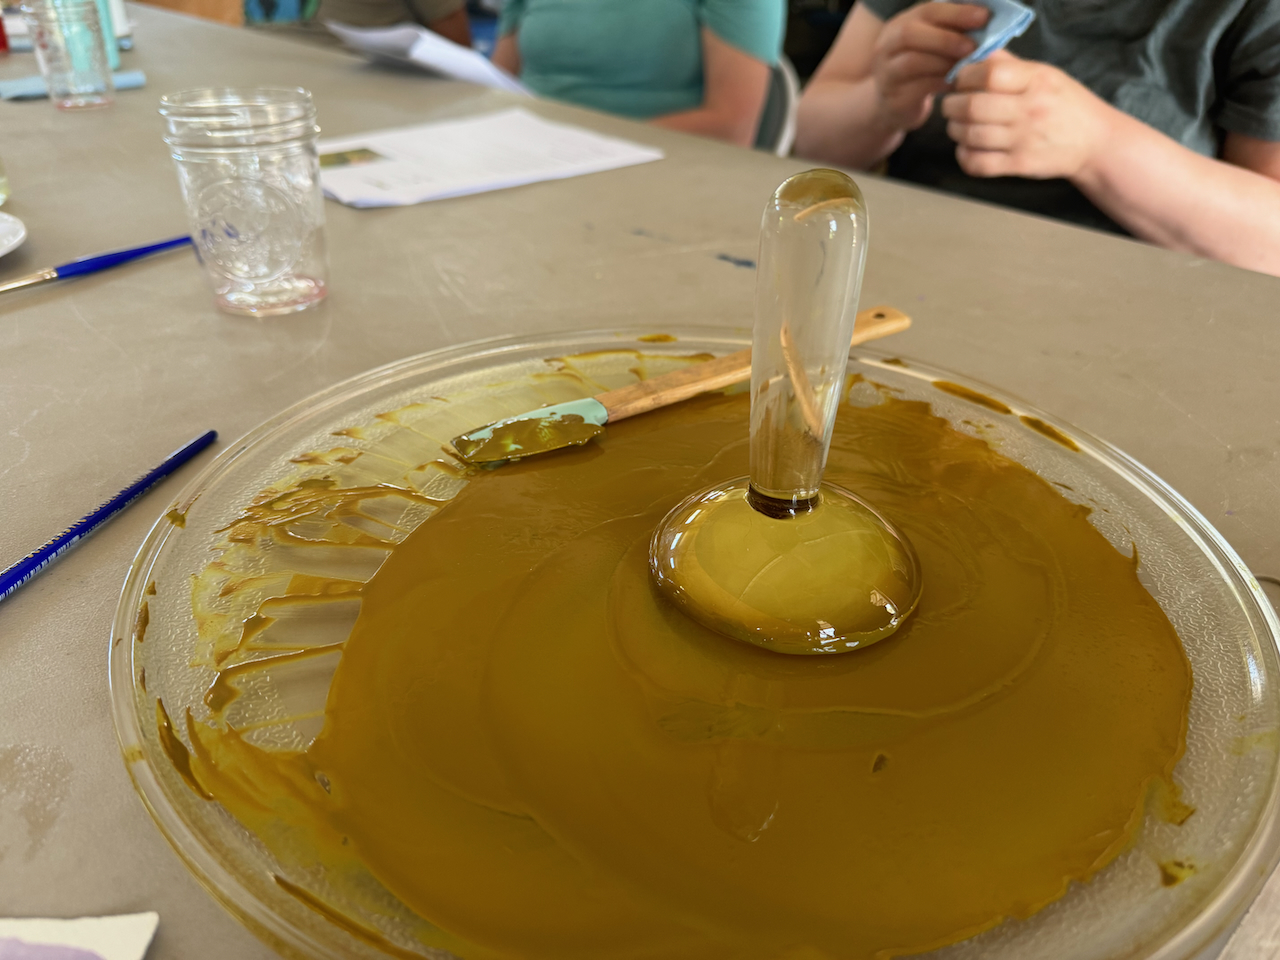
Measure approximately equal amounts of pigment powder and watercolor medium onto a glass board.
Mix with a palette knife and then mull with glass muller in circular and figure 8 patterns, repeatedly scraping back into the center, and continuing until smooth and gliding easily. Additional water droplets or medium may be needed. This may take a lot of time, and takes practice to get right. Enjoy the process!
Scrape into a container. You now have paint! Yay!
Test the color and enjoy painting, using like watercolor paints.
If your supernatant (clear liquid above settled pigment) is still very dark in color, you can lake that again for a different color! It’s also a sign that more chemicals could have been used the first time.
Simmer flowersLaked solution with pigment settlingPigment drying on coffee filterDried pigment on coffee filterGround pigmentBlending pigment with watercolor medium using palette knife Mulling pigment after blending with palette knifeFlowers – pigment – paint!
Last winter I started bringing my art out into the community more. I now feel a bit more confident sharing what I know about natural paints and inks, and have accumulated enough material to bring along for show and tell and play.
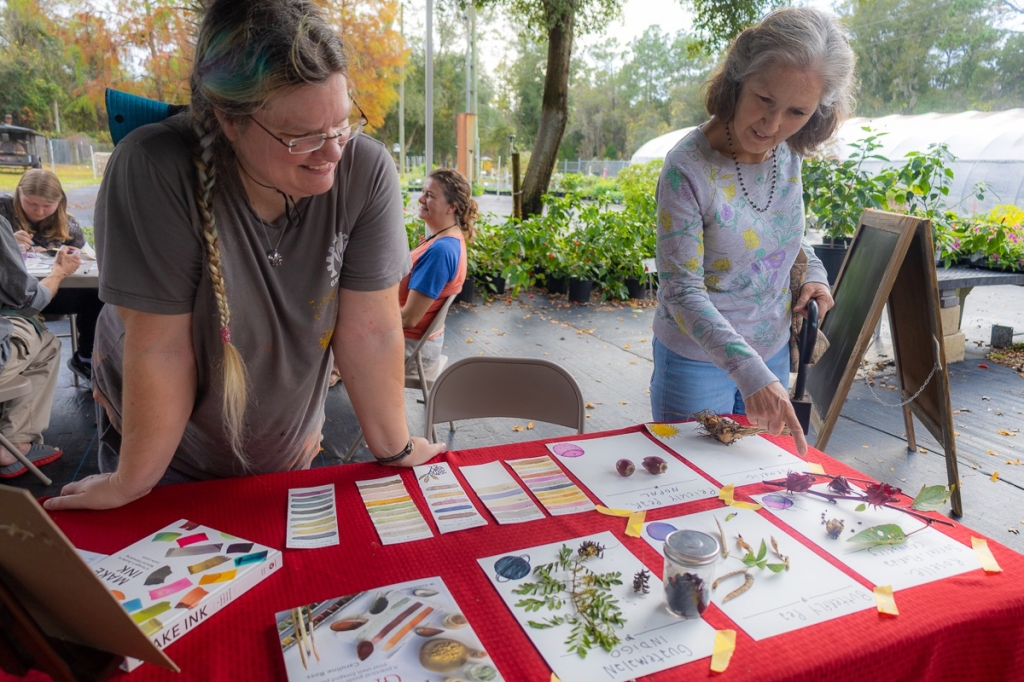
Gratefully, I was a recipient of an Alachua County Art Tag Mini Grant. Thanks to those that purchase the fancy “I Support the Arts” license plates and Visit Gainesville, there are small grants available to local artists like me. As part of this gift, I brought workshops to a diverse crowd of folks. Here’s a little snapshot of what I’ve been up to the last several months!
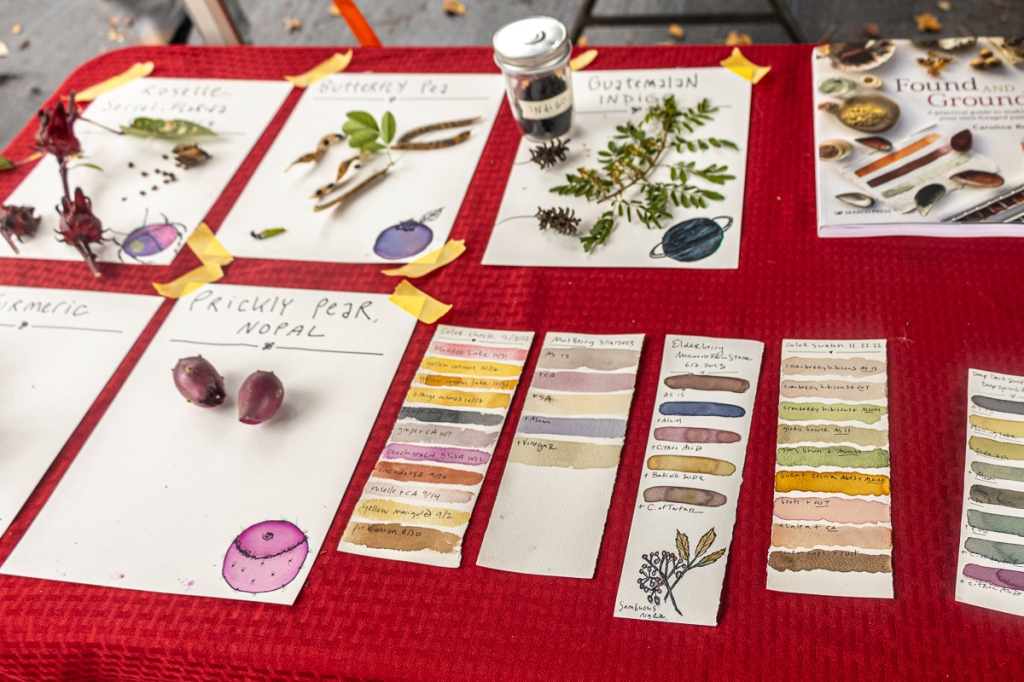
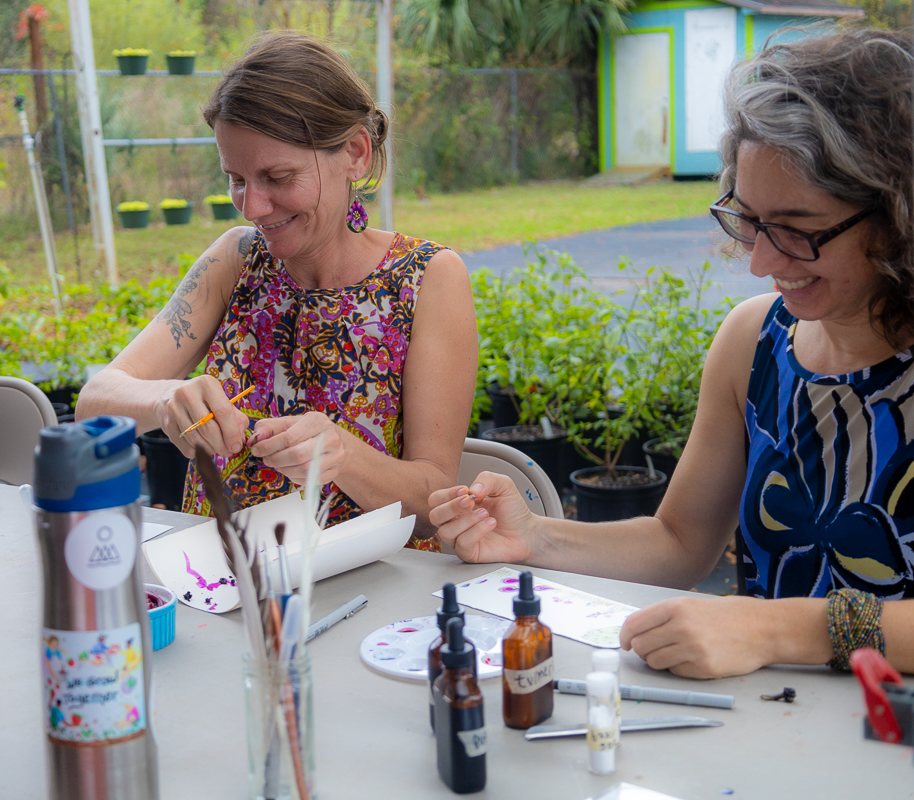
As part of the Florida Heritage Foods Project’s Crops & Colors Festival in early December at GROW HUB, I created a work station for folks to explore natural pigments and play around with them. Not to brag but I think my table had the most engagement and the most lingering folks around! There’s just something about working with these natural materials that feels relaxing and soothing. I was excited to see many new faces and get to re-connect with folks I hadn’t seen in a while.
** All these photo blocks are slideshows – be sure to slide through them all! **
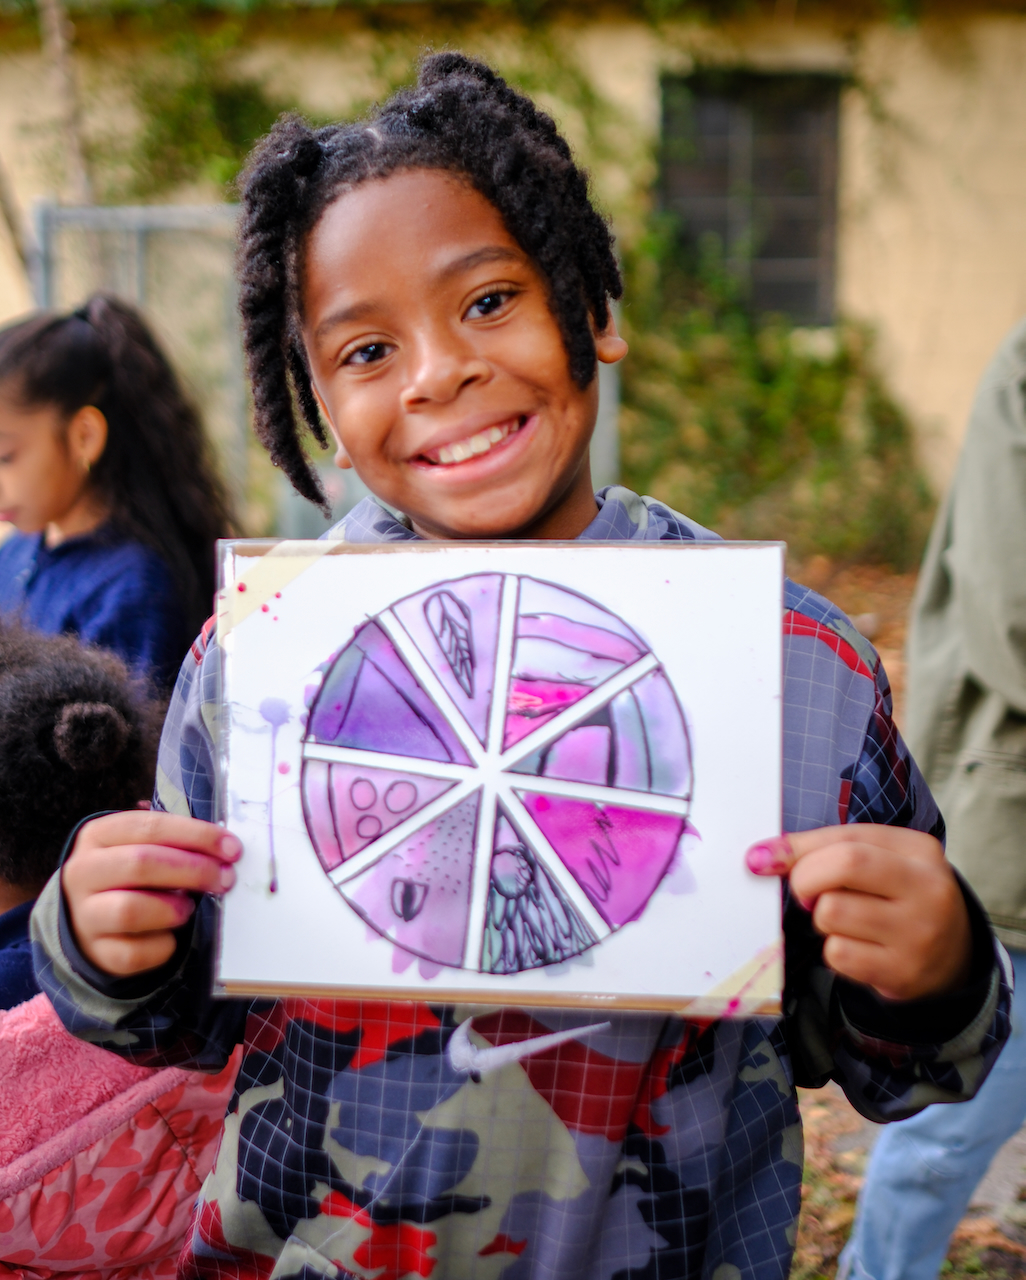
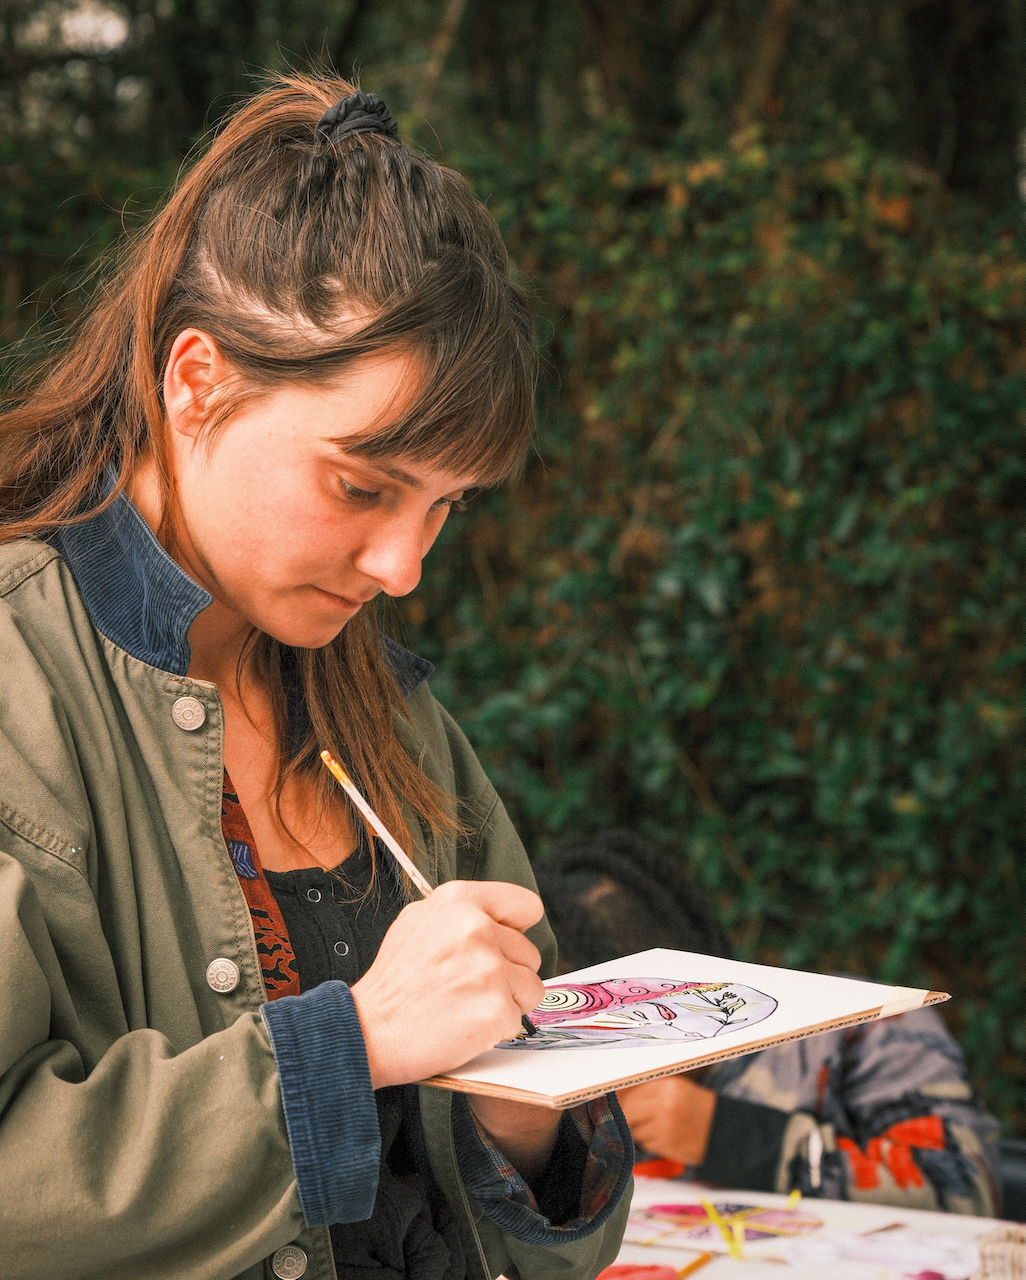
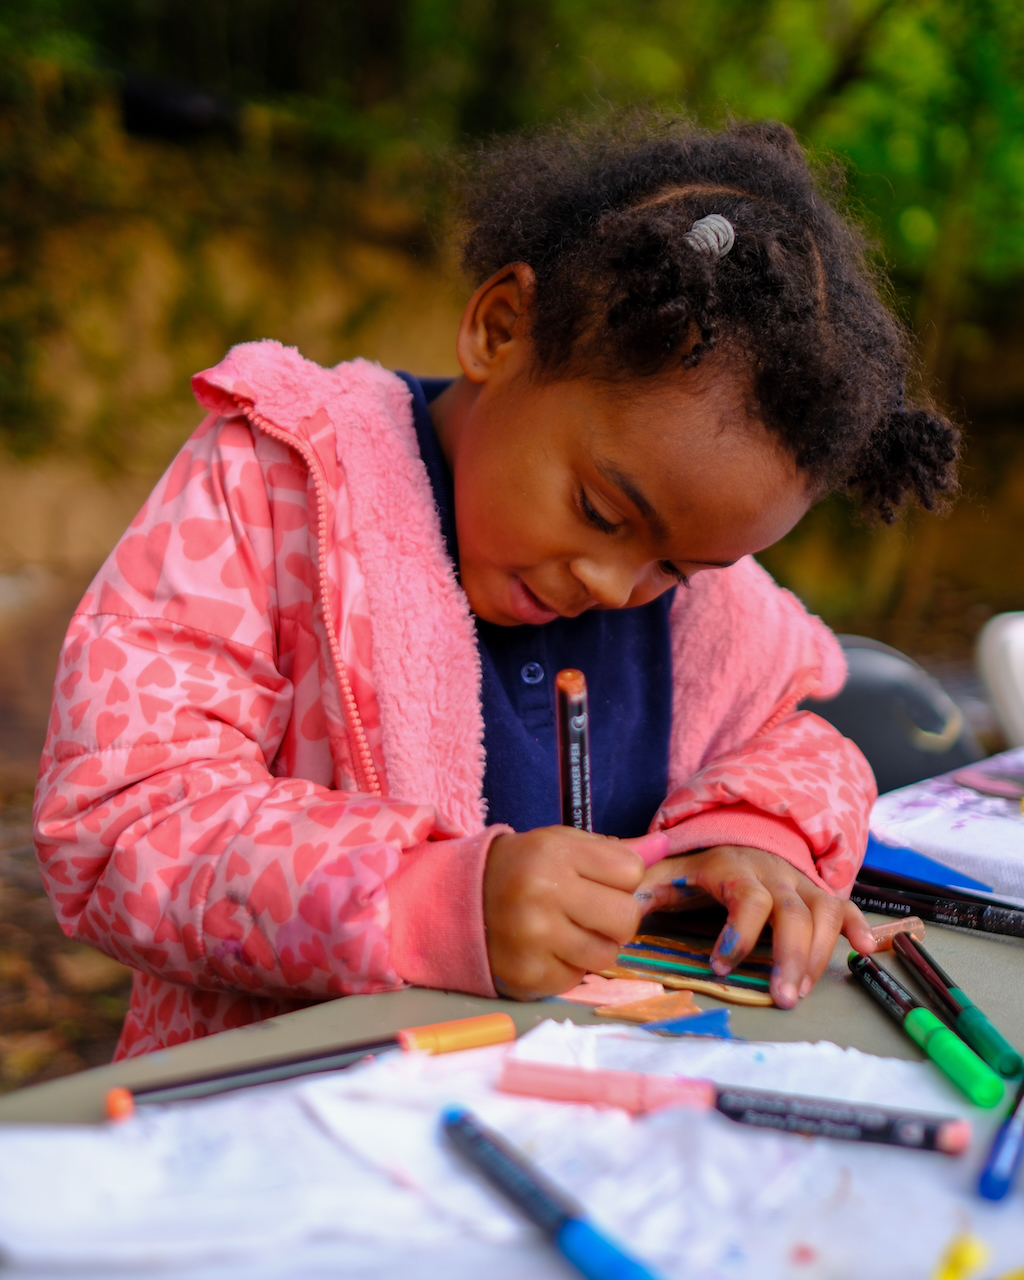
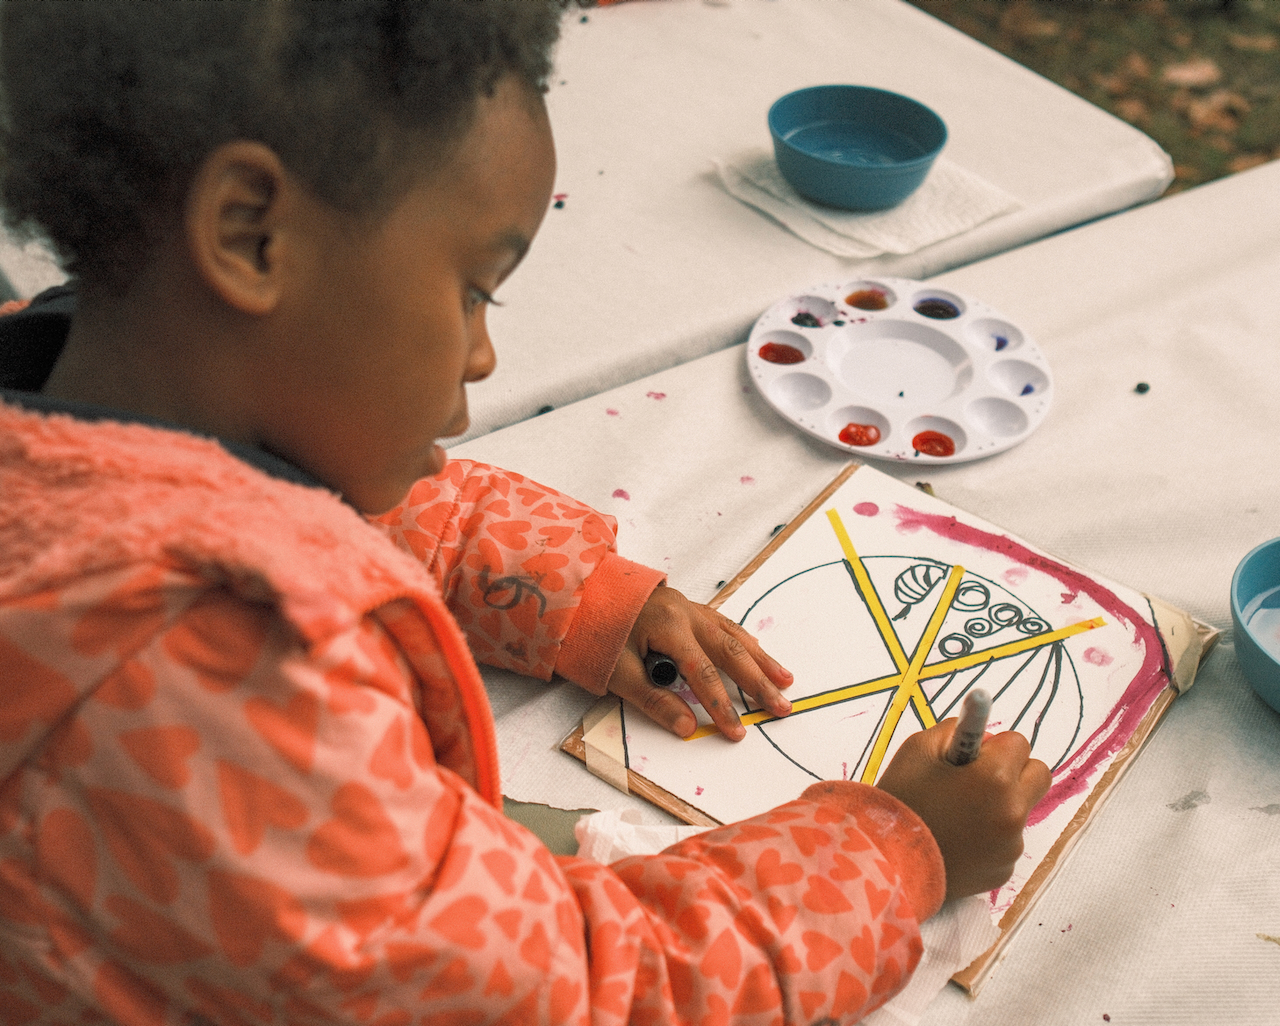
Then later that month with the most perfect weather for more outdoor art making, I spent time with the amazing kids enrolled in the George Washington Carver After School Science Club run by the Cultural Arts Coalition. Every Wednesday, my co-workers at Working Food, Jesse and Jenna bring gardening, food and art exploration to the club as a fun way to learn about science. This is such a beautiful connection because George Washington Carver was not only a friend to farmers bringing regenerative agricultural techniques to to poor southern farmers, but he was also an artist himself, using natural pigments! Thanks to Ryan Smolchek for capturing a few great moments for some of these adventures!
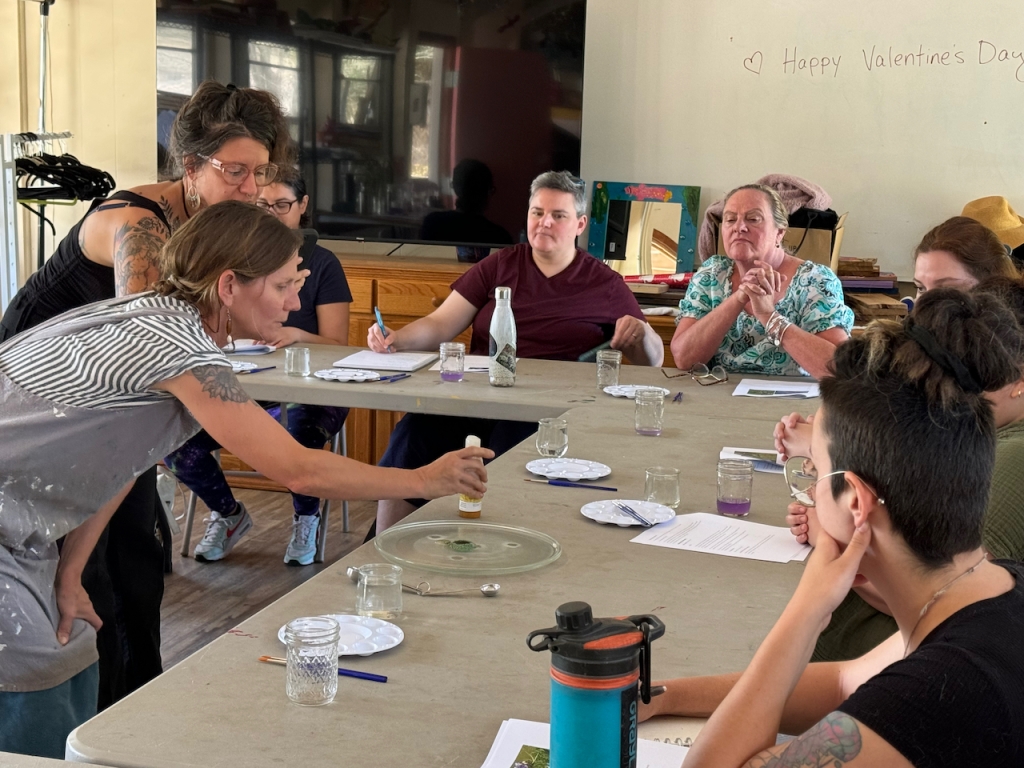
In the new year, I spent time at the Art Hub – one of my favorite places nestled at GROW HUB where I spend many days tending to the seeds and gardens that are my life’s work with Working Food. Once a week, UF Center for Arts in Medicine provides art classes for the staff members and volunteers. On a chilly winter’s day (for Florida!) in January, we played with vibrant spring colors harvested from last year: poke, turmeric, prickly pear fruits, roselle calyxes, and butterfly pea flowers. All grown on site except for the prickly pear which came from a robust patch of thorny plants on 10th Avenue near my house.
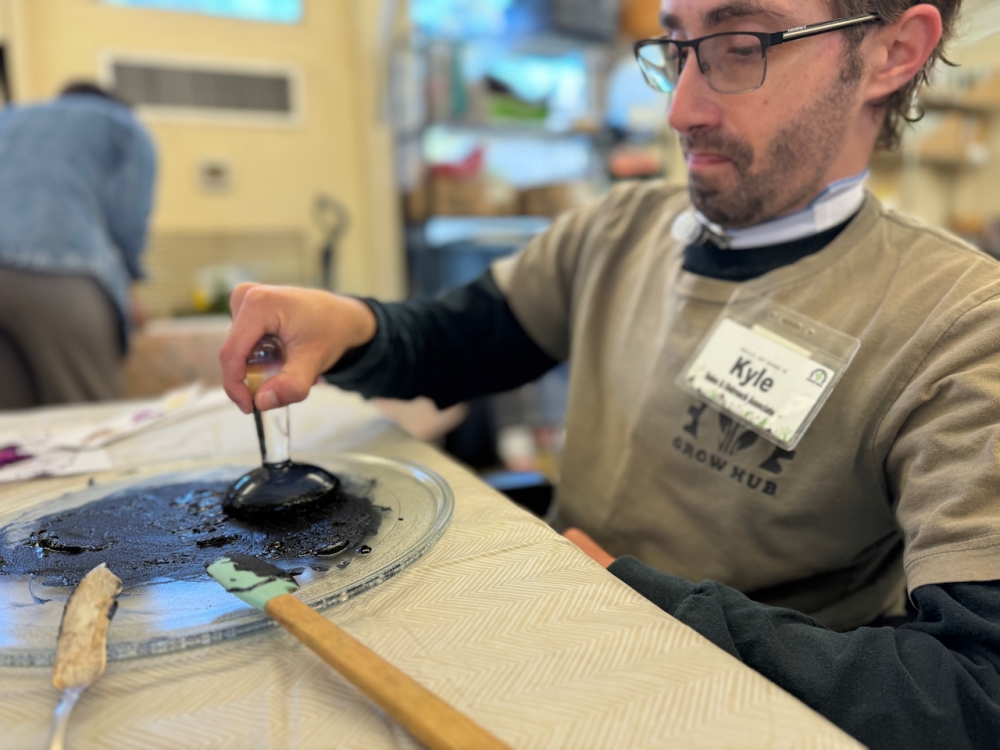
A couple weeks later, we played with indigo! This one was extra fun because myself and one of the staff at GROW HUB, Sarah H. grew the indigo plants (Indigofera suffruticosa or Guatemalan Indigo), which were gifted to me years ago by Jenn Rex, and now we can’t get rid of this plant, which I’m not mad about! We harvested the plants and went step by step through the specialized process required to obtain the pure blue pigment. Students got a chance to learn about mulling, part of the process of making watercolor paints.
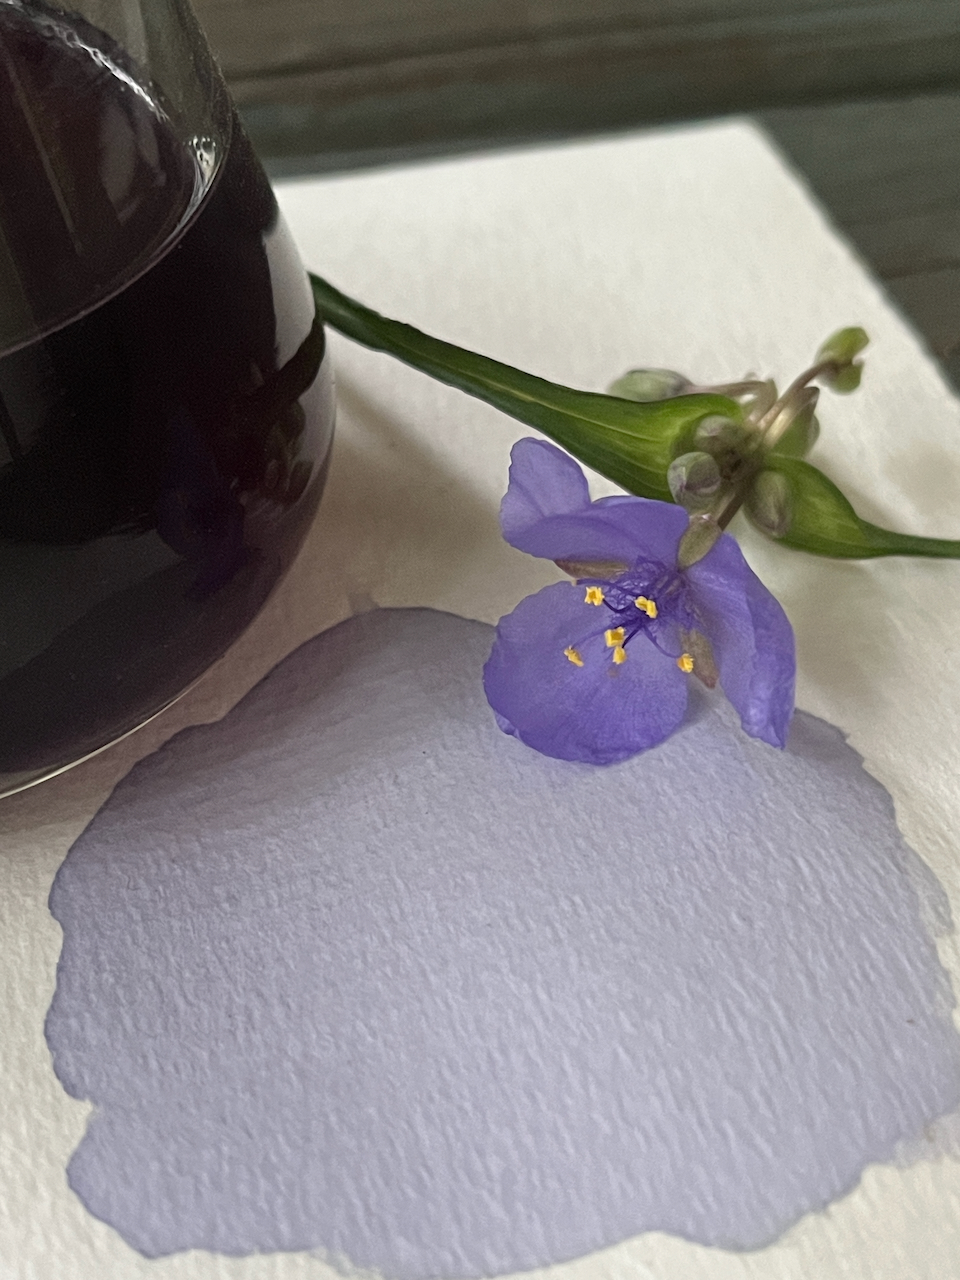
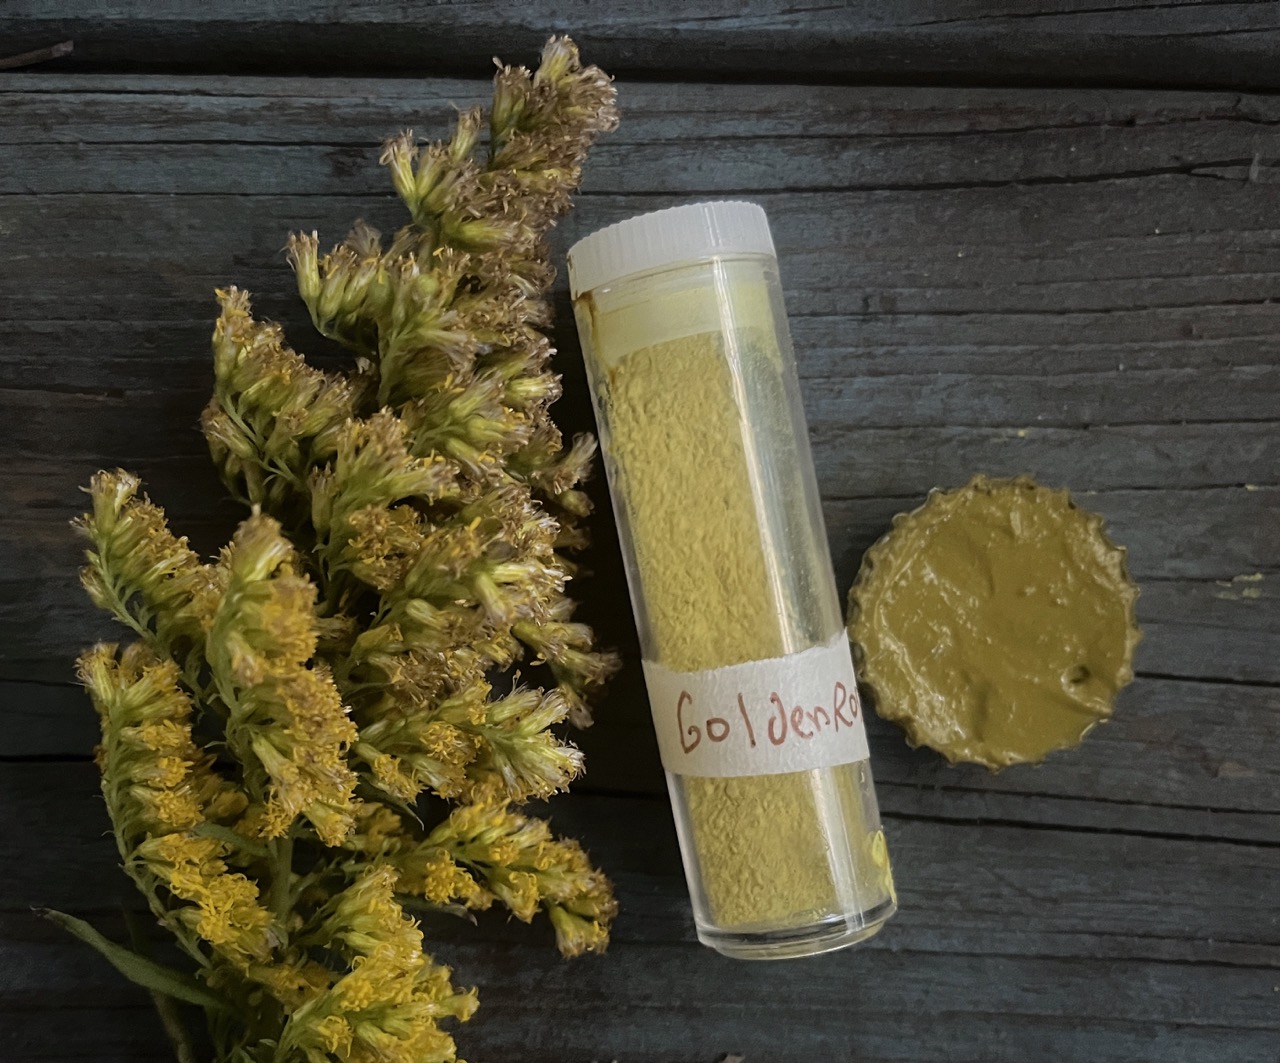
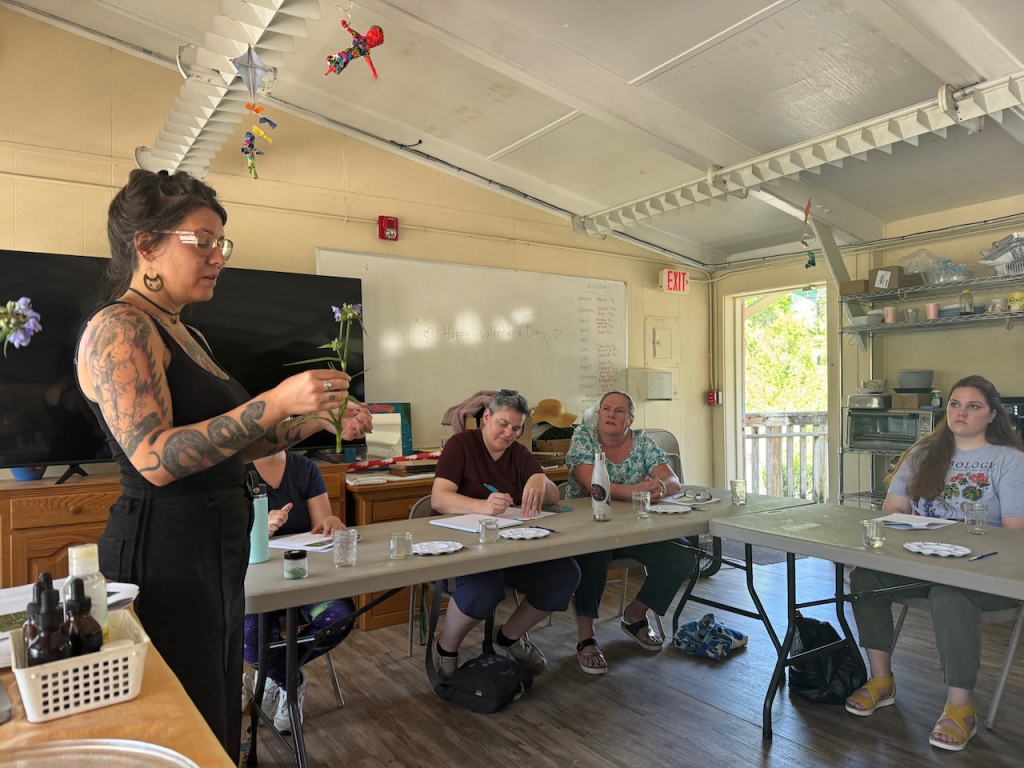
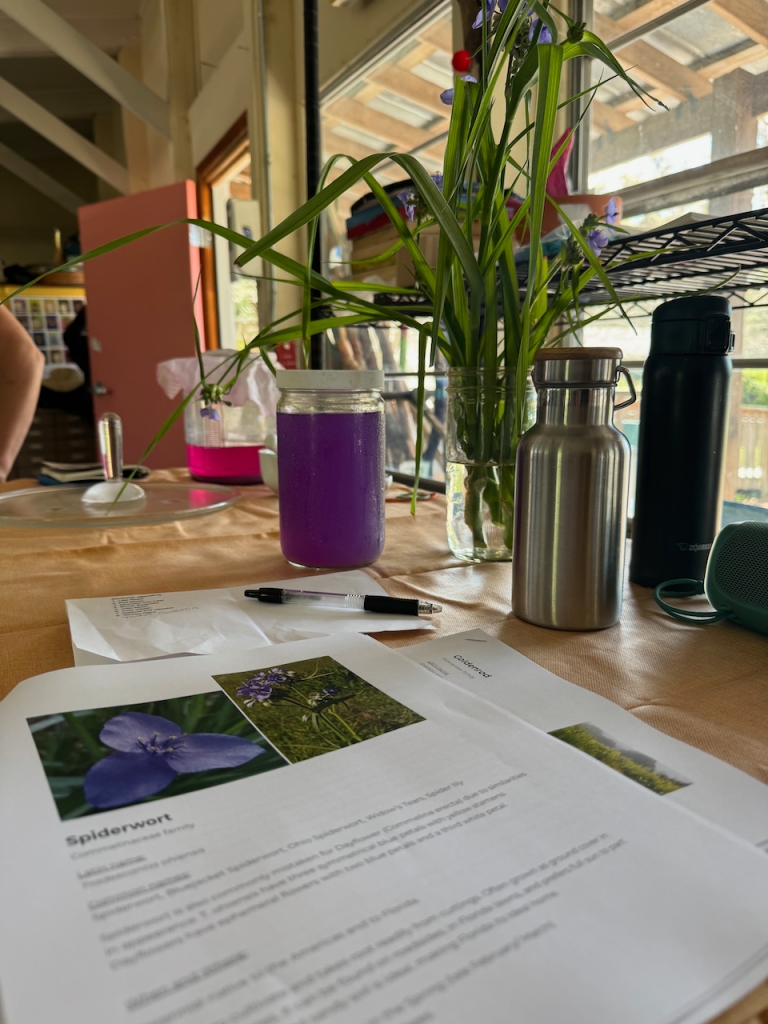
Then as spring was at it’s most perfect in mid March, with spiderwort blooming all around, and a stash of roselle from the fall harvest in the freezer, LeAnn Averill from A Thousand Leaves Herb Shop and I did an amazing collaboration – Paint Medicine! A lovely group of folks shared in the herbal magic LeAnn and I brought together. Celebrating roselle, goldenrod, spiderwort and poke – familiar local plants to those who notice, we discussed the virtues of each as medicine or food, and as a pigment source. Students got to taste spiderwort fermented soda and roselle tea, sample goldenrod tincture, and rub a poke root salve into their skin. Then we experienced each plant and the pigments they offered.
The last workshop (for now) was at the end of May, and once again with the fun and curious kids of the George Washington Carver Science Club. They had a special field trip out to GROW HUB, where we started off our adventures at the mulberry tree! We harvested some abundant berries for snack and for making ink later. No one had ever done that before and we were all so giddy and grateful, thanking the mulberry tree for all the goodies.
This time they got to learn about the science of plant pigments – the chemistry that is pigments like anthocyanin (red, purple and blue), chlorophyll (green), carotenoids (yellow and orange). And how these colors signify nutrition and healthy foods, help the plants in various ways, and are colorful and may be used in art!
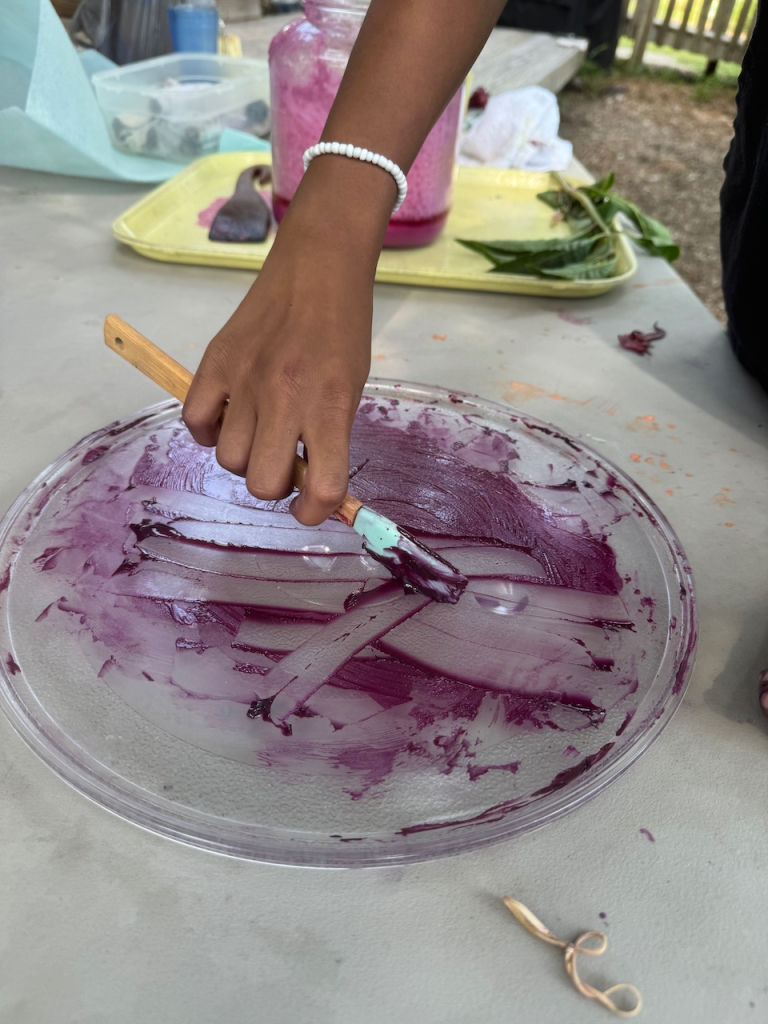
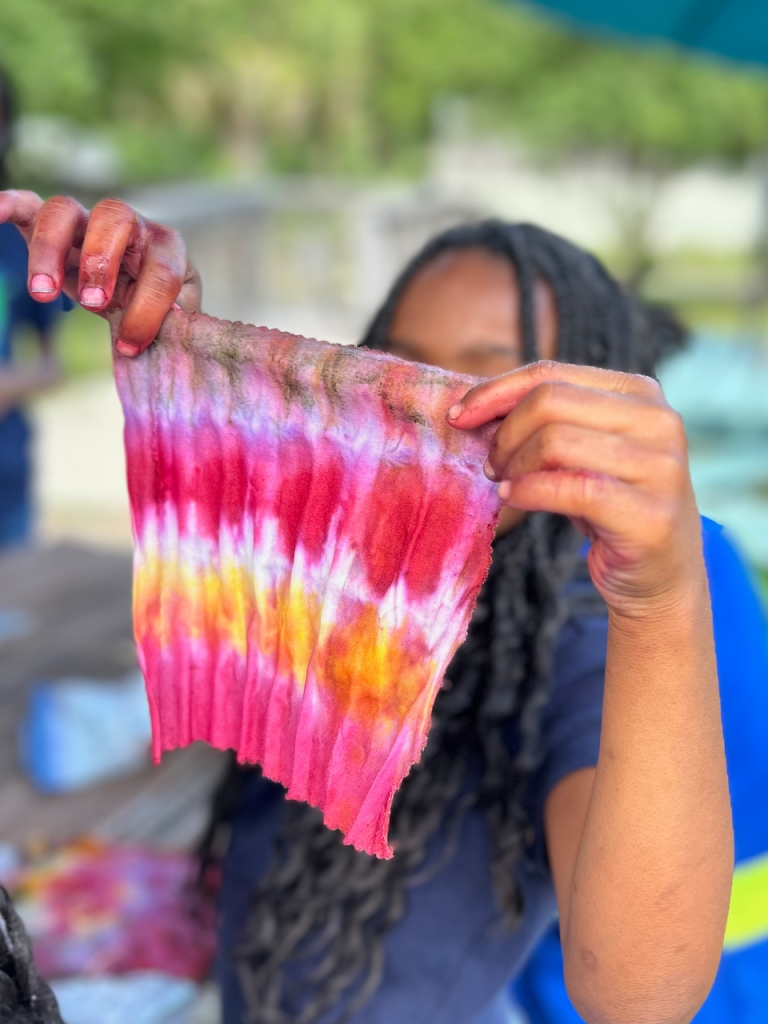
I demonstrated the chemical reaction that causes the precipitation of plant pigments that are pulled out of solution and into a solid form that can be used for paint making. I did it with poke berries that were harvested last summer and the hot pink foam was a crowd pleaser for these curious little scientists and gardeners! I also had some dried poke pigment they mulled into watercolor paints using my homemade binder solution of local honey, apple tree gum, thyme oil and water. Jesse, my amazing and creative co-worker then introduced a mini tie-dye activity and they made beautiful little swatches of colorful flags using turmeric, spiralina, roselle and sumac.
The grand finale will be a collaborative art show at Cypress & Grove Brewery in August, where we’ll show some artwork and photos of this nature based goodness!
The youth and GROW HUB workshops were proudly funded in part, by the Alachua County Board of County Commissioners through Art Tag proceeds and Visit Gainesville – Alachua County, FL.
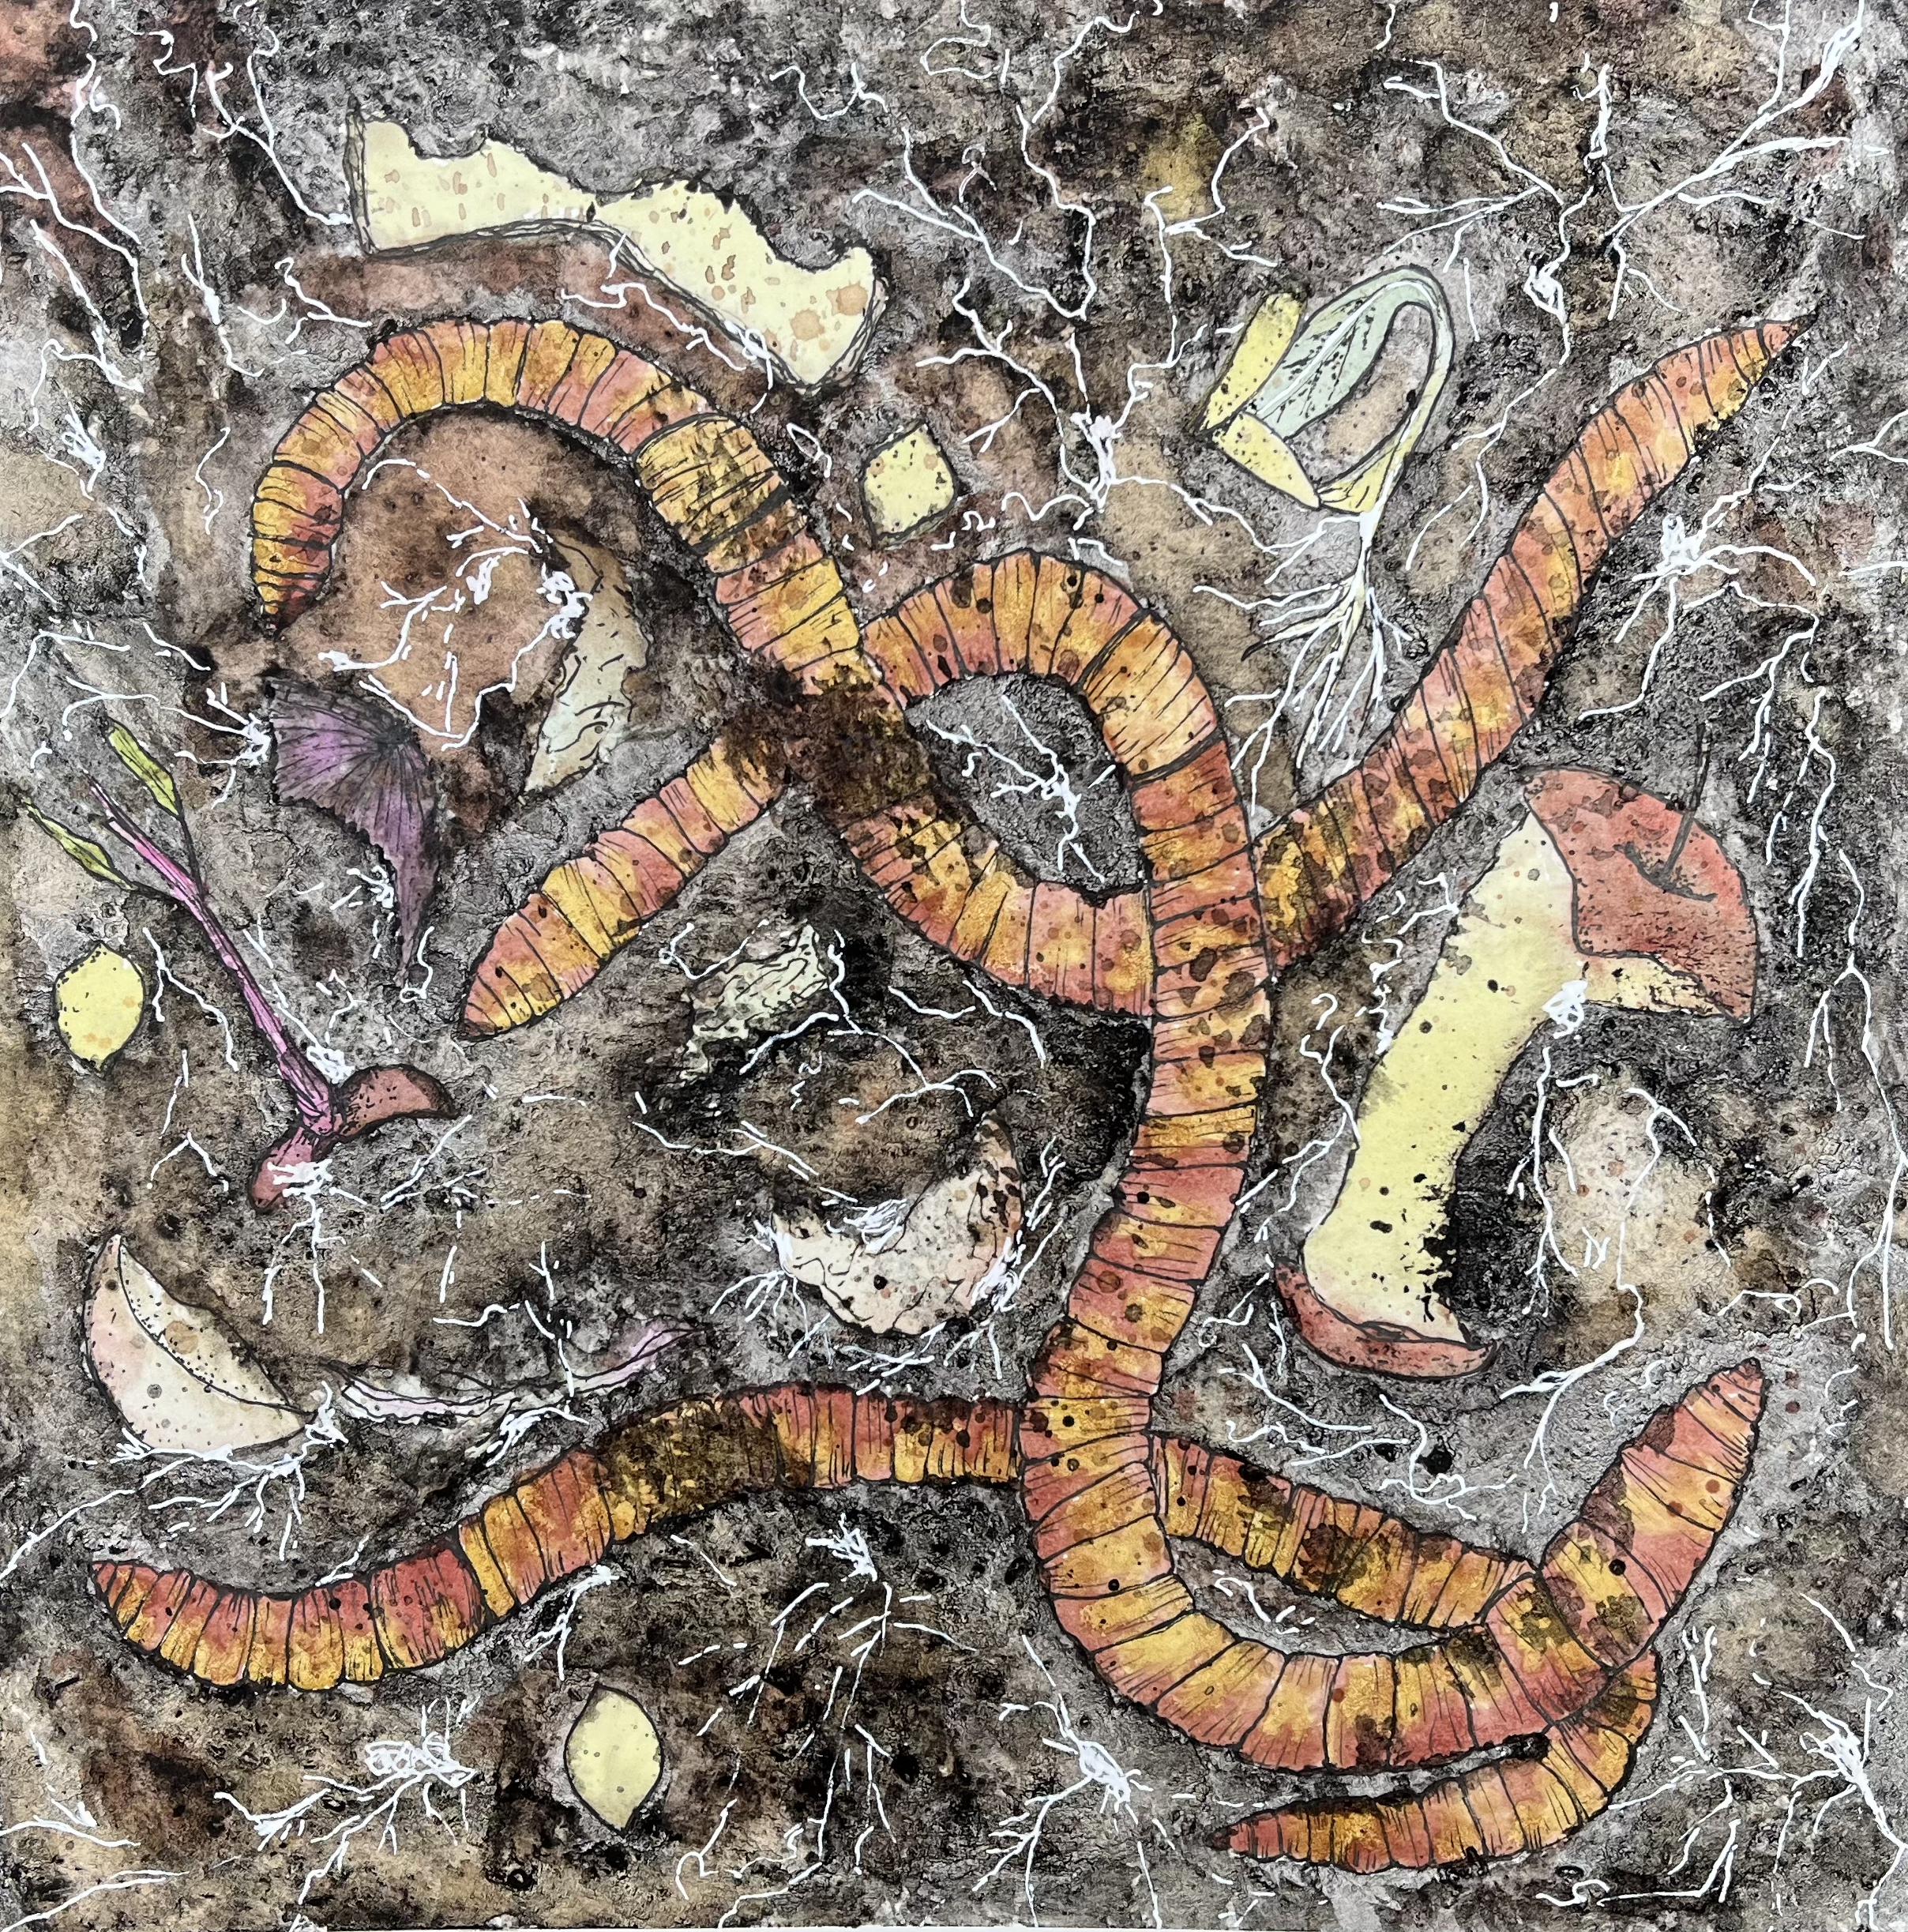
My friend Jesse shared this poem with me and I just absolutely love it! Since reading it, I’ve been daydreaming about painting worms, compost magic, mycelium, decay and renewal soaked in ecstasy of simple but vital things – in a world often unseen or appreciated by most of us.
Feeding the Worms
by Danusha Laméris

Ever since I found out that earth worms have taste buds
all over the delicate pink strings of their bodies,
I pause dropping apple peels into the compost bin, imagine
the dark, writhing ecstasy, the sweetness of apples
permeating their pores. I offer beets and parsley,
avocado, and melon, the feathery tops of carrots.

I’d always thought theirs a menial life, eyeless and hidden,
almost vulgar—though now, it seems, they bear a pleasure
so sublime, so decadent, I want to contribute however I can,
forgetting, a moment, my place on the menu.
I have great fondness for worms and their role in creating living soils, and inspiring curiosity and connection. Having worked with children in gardens over many years, I’ve developed the Worm Theory. I believe these creatures can be a gateway to opening up curiosity and compassion for all other creatures. Worms are typically slow moving, and their lack of legs, inability to sting or bite, fly or crawl up your sleeve or into your face, means they can be held in peace and safety for close observation, as they tickle your hands, trying to move back into darkness. This acceptance of creatures so different from ourselves, opens up the mind and heart to others- that don’t feel as safe and easy. Next, they’ll be looking at rolly-pollies, roaches, other beings that freak out adults (pointing at myself here, I still squeal and recoil at the sight of a roach). I’ve seen kids name the worms, caress them, and even hold worm funerals, mourning the loss of a friend.
Worm Theory suggest that their gentle nature, facilitates connections to other worlds and lives not our own. Worms allow us to overcome the ick factor that may either be innate or learned, or a mix of both.
It turns out, they are fascinating creatures too, with much to learn about! Our youth program at Working Food would be a lot less fun without worms! Often, a simple worm activity ends up taking up an entire session and we just scrap the rest of our best laid plans, to go with the worm flow. Here are just a few things I know:
They are hermaphrodites.
They consume bacteria and fungi that decompose organic materials (i.e. they don’t actually eat the apple core you toss into the compost bin, they eat the microbes that eat the apple).
Their poop (aka worm castings) is black gold, a probiotic bliss for plant life.
They are an important source of food to so many other animals.
They have the ability to sense the world over the surface of their bodies; their permeable, moist skin is covered in chemoreceptors and they breath, taste, and sense light and vibrations over their body surface.
Worms painted with senna and avocado. Black soil is cabbage palm charcoal mixed in with splotches of black walnut, avocado and plantain. Various decomposing items painted with marigold, avocado, beets, cochineal. White mycelium added with a gel pen.
Part 5 of a series of posts about my artist in residency experience at Oak Spring Garden Foundation.
I’m back home and adjusting to normal life after such a luxuriously long time of freedom and quiet for creativity, flow, rest and reflection. Fortunately, I’ve made time to keep some of the flow and inspiration going.
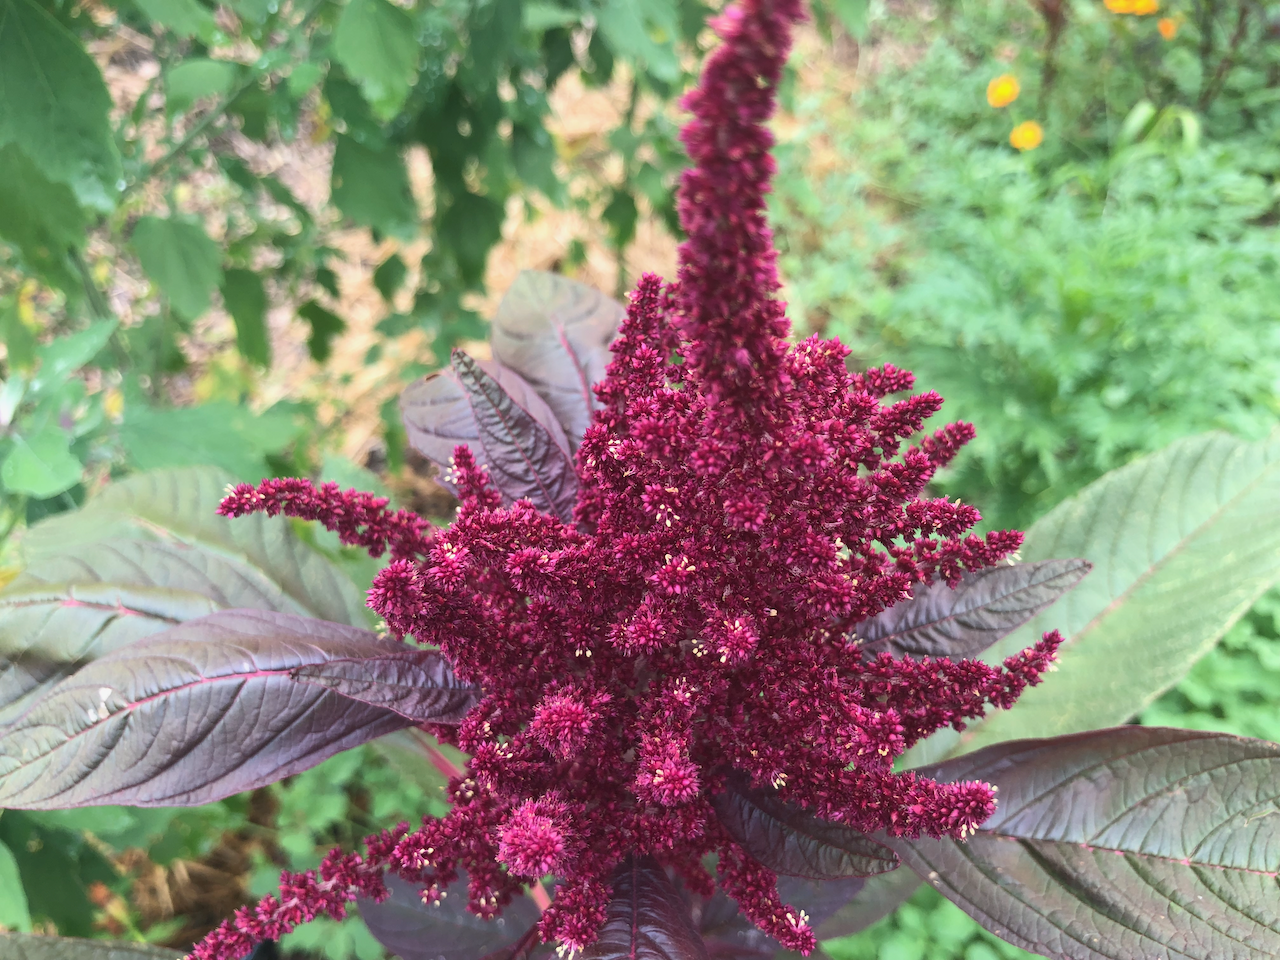
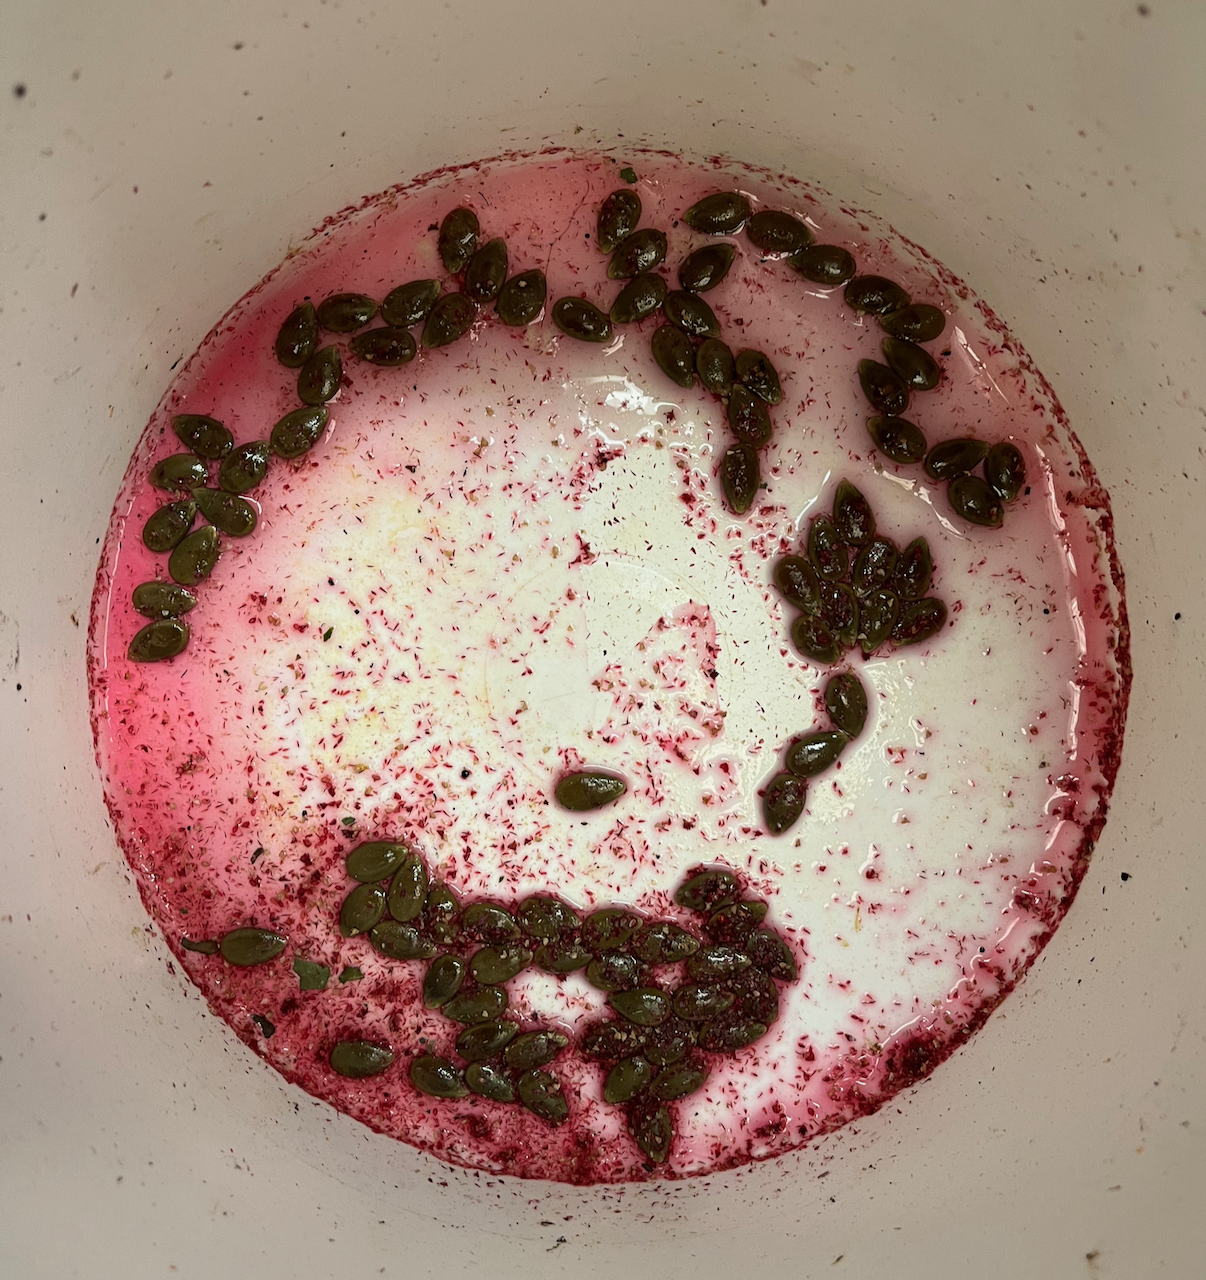
My first day back to work, I was cleaning up some Hopi Red Dye Amaranth seeds. I wanted a gentle and enjoyable re-entry to work, and seed cleaning is one of my favorite things to do. So I was glad when Sarah said that’s what she needed us to do. An accidental blowing of the lightweight chaff into a nearby bucket with some wet seeds, seemed to be a sign when I peeked inside: make some plant paint!
Hopi Red Dye Amaranth is an ancient grain crop cultivated by the Aztecs and still with us today. Prized for its ability to lend color to food and fiber, it sure doesn’t take long for color to leek out! These watermelon seeds were left in a wet bucket nearby, as the seeds I was cleaning blew around the lightweight chaff. Universe telling me to keep creating!
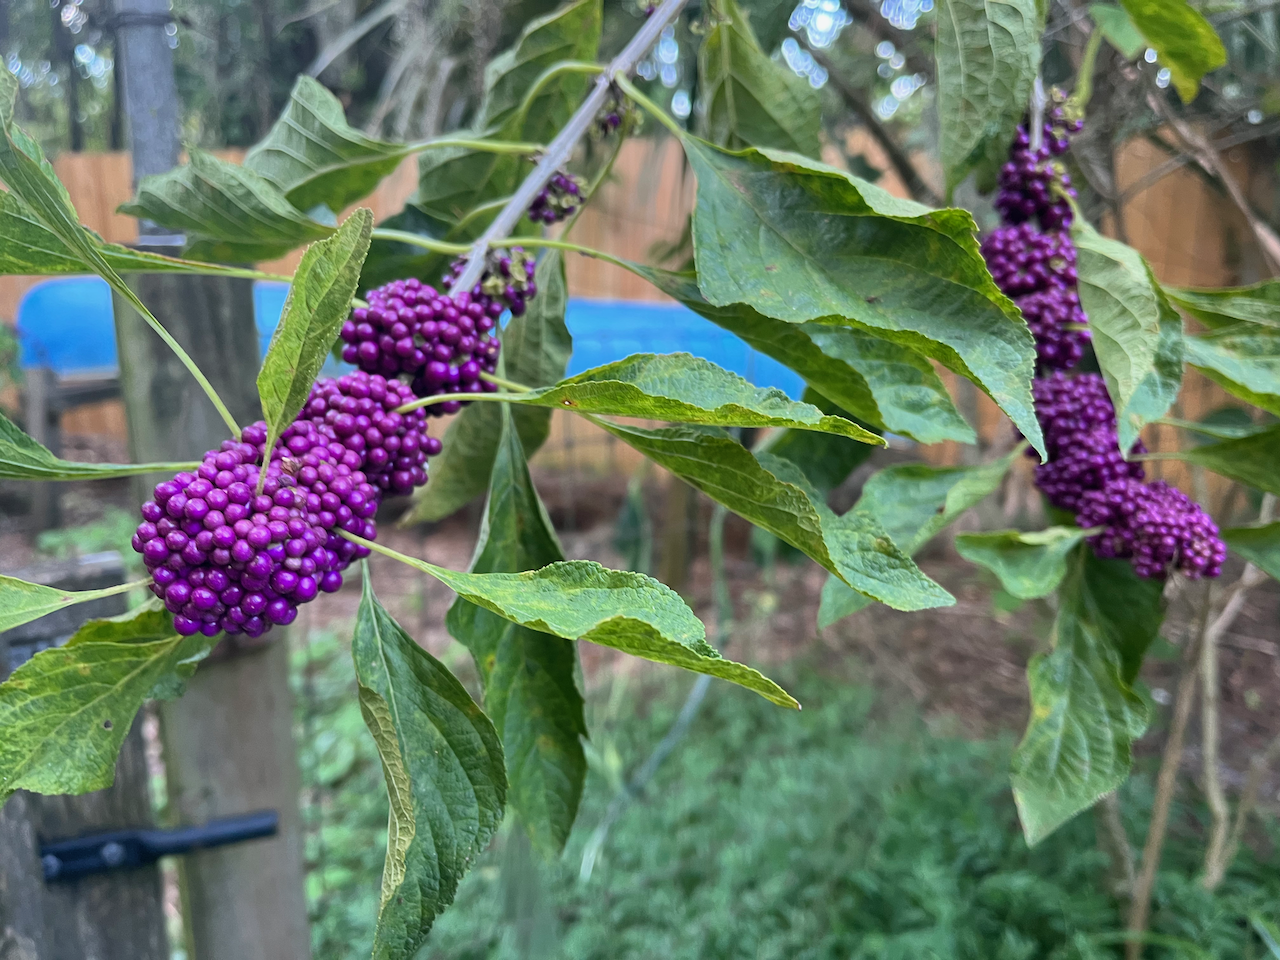
I collected all the chaff and played with it this weekend. I also made some paints from turmeric powder I’ve had on hand for a couple of years and played with some moringa and beauty berries a few different ways. They were all abundant and practically calling for me to play with them from the backyard, just as the amaranth chaff was.
The birds and I couldn’t be happier about the plump beauty berries!
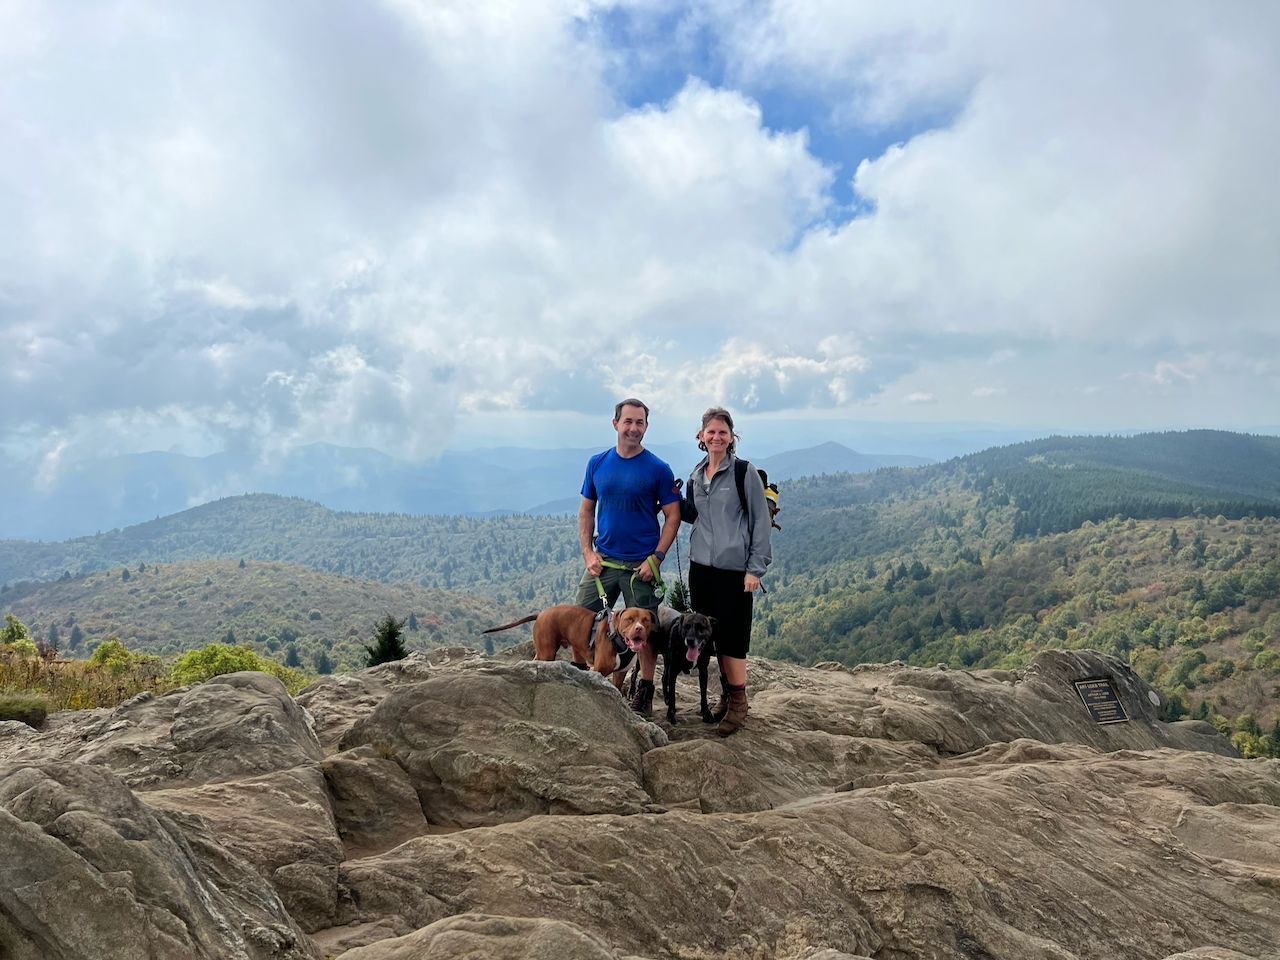
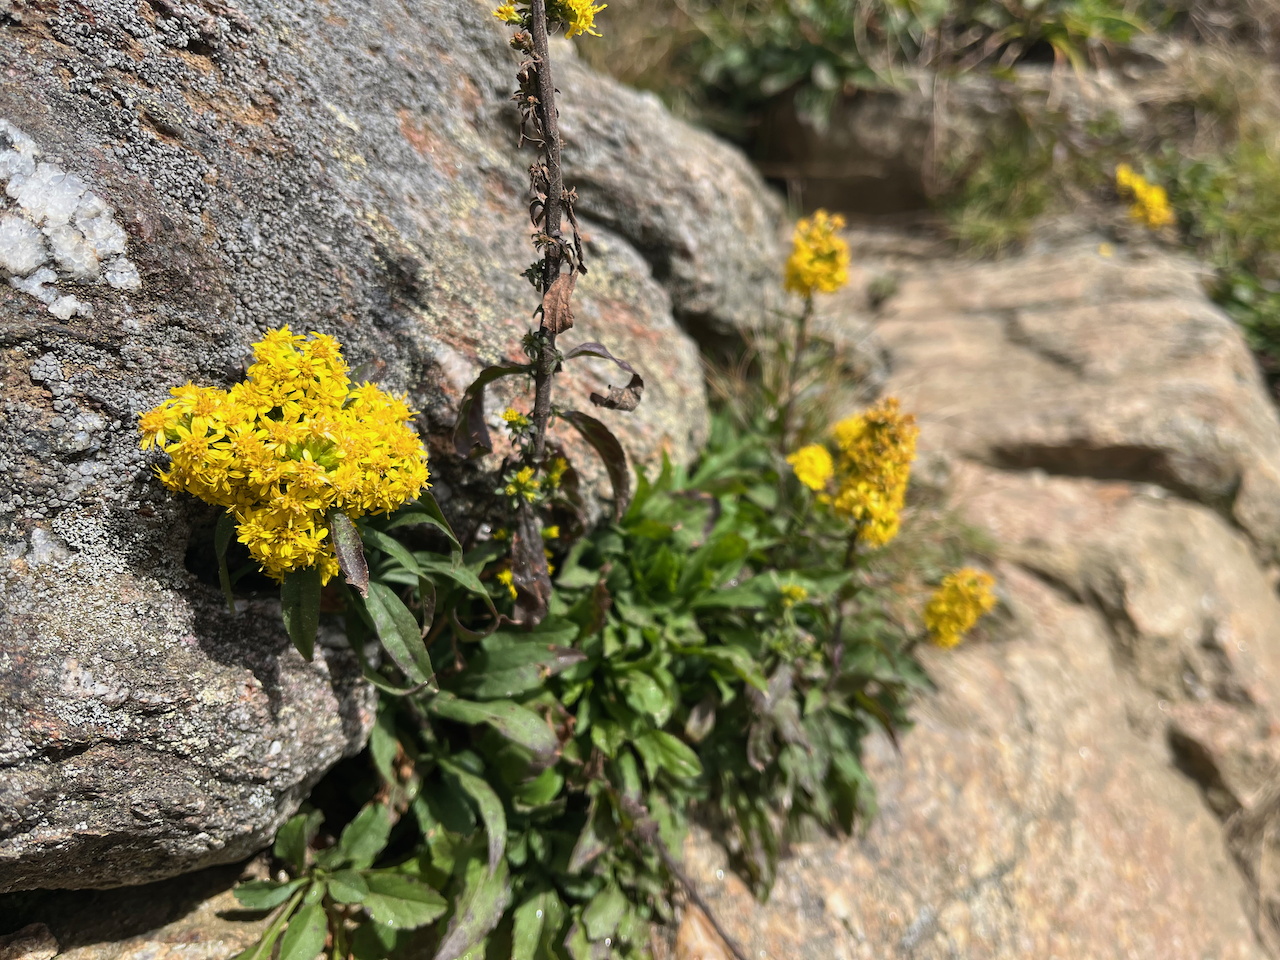
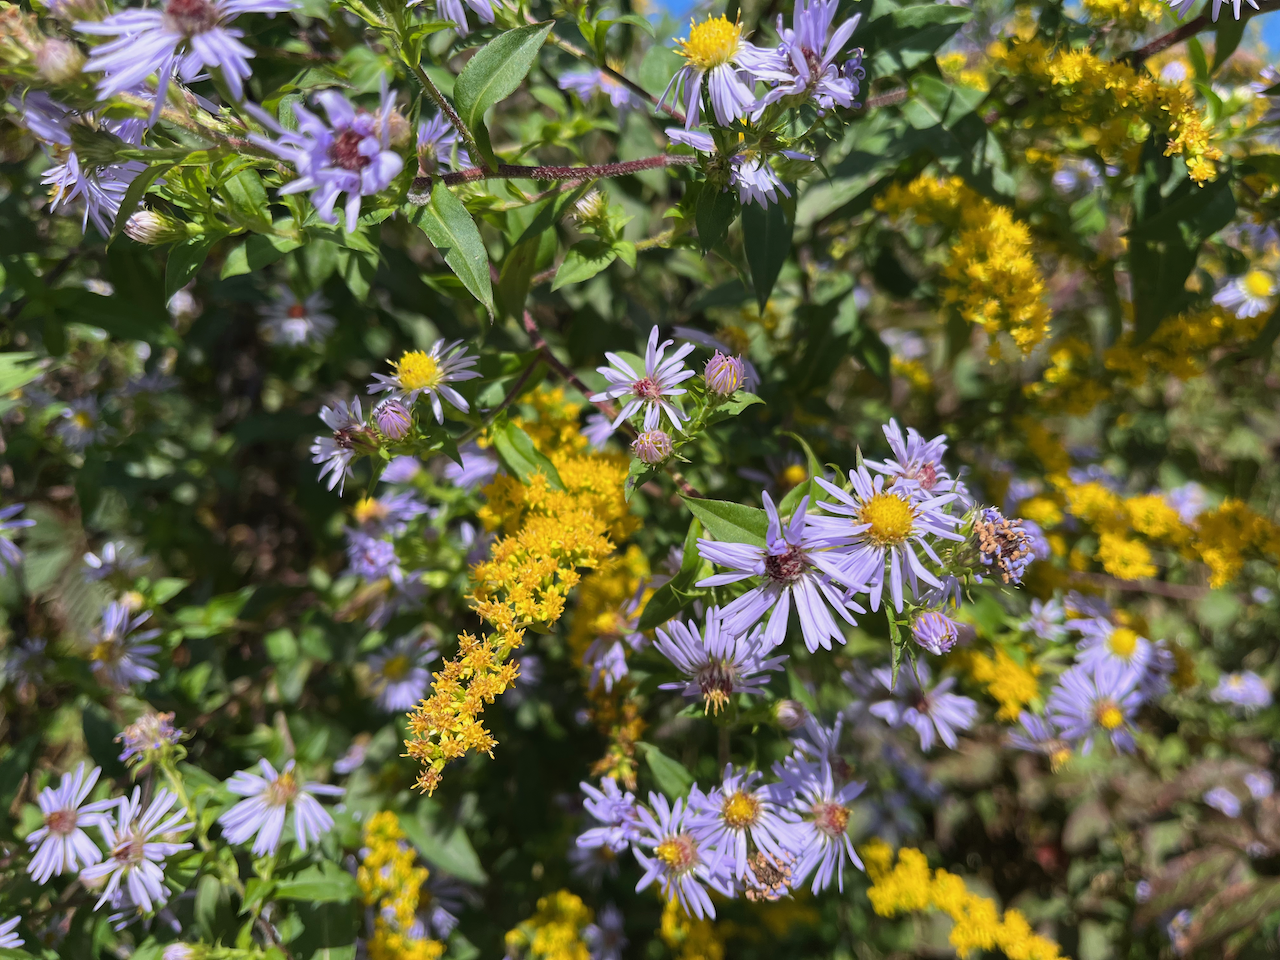
I was thinking a lot about the beautiful hikes Mike, Huxley, Okra and I did as we wound our way slowly south, stopping at Shenandoah and then Pisgah National Parks. From the mountains of Virginia to the coastal plains of Florida, goldenrod a was in full bloom! In the mountains, purple asters were also gloriously in full bloom, and were especially stunning when mingling with the goldenrods.
Art Loeb trail head in Pisgah National Forest was loaded with asters and goldenrods, and amazing views. Tough as nails growing on a rock face in the mountains. Pretty alone, but stunning together, below!
They reminded me of a chapter from Robin Wall Kimmerer’s book, Braiding Sweetgrass. An entire chapter is devoted to this stunning pair that often bloom together with showy fields of purples and yellows. It’s hard not to fall in love, and be drawn in. Robin wonders and marvels as have I, why they look so beautiful together?
Basic color wheel theory has them at opposite sides – complementary or reciprocal colors. Putting them together makes each more vivid. Just a touch of one will bring out the other.
Fun fact: although bee eyes perceive flowers much differently than human eyes, it turns out this reciprocal color display appears similar to us both! I’ve always wished I could have bee vision in a garden or field of flowers, and this might be the closest I get! Interestingly, when these two plants grow together, they both receive more pollinator visits than they do when growing alone.
Better together, right?!
The pairing is lived reciprocity; wisdom that the beauty of one is illuminated by the radiance of the other. Reciprocity is a major theme throughout this book and one that I think, if we could all embrace and act upon, would give us a much kinder world. I’ve thought a lot about this word and what it means since reading this book.
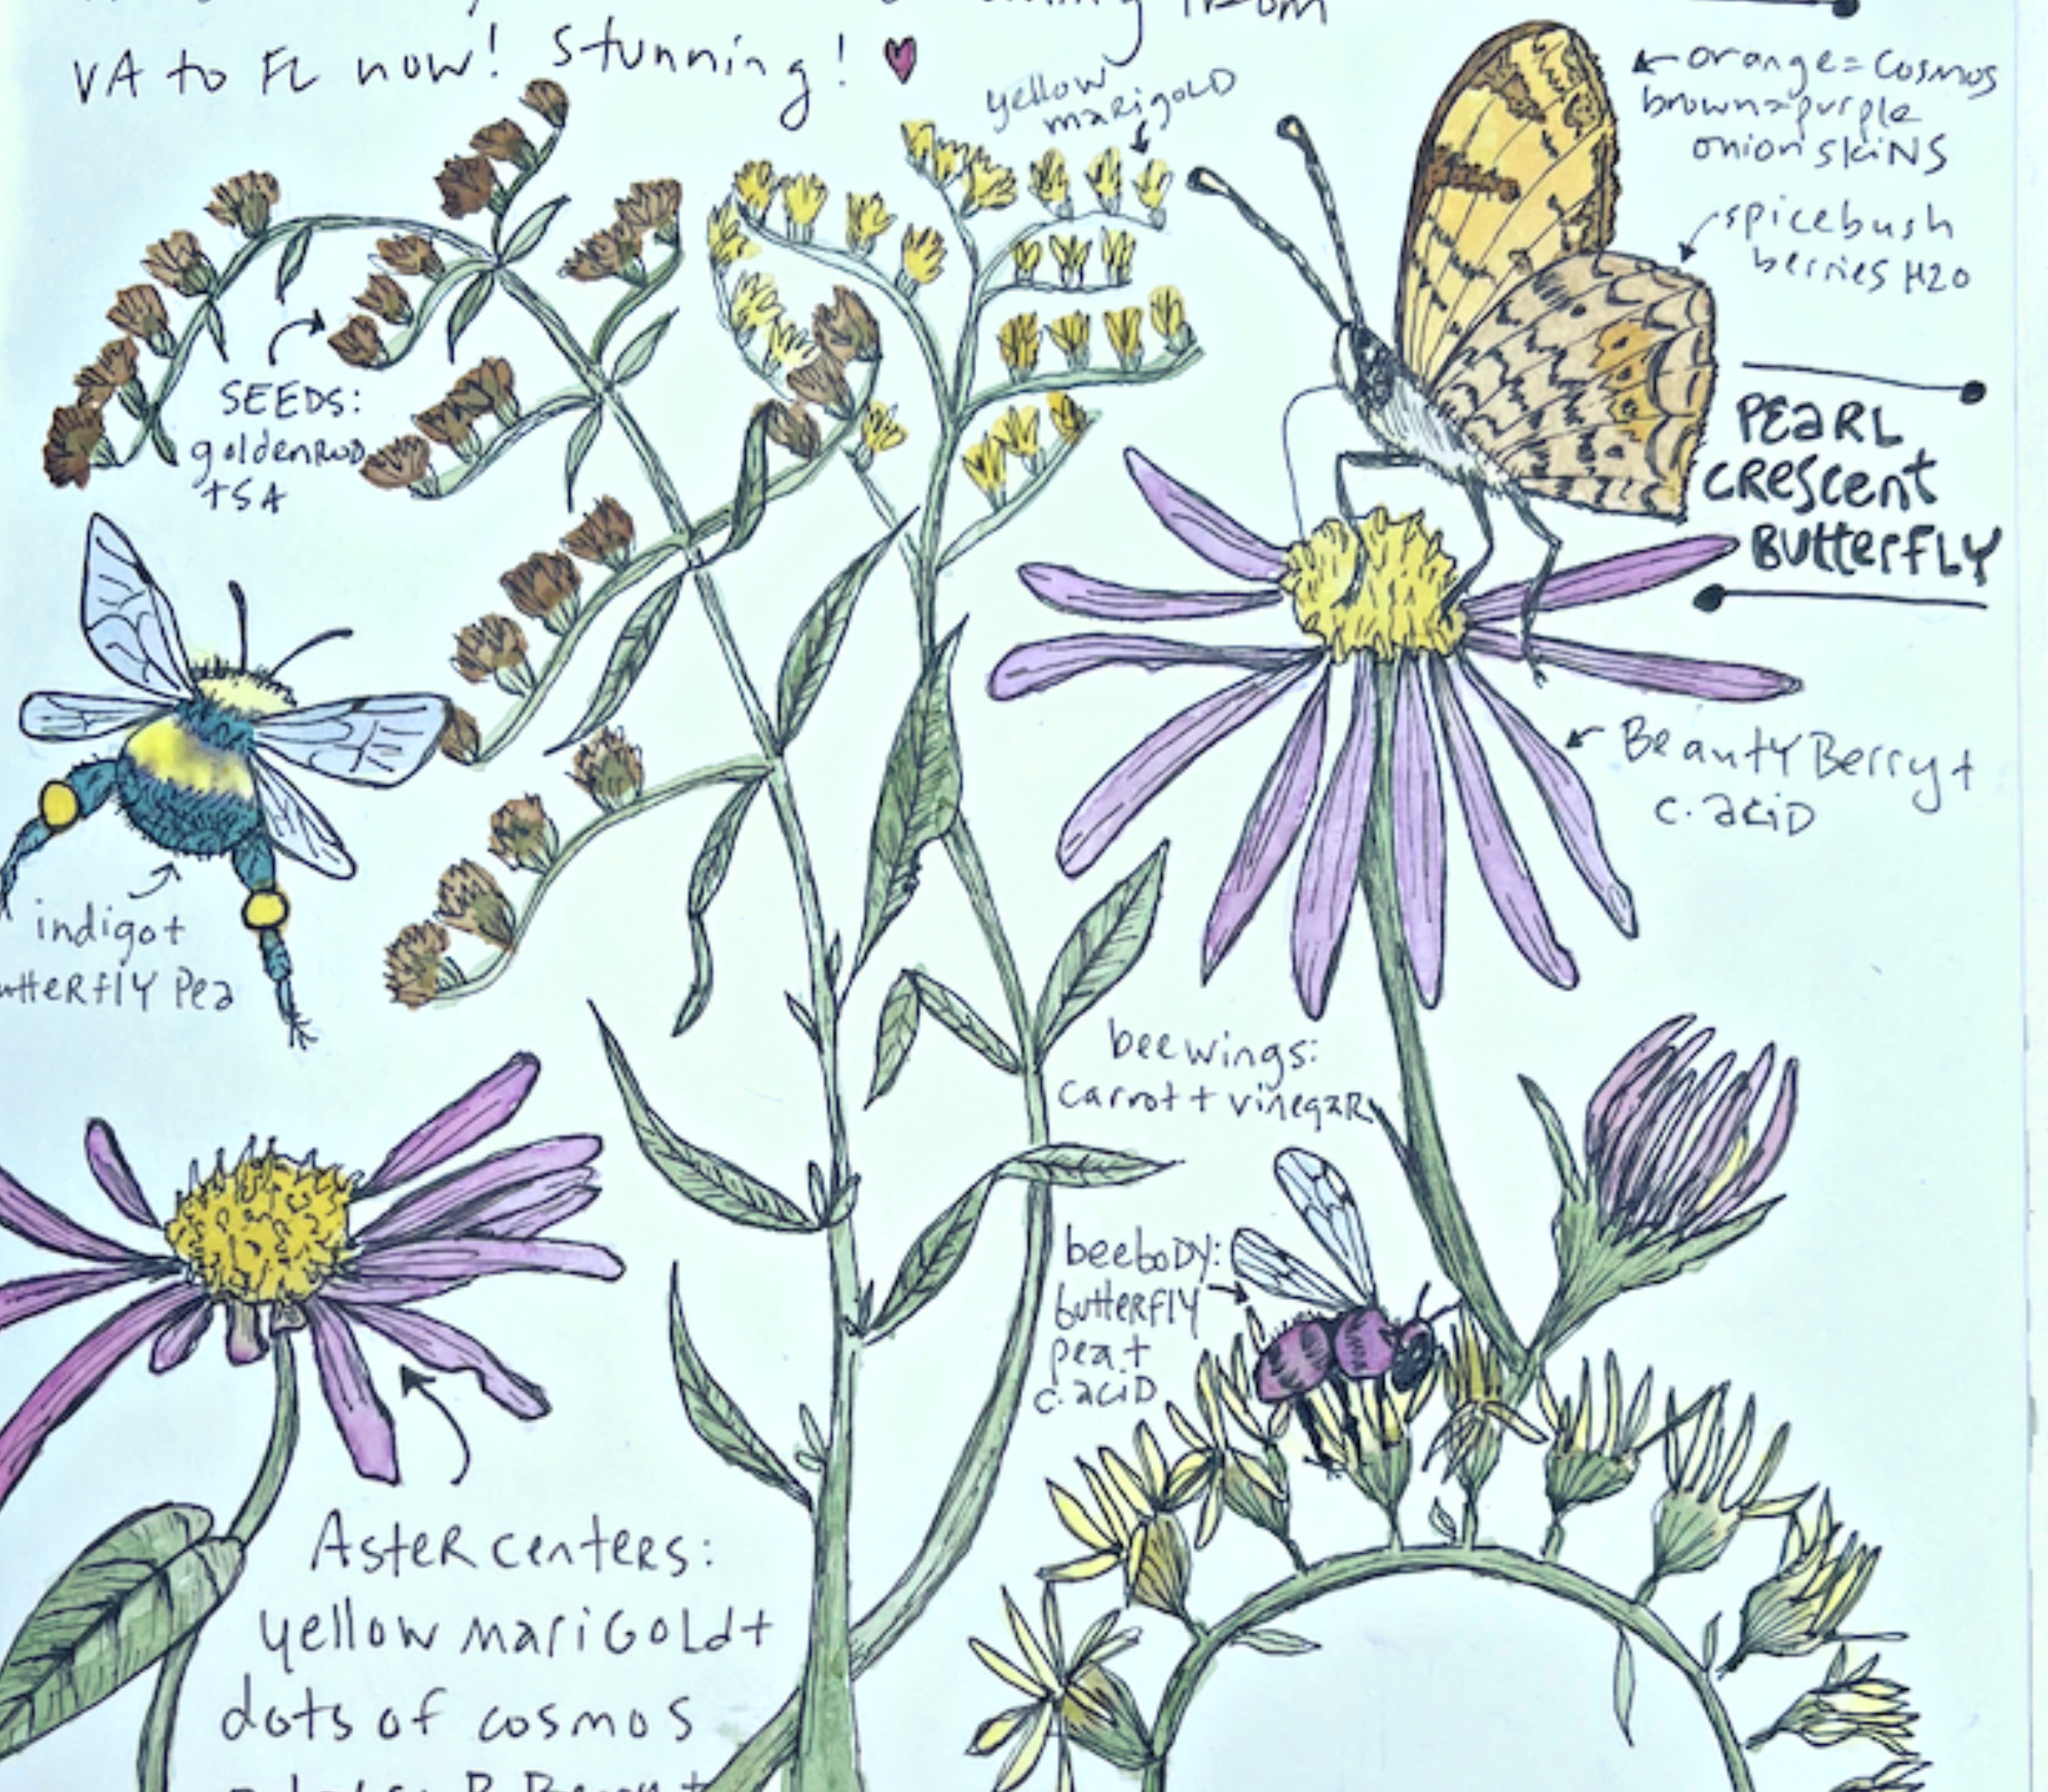
Back to the Florida yard- the beauty berries were fun and one way of preparing them led to a lovely purple hue – ASTERS! That might not seem surprising, but just on their own simmered in water created more of a grayish purple when dried. But a touch of citric acid turned it into a vibrant pink, that dried purple on the paper. I left plenty for the birds, just taking a couple big handfuls to experiment with. I had some decent yellow options already, plus some new turmeric hues- GOLDENROD + ASTER CENTERS!
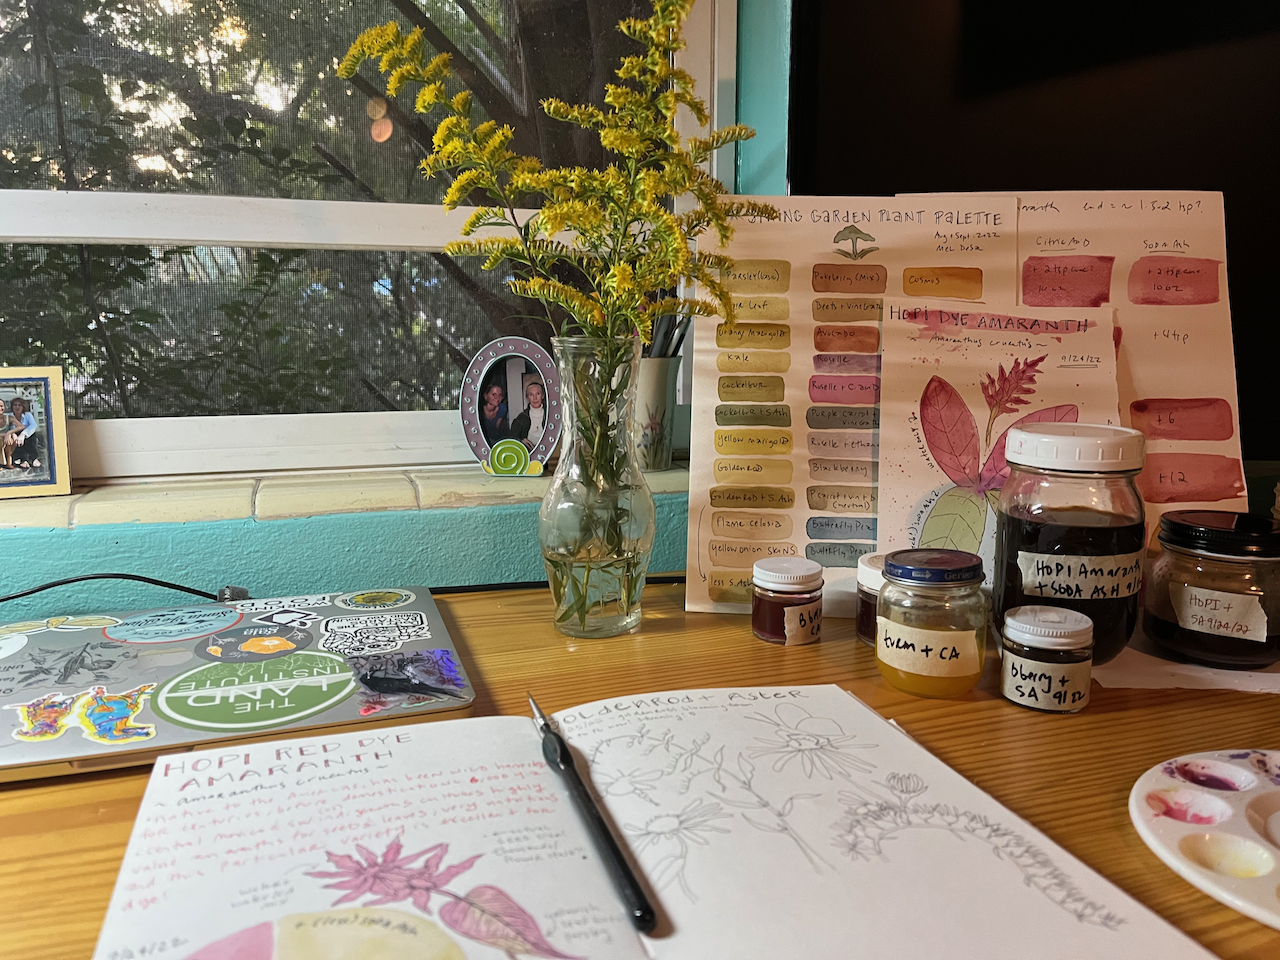
So I had the palette, and it was go time!
Set back up at home, re-creating Oak Spring Garden vibes with my plant palette, sketchbook, and goldenrod for inspiration!
I agreed with myself on Friday, that me and my creative bee would get some time to buzz and play this weekend, despite the somewhat long and pressing list of things to do and catch up on this coming week. Oh, and the hurricane we have been watching that might come visit us this coming week was also on my mind. But worrying less and creating more seemed like the better option.
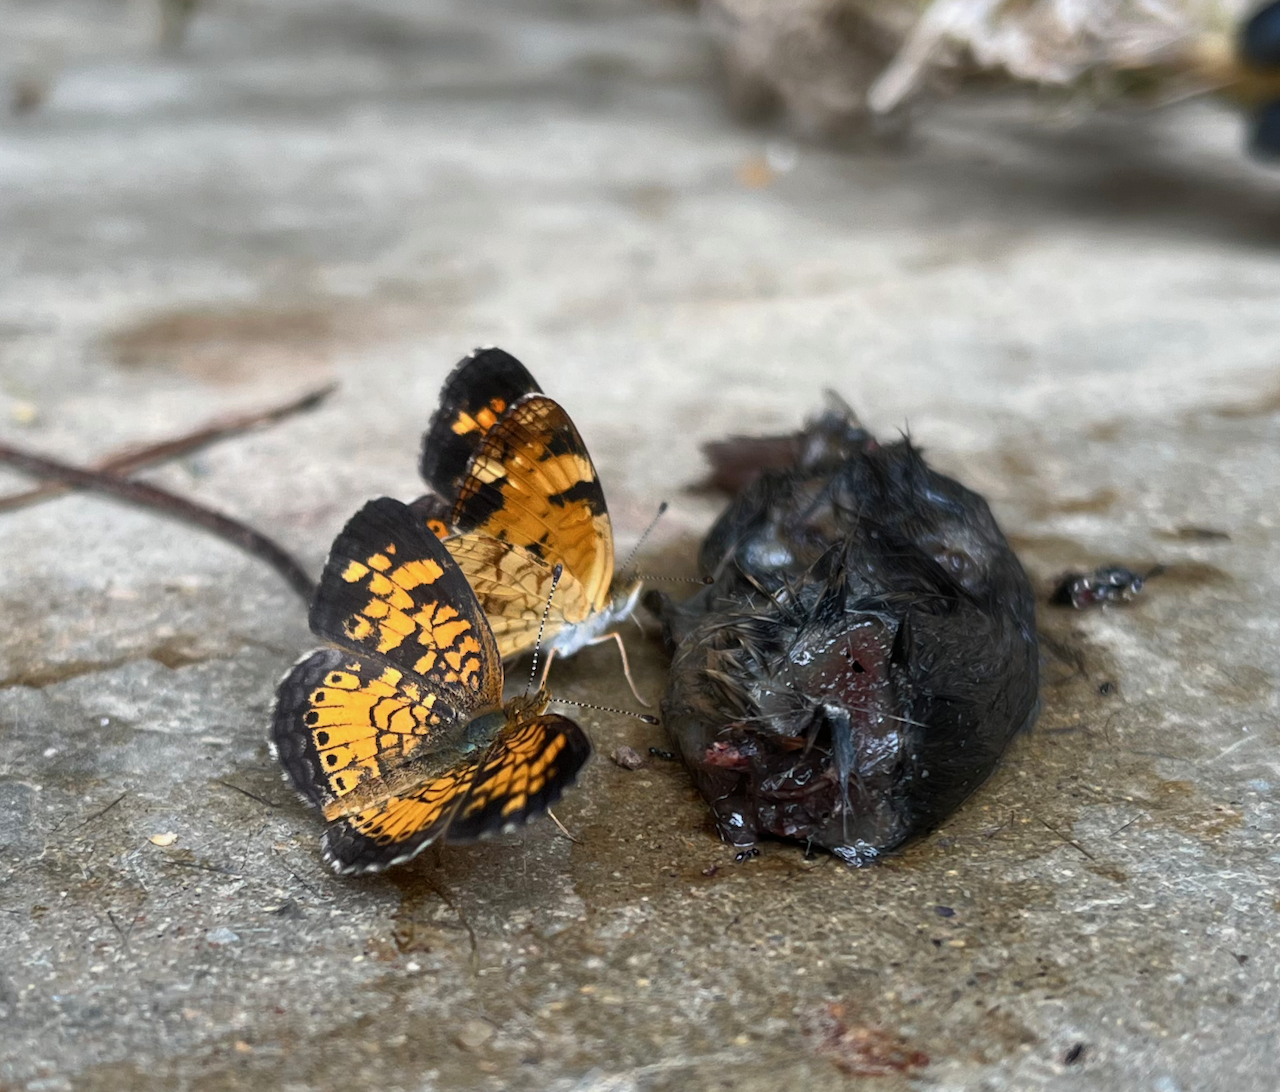
I included a Pearl Crescent Butterfly here among the pollinators. I first really noticed these small butterflies at Oak Spring Gardens in a way that some might find surprising for butterflies: swarming over a stinking mouse carcass. Many butterflies, even if they are pollinators, find value on carcasses and poop because of the salts and minerals they can’t get from a plant’s sugar water. I’d noticed them as well as some swallowtail and buckeye butterflies also enjoying some poop on the road. Nature doesn’t waste any waste! Is this reciprocity? I don’t know, but it’s neat!
Pearl Crescent butterflies finding sustenance on a decaying mouse. Funny story. I was calling into our monthly staff meeting when I noticed this scene as I was wandering, listening, and chiming in now and again. I guess I wasn’t muted because Sarah later said (when I sent her this picture), “is that what you gasped about during the meeting?” Oh she knows me so well! I didn’t know I gasped, but wouldn’t you if you saw this with your own eyes?
Nature never ceases to amaze me, and find me deep in wonder and curiosity; hunched over, on my knees, gazing up, or zooming in for a closer look at what most people pass by. A classic Mary Oliver poem that is pasted to the front inside cover of my sketchbook reflects this wonder in the small things so well.
The Summer Day
by Mary Oliver
Who made the world? Who made the swan, and the black bear? Who made the grasshopper? This grasshopper, I mean — the one who has flung herself out of the grass, the one who is eating sugar out of my hand who is moving her jaws back and forth instead of up and down — who is gazing around with her enormous and complicated eyes. Now she lifts her pale forearms and thoroughly washes her face. Now she snaps her wings open, and floats away. I don’t know exactly what a prayer is. I do know how to pay attention, how to fall down into the grass, how to kneel down in the grass, how to be idle and blessed, how to stroll through the fields, which is what I have been doing all day. Tell me, what else should I have done? Doesn’t everything die at last, and too soon? Tell me, what is it you plan to do with your one wild and precious life?
Part 6 of a series of posts about my artist in residency experience at Oak Spring Garden Foundation.
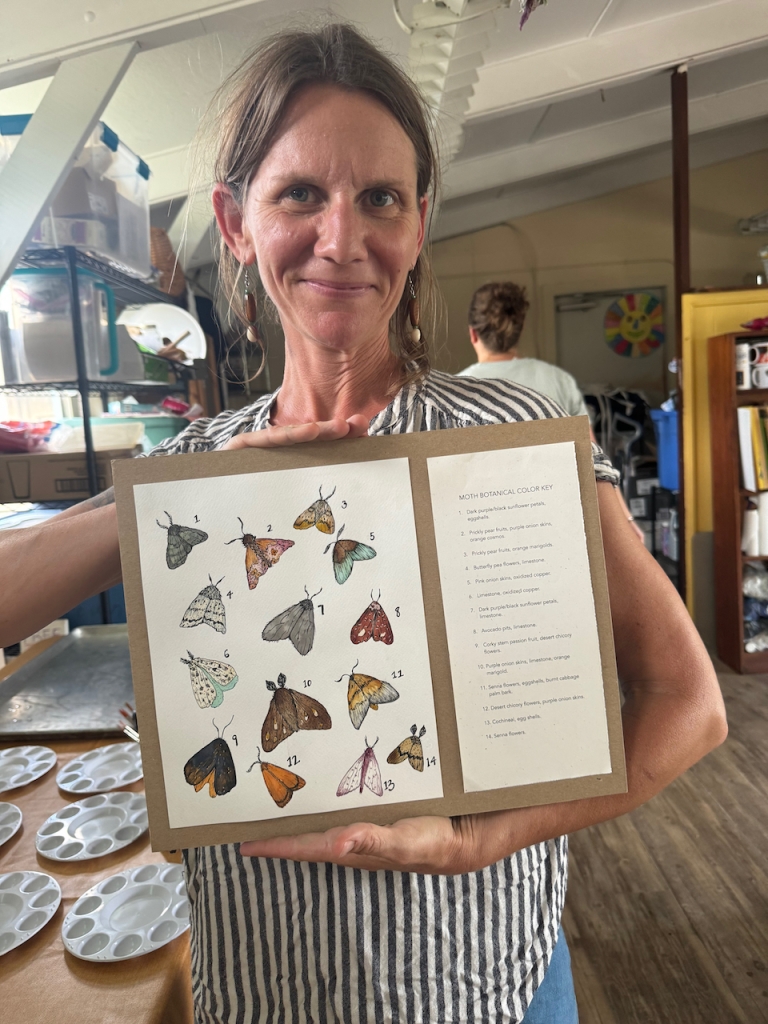
It’s been about a year since I picked up my linoleum tiles and carving tools to make a print. It felt good! I’ve wanted to create this lifecycle piece for awhile now, but had forgotten about it. I was reminded while here at the lovely Oak Spring Garden Foundation for my artist in residency stay, and had the time to dig in.
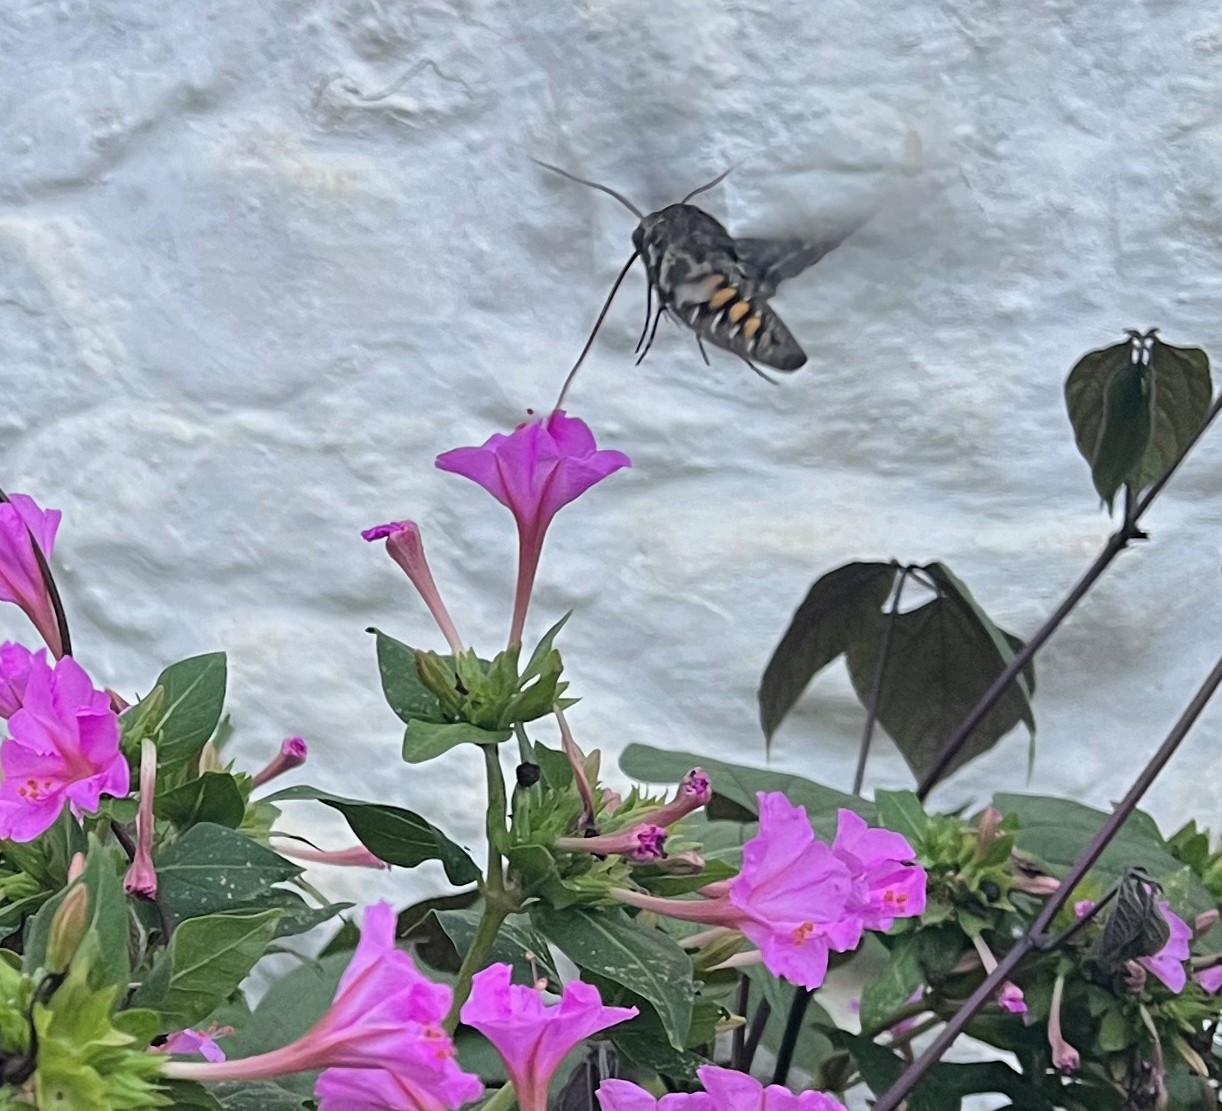
During my evening walks and meanderings about the gardens, I’ve been entertained by the flurry of hawk moth activity. We met in the lilies, and I followed them out to the 4 o’clocks- both very pronounced and tubular flowers.
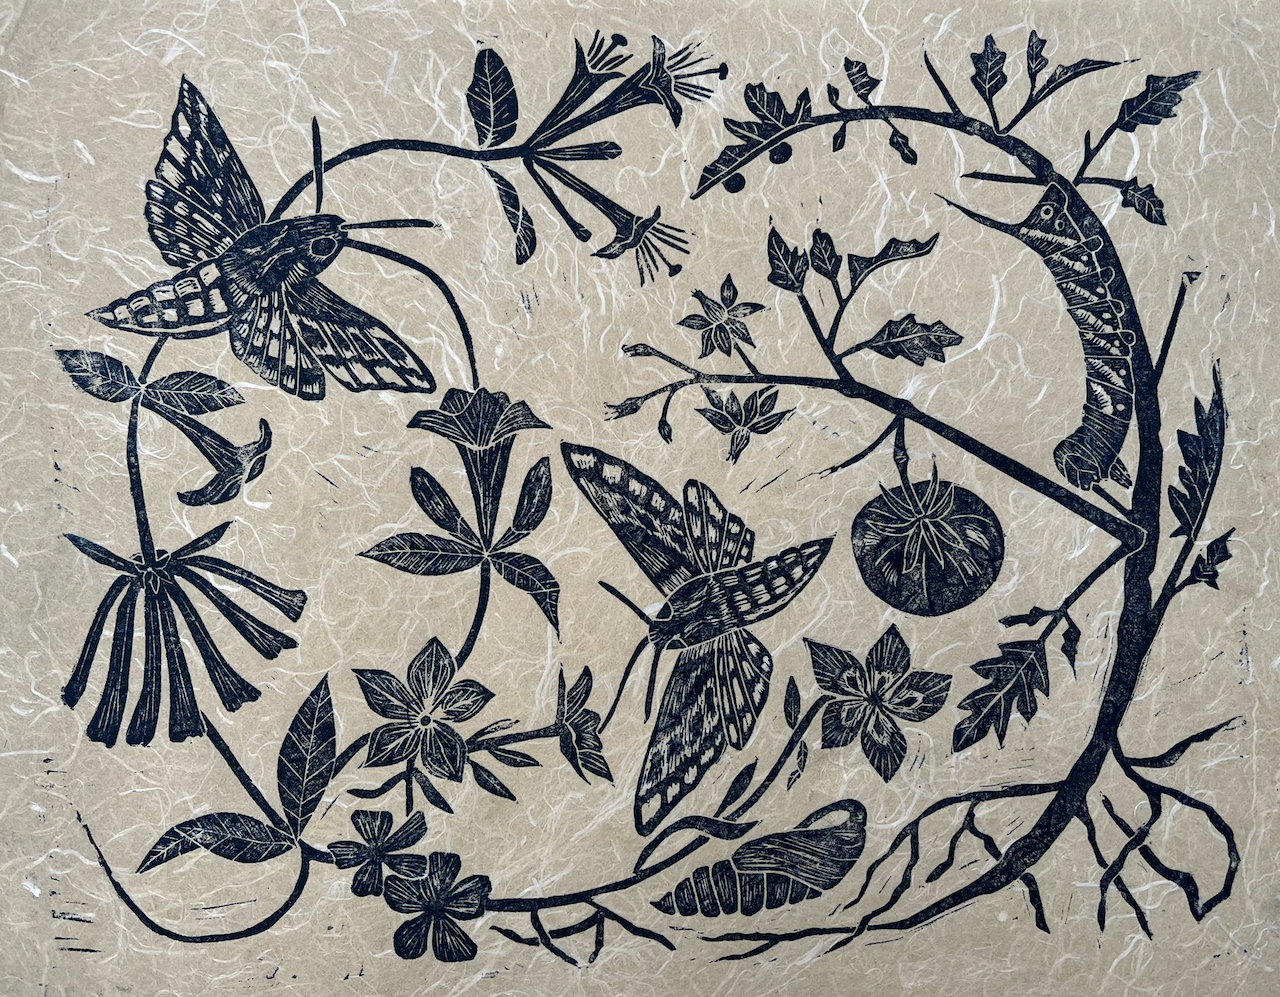
This piece is inspired by the complicated relationships we have with insects. As a farmer and seed saver, growing tomatoes is important to me. As an ecologist and lover of all life, insects are also important to me. The process of metamorphosis so many insects undergo is marvelous. From a caterpillar to a pupae to a moth or butterfly. I wrote about metamorphosis awhile ago.
Oh my! It’s something spectacular.
My latest linoleum carving + print showcasing all stages of this insects life from egg to moth.
But when a tomato hornworm shows up, things get really complicated.
I think the bright green caterpillars are cute! Soft and silky, I like to pet them gently. After a few strokes, they settle in, and I think they might actually like the little massage. The horn on their back is a bluff. They are gentle, tomato-loving creatures. But they are ravenous for tomato plants and can do quite a bit of damage before going noticed.
Once they are fat and satiated on tomato leaves, flowers, and even fruits, they crawl to the soil and pupate underground. This is where metamorphosis magic happens. Cells liquefy and re-organize themselves. Crawling muscles swapped for flight muscles, extra legs swapped for wings, and so on.
The emerging pupa are gorgeous moths, known as the 5-spotted hawk moth. Their exquisitely long proboscis (tongue) is specially designed to sip from flowers with similarly long and tubular necks. They need each other. They are so large and so fast, they are often mistaken for hummingbirds. And so they are also colloquially referred to as hummingbird moths.
An Oak Spring Garden resident visiting the 4 o’clocks.
I’ve seen them consistently every evening here at Oak Spring Gardens. I imagine back down in Florida, they are finding some great native plants like jessamine, phlox, trumpet vine and coral honeysuckle, which are depicted in this piece. Long tubular flowers with a sweet nectar treat waaaaay down in there, waiting for the pollinator match to arrive. Lots of ornamental garden plants are also likely to attract them.
Unlike hummingbirds, these nectar feeding pollinators are mostly active at dusk and night time. They lay their eggs singly on the host plant- tomatoes- starting the cycle all over again. Each tiny egg will hatch into a teeny tiny caterpillar that will successfully grow into larger and larger versions of themselves – as they devour tomato plants. We often won’t spot them till significant damage is done and they are quite fat. At this point, they are close to going into life phase 3: underground pupae.
Farmers and gardeners typically reach for a bottle of something or other to “take care” of the problem. And they are not necessarily wrong in doing so. Tomato hornworms have the ability to destroy a crop of tomatoes if it gets out of hand.
I have found a balance.
I will let a few get large enough to successfully become pupae, depending on the size of my tomato plant population. The little tiny caterpillars (if I can find them!) might be squished, along with an apology and a prayer if I feel the plants can’t sustain their own growth and that of the hungry, hungry caterpillars.
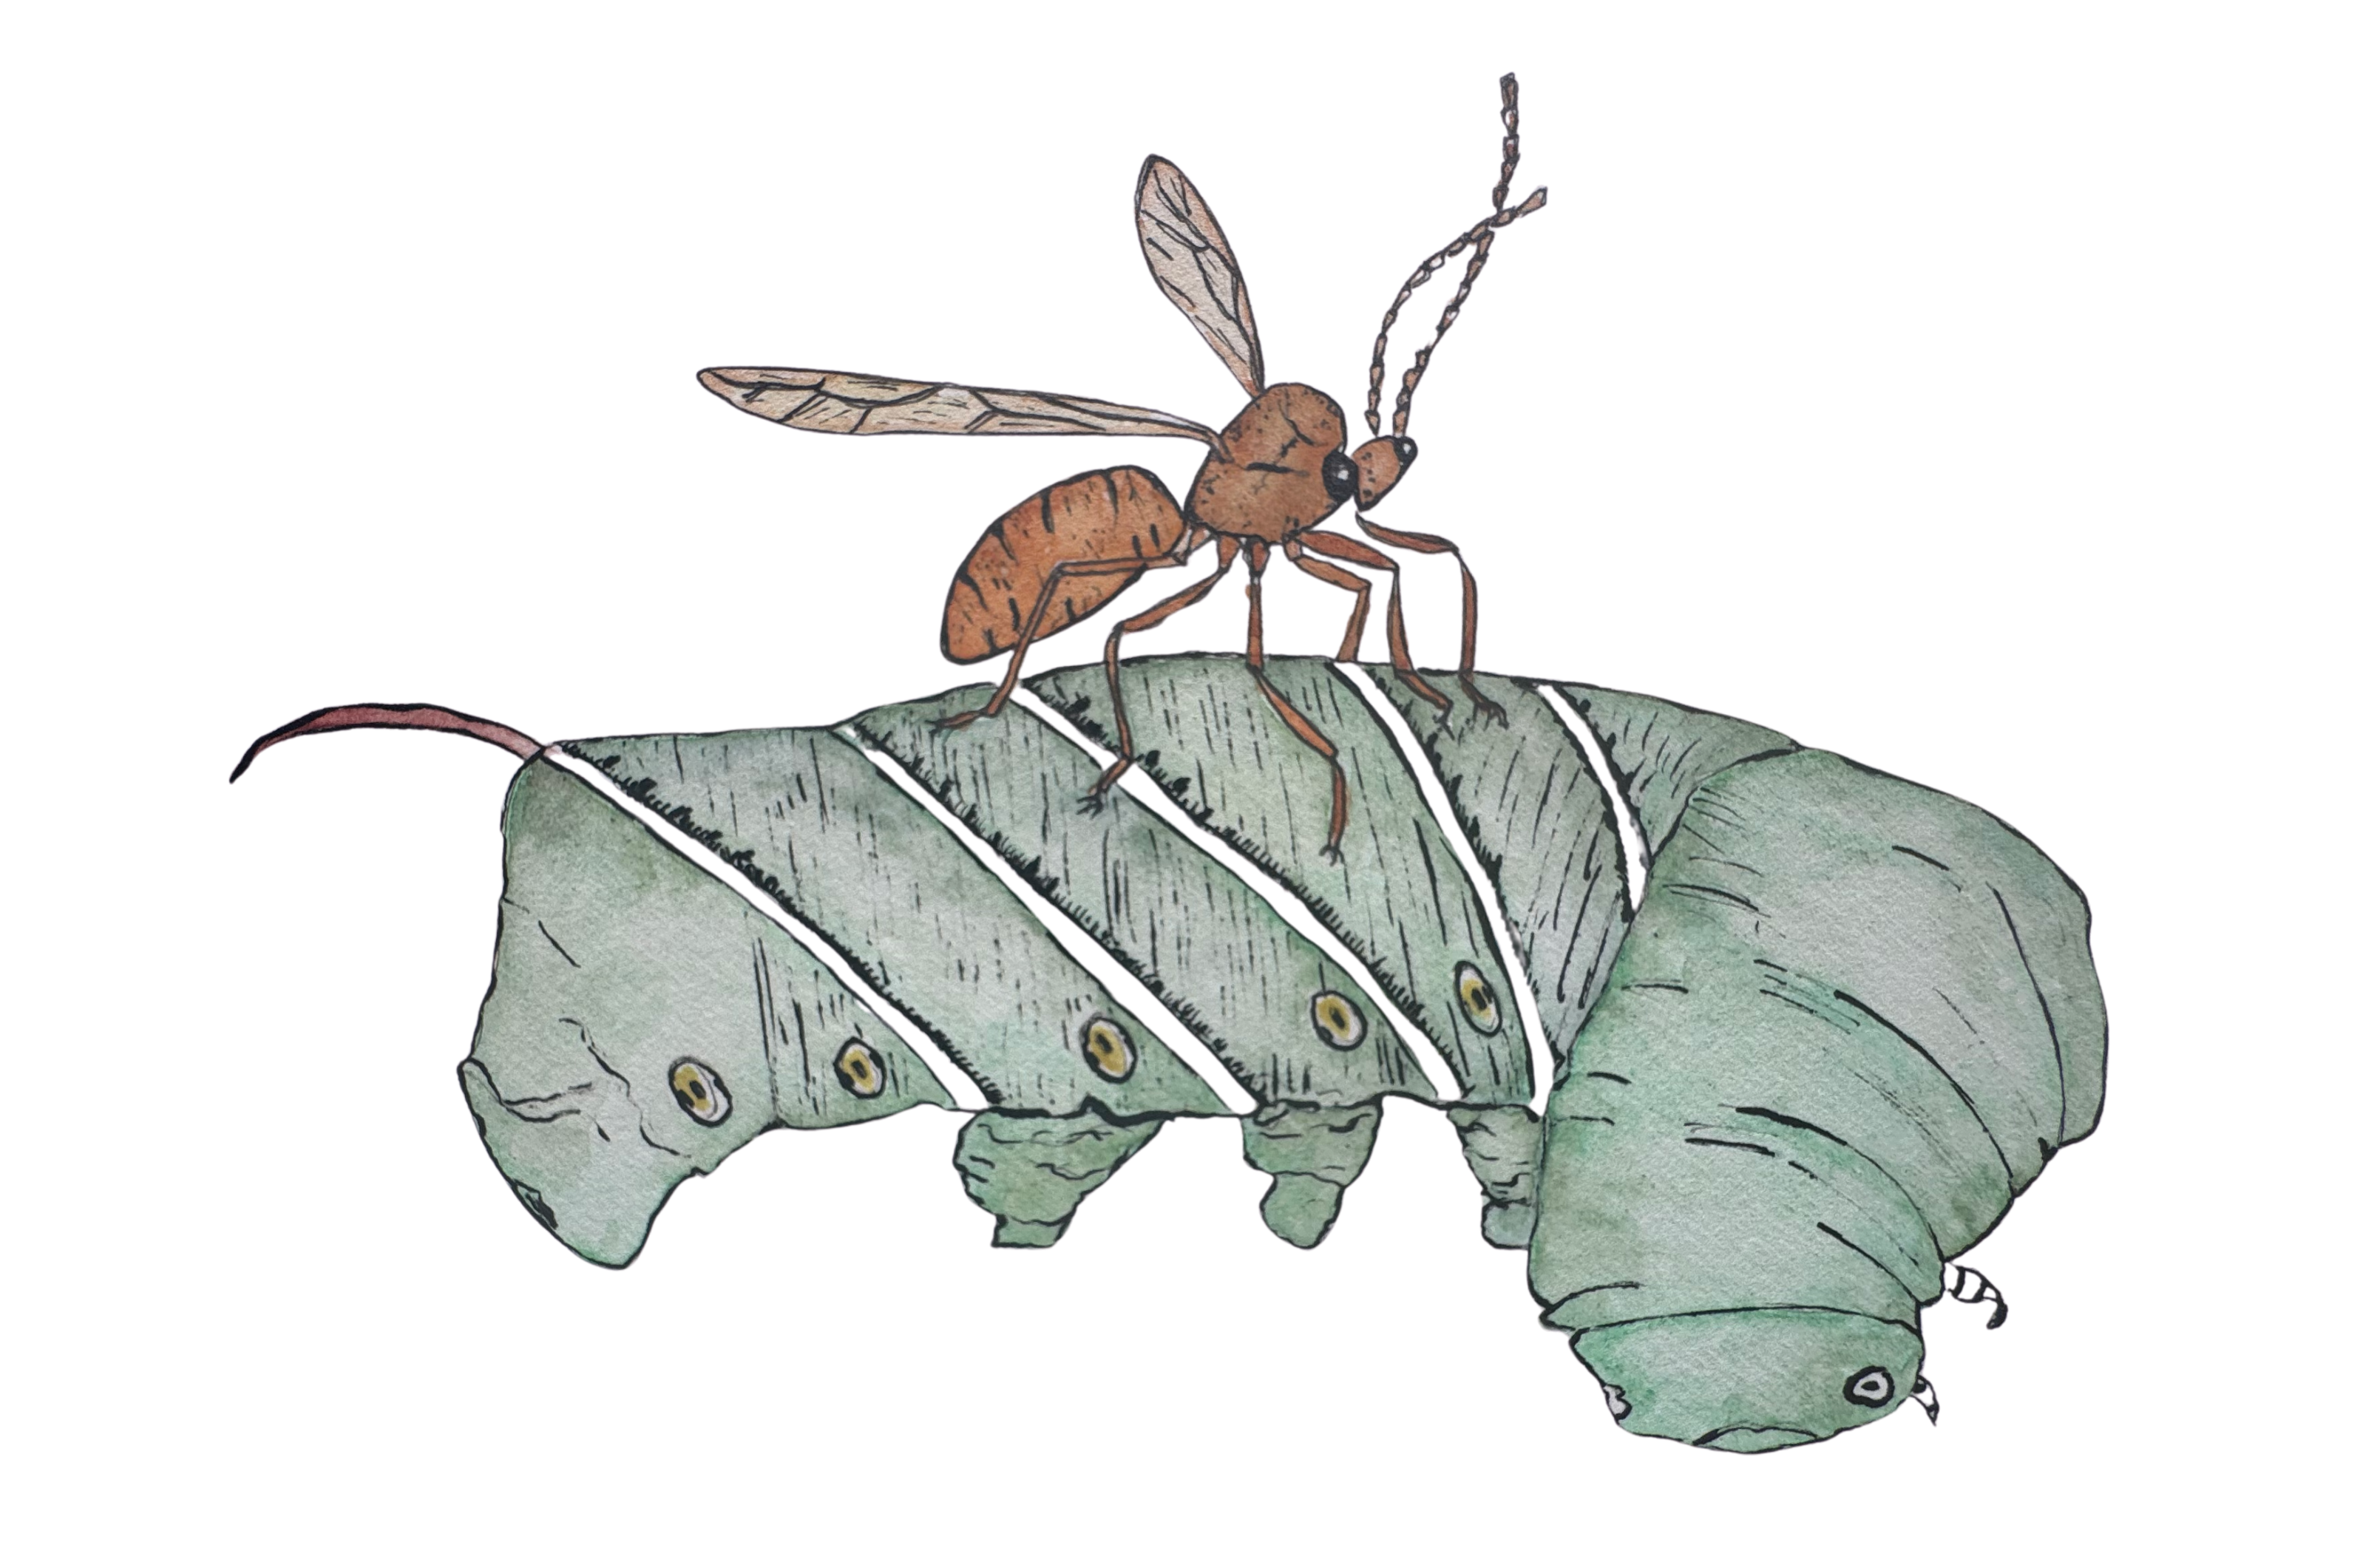
Sometimes nature swoops in on horrifying wings and takes care of things. Braconid parasitoid wasps lay their eggs inside a living hornworm caterpillar, and the hatched larvae literally eat the poor caterpillar alive. So if you ever see white rice-like things protruding out the back of a caterpillar, best leave it alone and let Mother Nature do her thing.
I may resort to spraying with Bt, a fairly harmless and organic approved spray (harmless for all but caterpillars of course) on select plants. Tilling can reduce pupa in the soil by about 90%, but tilling has its own issues for soil health too.